Digging Tools For Raised Garden Beds Guide: Best Picks 2026
Raised beds make gardening easier until you try to use ground-garden tools inside them. A full-size shovel catches on the bed walls, a long-handled fork works at the wrong angle, and heavy equipment compacts the soil you worked hard to build. That is why the digging tools for raised garden beds need more thought than the tools for an open plot.
This guide covers the tools that actually earn their place in a raised bed, how to match them to your soil and body, how to use them without setting back soil health, and how to keep them sharp season after season. You do not need an expensive collection. You need a small, well-chosen core set. You can also read our guide on how to water lawn efficiently.
Why Raised Beds Demand a Different Toolbox
Raised beds are not miniature versions of a ground-level garden. The frame changes everything: working width, working height, and the way force travels through your body.
Inside a bed, you are often reaching across a four-foot span while kneeling or bending from the edge. A standard shovel is too wide, too long, and too heavy. It scrapes against the frame, and every scrape interrupts your rhythm. Before choosing anything, understand the difference between compact raised bed tools and full-size digging equipment. The latter is designed for open ground and will fight you between bed walls. You can also read our guide on cape cod weeder tool.
The right raised bed tools share a few traits:
- Short enough to maneuver in confined spaces
- Narrow enough to slip between plants
- Light enough to use without excessive force
- Sharp enough to cut through soil rather than crush it
Soil structure matters just as much. Healthy raised bed soil is alive. Earthworms, fungi, and bacteria form a network that cycles nutrients and holds moisture. A butter knife of a trowel tears through that network. A well-designed tool loosens soil while leaving the living structure mostly intact.
The Core Raised Bed Digging Tools for 2026
You can grow successfully with five or six tools. These are the non-negotiables, chosen for how they perform inside a confined bed. You can also read our guide on digging tools names with pictures.
Hand Trowel
No tool gets more use in a raised bed. A good trowel plants transplants, digs small holes, mixes amendments into root zones, and lifts small weeds.
Buy one with a full-tang design: the metal should run from the blade tip through the entire handle. The blade should be narrow and thick enough not to flex when you hit a root. Depth markings stamped into the blade are genuinely useful for planting bulbs and garlic. You can also read our guide on best sharpener for garden tools.
Avoid cheap stamped trowels with riveted handles. A common mistake is choosing a wide blade for faster digging; in a raised bed, a narrow blade is almost always better because it fits between established plants.
Transplant Spade
A transplant spade is a trowel’s bigger sibling. It has a long, narrow blade and usually a D-handle that gives you control when twisting and prying. You can also read our guide on hole digging tool.
This is the tool for lifting root balls, dividing perennials, and planting large seedlings. The narrow shape lets you work close to a plant without slicing through the roots of its neighbors.
Look for a solid socket or one-piece forged head. Bolted or riveted joints loosen over time, especially when you use the spade for leverage. You can also read our guide on how to mix oil and gas for leaf blower.
Border Fork
A border fork is a smaller version of a standard garden fork, and it is the best tool for loosening compacted raised bed soil without destroying it.
Its square-profile tines penetrate hard ground and lift roots without slicing earthworms in half. Insert it vertically, press to full depth, then pull back on the handle to fracture the soil. This is aeration, not excavation.
Choose a fork that feels comfortable at hip height. It should be noticeably lighter than a full-size digging fork, because you will use it more often.
Hori-Hori or Soil Knife
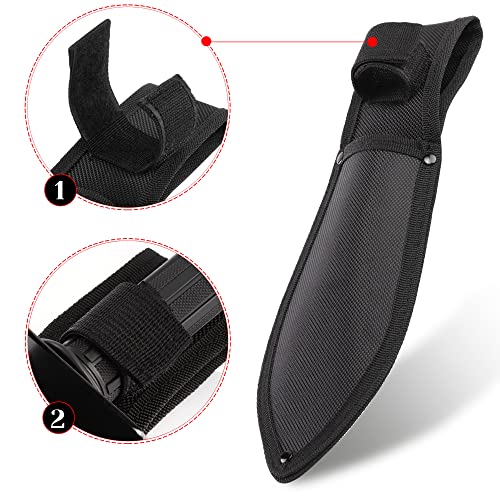
The hori-hori is the closest thing gardening has to a multi-tool. Its blade has a straight edge on one side and a serrated edge on the other, with a pointed tip that doubles as a mini-digger.
Use it to cut through roots, split perennial clumps, open compost bags, score planting furrows, and remove stubborn weeds. The serrated edge handles fibrous roots that would dull a smooth blade.
In practice, this is the tool you reach for when you do not want to walk back to the shed. Buy one with a comfortable grip and a sheath. Do not use it as a pry bar; the blade is strong, but it is not a crowbar.
Hand Cultivator
A hand cultivator or claw has three or four curved tines on a short handle. It breaks the surface crust after watering, works compost into the top inch of soil, and pulls shallow weeds.
During summer, this tool often gets more use than anything else in the shed. Low weeds germinate constantly in raised beds because the soil is loose and warm. Run the cultivator through the top inch every few days and most weeds never establish.
Look for tines that are solidly attached. A wobbly cultivator is more annoying than useful.
Soil Scoop
A soil scoop looks like a large, deep spoon. It is the fastest way to move compost, mulch, and potting mix into a bed.
The raised lip lets you pour contents exactly where you want them without burying the crowns of nearby plants. Use it to top up beds, spread compost, and fill planting holes.
Some gardeners skip this tool. If you regularly amend your beds, you will not want to skip it.
Specialty Digging and Weeding Tools Worth Adding
Once you have the core set, add tools only when a recurring task demands them. Several specialty tools earn their place quickly.
Dibber
A dibber is a pointed stick that creates consistent planting holes. It is ideal for garlic cloves, onion sets, bean seeds, and any direct-sown crop that benefits from uniform depth.
A good dibber has depth markings and a comfortable handle. Push it in, twist slightly, and drop the seed or bulb into the hole.
Compact Broadfork
A broadfork loosens soil deeply without inverting it. The long tines penetrate compacted layers, and the handles let you lean back to fracture the soil.
For raised beds, choose a compact version sized to the bed depth. A full-size broadfork can be too tall and too heavy for most residential beds. This is the right tool when a border fork alone cannot break through a hardpan layer.
Cape Cod Weeder and Precision Weeding Knives
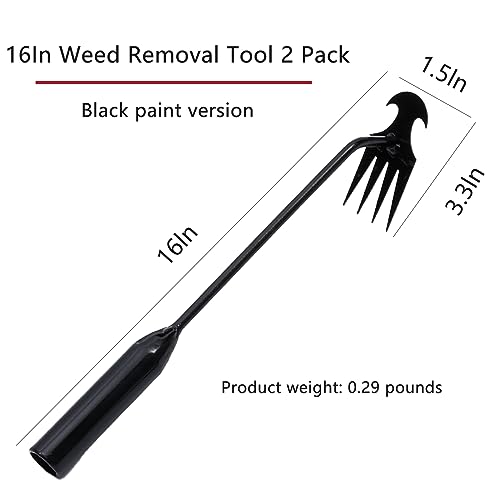
Cape Cod weeders have a long handle and a narrow, angled blade that slides under weeds at the soil line. They are excellent for dense plantings where a trowel is too wide.
For tight raised beds, compact weeding tools are often more useful than another digging tool. For deep taproots like dandelion, taproot weed specialists slice below the crown instead of simply pulling off the top.
Before you buy, different weeder designs are worth comparing. The right one depends on whether you fight shallow annual weeds or deep perennials.
Kneeler and Tool Caddy
A kneeler keeps your knees off damp soil and protects your joints during long planting sessions. Many flip over to become a low seat.
A simple apron or bucket caddy keeps your trowel, knife, and cultivator within arm’s reach. The few seconds you save each time add up to real time over a season.
How to Match Your Tools to Your Soil
A tool that works beautifully in sandy soil can feel useless in clay. Your soil type should guide your choices.
Clay Soil
Clay needs penetration power. A border fork with sharp, square tines will outperform a spade every time. Clay also puts serious torque on handles and joints, so choose reinforced construction and avoid flimsy stamped heads.
Do not dig clay when it is wet. Wet clay smears and forms dense clods that are hard to fix. If a handful of soil forms a tight ball and holds its shape when dropped, wait.
Sandy Soil
Sandy soil drains fast and offers little resistance. A wide-bladed trowel or soil scoop moves it easily. You rarely need heavy pry tools in sandy beds.
The challenge is retaining moisture and organic matter. Use a hand cultivator to mix compost into the top few inches regularly.
Mature Raised Bed Compost
Once a bed has been amended for a few seasons, it becomes light, dark, and crumbly. This is the easiest soil to dig, and precise tools shine here. A soil knife and cultivator glide through loose earth with almost no effort.
The more organic matter your soil contains, the less force your digging tools need. Federal soil researchers at the U.S. Department of Agriculture describe healthy soil as a living system, and the practical takeaway is simple: minimize disturbance, add organic material, and let the biology do the heavy lifting.
Steel and Handle Choices That Matter
Stainless steel resists rust and releases soil cleanly. It costs more, but it pays off for tools you use weekly.
Carbon steel holds a sharper edge and costs less, but it rusts quickly if neglected. Wipe it dry after every use and oil it occasionally.
Forged tools are shaped from a single piece of heated steel. They are heavier, stronger, and much less likely to snap at the neck. Stamped tools are cut from sheet metal; they are lighter and cheaper, but they bend under pressure.
For handles, ash wood absorbs shock and feels comfortable, but it needs periodic oiling. Fiberglass is weatherproof and light, but it transfers more vibration to your hands. Steel and aluminum are strong but heavy for small beds. Test before you buy whenever possible.
Proper Digging Technique for Raised Beds
A good tool is only half the equation. Technique determines whether you build soil or damage it.
Loosen, Don’t Flip
The goal in a raised bed is to aerate, not to invert. Flipping soil buries the underground ecosystem that keeps nutrients available and brings dormant weed seeds to the surface.
Use your border fork to lift and loosen. Insert the tines vertically, press to full depth, and pull the handle back slightly. This fractures compacted layers without turning the profile upside down.
Stay Off the Soil
Every step compresses the soil structure you are trying to preserve. Work from the edge or kneel beside the bed.
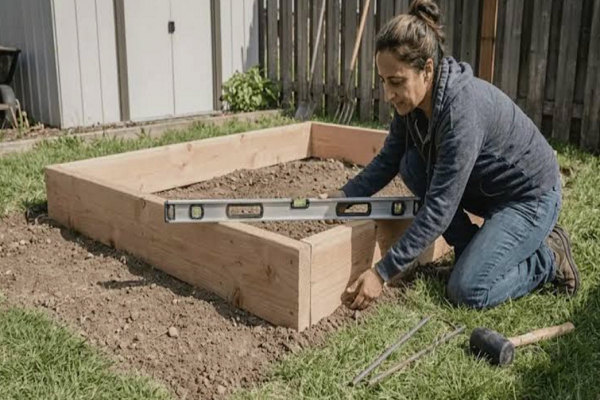
For beds wider than four feet, lay a sturdy board across the top and work from that platform. The board spreads your weight and prevents compaction in the planting zone.
Dig Holes That Fit the Root Ball
Planting holes should be only as deep as the root ball requires. Set the plant at the correct depth, gently firm the soil around it, and water thoroughly to remove air pockets.
A sharp trowel or soil knife cuts a clean hole with minimal tearing. Ragged holes damage nearby roots and slow establishment.
Put Amendments Where Roots Can Reach Them
Compost, worm castings, and organic fertilizers should be mixed into the top few inches of soil, not buried deep. Most feeder roots live in that zone, and that is where they can access nutrients.
Spread a layer of amendment over the surface, then work it in with a hand cultivator. If you want the full picture, long-term soil building starts with regular organic additions and minimal disturbance.
Ergonomics, Body Mechanics, and Comfort
Raised beds raise the work surface, which changes how you bend, reach, and apply force. Tools that are too long or too short force awkward postures. Over time, that becomes back pain, wrist strain, or knee trouble.
Keep your wrist straight while digging and prying. Tools with angled or offset heads make this easier. The same neutral-joint principle found in OSHA ergonomics guidance applies to gardening as much as to factory work.
Other habits that protect your body:
- Bend at the hips and knees, not the lower back
- Keep loads close to your body
- Lift with your legs, not your spine
- Switch hands periodically during repetitive tasks
- Take a two-minute break every twenty minutes of sustained digging
- Stretch your hamstrings, hips, and wrists before a heavy session
Handle fit matters more than most gardeners realize. A handle that is too large forces a tight grip; one that is too small reduces control. Test tools with the gloves you actually garden in.
Seasonal Digging Calendar for Raised Beds
Matching the right tool to the right season keeps work efficient and prevents damage.
| Season | Main Tasks | Best Tools |
|---|---|---|
| Early spring | Loosen beds after winter, mix in compost, mark planting rows | Border fork, hand cultivator, dibber |
| Late spring and summer | Set transplants, direct sow, manage weeds before they seed | Trowel, hori-hori, Cape Cod weeder |
| Late summer and fall | Lift garlic and potatoes, divide perennials, top-dress beds | Transplant spade, border fork, soil scoop |
| Winter | Clean, sharpen, oil, and store tools | File, linseed oil, dry storage |
In fall, top-dress beds with compost and cover them with straw or leaves. This protects soil structure through winter freeze-thaw cycles and gives you a head start in spring.
How to Maintain Digging Tools So They Last
Good tools are an investment. A few minutes of care after each use can keep them working for decades.
Clean After Every Session
Soil left on metal traps moisture, and moisture causes rust. Knock off loose soil, rinse, and dry tools before storing.
Pay special attention to the joint where the metal meets the handle. That is where rust usually starts. Use a putty knife to scrape off stubborn buildup.
Sharpen Edges Regularly
A sharp edge cuts through soil with less force, which reduces fatigue and strain. Dull tools make you push harder and create ragged cuts on roots.
Light touch-ups with a file every few sessions keep edges effective. One comprehensive sharpening session at the end of the season prepares everything for spring. Follow the original bevel angle and make smooth, one-direction strokes.
Protect Handles and Store Properly
Sand rough spots on wooden handles smooth, then rub boiled linseed oil into the wood once or twice a year. This prevents drying and cracking.
Hang tools vertically in a dry shed or garage. This keeps cutting edges off concrete and allows air to circulate. Apply a light coat of oil to metal blades before long-term storage.
Know When to Replace
Even good tools wear out. Replace a tool if the neck bends when you twist, the blade is worn thin, a handle has deep cracks, or the head wobbles. A wobbly head is not just annoying; it is a safety hazard.
Best Picks 2026 by Budget
The right amount to spend depends on how often you use the tool. Invest in the tools you reach for daily, and save money on occasional-use additions.
| Budget | What to Buy | Best For |
|---|---|---|
| Budget ($10–$25 per tool) | Full-tang carbon steel trowel, wire cultivator, soil scoop | First-time gardeners and small beds |
| Midrange ($25–$60 per tool) | Stainless steel trowel, quality hori-hori, solid-socket border fork | Regular gardeners who want reliable performance |
| Professional ($60–$150 per tool) | Forged border fork, transplant spade, compact broadfork | Daily-use gardeners and anyone who values long life |
In 2026, the biggest upgrade most gardeners can make is not a fancier brand. It is replacing the tools that flex, rust, or hurt your wrists. A single forged tool used every week is worth more than a ten-piece set used once a season.
Common Raised Bed Digging Mistakes to Avoid
Even experienced gardeners make these mistakes.
- Using full-size shovels in raised beds. They are too wide, too heavy, and they compact soil near the walls.
- Tilling established beds. A tiller destroys soil structure and fungal networks. Save it for creating new beds from lawn.
- Digging wet soil. Wet soil smears and forms clods. Do the squeeze test before you start.
- Letting tools go dull. A sharp tool is safer and requires less force.
- Buying a twelve-piece kit. Most gardeners regularly use five or six tools. The rest take up space.
- Using a shovel for weeding between plants. A shovel is too wide for tight plantings. If weeds are a constant problem, dedicated weeding implements will do more for you than another shovel.
Frequently Asked Questions
What is the single best digging tool for a raised bed?
A full-tang hand trowel is the most versatile. It plants, digs, mixes, and weeds. If you buy only one tool, make it a good trowel. If you buy two, add a border fork.
Do I really need a regular shovel?
Usually not. A transplant spade fits the bed better and causes less compaction. Keep a full-size shovel for breaking ground on new beds elsewhere in the yard.
How do I loosen compacted soil without wrecking it?
Use a border fork to lift and fracture, not flip. For deeper compaction, use a compact broadfork. Follow up with compost and mulch so the soil biology can rebuild structure.
Is stainless steel worth the extra cost?
Only for tools you use regularly. Weekly-use tools benefit from stainless because it resists rust and releases soil cleanly. For occasional tools, quality carbon steel with proper care is fine.
How often should I sharpen my tools?
Lightly sharpen every few sessions during heavy use, and do a full sharpening at the end of the season. Sharp tools are noticeably easier on your hands and wrists.
What is the best tool for clay soil in a raised bed?
A border fork with sharp, square tines penetrates clay better than a spade. Avoid digging clay when wet, and add compost consistently to improve structure over time.
Final Thoughts
The best digging tools for raised garden beds are not the biggest or the most expensive. They are the tools that fit the bed, fit your hand, and do the job without destroying the living soil beneath you.
Start with a quality trowel and add a border fork, transplant spade, and hori-hori. Keep them clean, keep them sharp, and store them properly. Then let your technique do the rest: loosen instead of flip, work from the edges, and disturb the soil as little as possible.
If your current tools make raised bed chores feel like punishment, replace the worst one this season. Your back, your soil, and your plants will tell you the difference.