Heavy Duty Digging Tools: Top Picks For 2026
Digging is the most physical part of any landscaping, gardening, or construction project. When you hit clay, caliche, or a web of roots, a flimsy tool doesn't just slow you down—it breaks, bends, and can leave you injured. The difference between a frustrating afternoon and a productive one often comes down to the steel in your hands. That's why choosing genuine heavy-duty digging tools matters more than almost any other purchase in your shed.
This guide is built from years of practical field experience, not just spec sheets. We've tested these tools in rocky fill, dense clay, and root-bound soil. We'll break down what truly makes a tool "heavy duty," which specific tool wins for each task, and how to maintain your investment so it lasts a decade or more. Whether you're setting fence posts, digging drainage trenches, or planting trees, you'll know exactly what to buy and how to use it safely. You can also read our guide on how to sharpen lawn mower blades at home.
What Are Heavy Duty Digging Tools? Types and Use Cases
Heavy-duty digging tools are professional-grade implements designed for extreme force, repetitive impact, and prying. Unlike standard homeowner versions, they feature thicker gauge steel, reinforced joints, and heavier heads that can withstand the punishment of hard, compacted earth. They are the difference between a tool that flexes and one that transfers every ounce of your energy into the ground.
Manual Heavy Duty Tools
These are your go-to for precision work, tight spaces, and jobs requiring "feel." The list includes:
- Round Point Shovels: The workhorse for general soil digging, planting, and moving loose material.
- Spades and Drain Spades: Feature flat or slightly curved blades for clean cuts, edging, and digging narrow, straight-sided trenches.
- Trenching Shovels: Have a narrow, long blade ideal for excavating deep, narrow utility lines without disturbing surrounding soil.
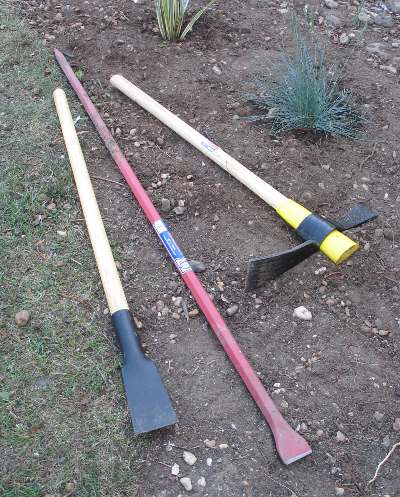
- Mattocks and Pickaxes: Combine a chopping blade and a pick or adze for breaking up hardpan, cutting through roots, and prying rocks.
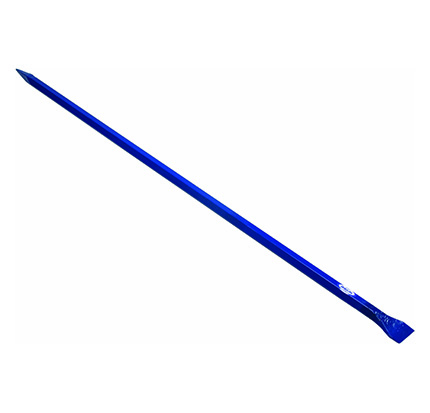
- Digging Bars (or Pinch Bars): Solid steel bars used for prying rocks, breaking up concrete, and creating pilot holes.
- Post Hole Diggers: Clamshell-style tools for excavating round, deep holes for fence posts.
- Root Saws: Aggressive, serrated blades designed specifically for severing thick, stubborn roots.
Powered Heavy Duty Options
When the hole count is high or the soil is brutally dense, engine power saves hours of labor.
- Power Augers: Available in gas, battery, or hydraulic models, these are essential for setting dozens of fence posts.
- Rotary Hammers with Clay Spades: For breaking up hard subsoil or small concrete sections in tight areas.
- Mini Excavators and Trenchers: Best for large-scale projects like laying drainage pipe or digging foundations.
Each tool fills a specific gap. Buying the right one for the job isn't a luxury; it ensures your safety and prevents rework. You can also read our guide on how to water lawn efficiently.
Key Features That Make A Tool Heavy Duty
Not all steel is created equal. When you're shopping for 2026, the term "heavy-duty" is overused, but a few concrete specifications separate the real tools from the pretenders.
Material and Construction
Look for forged, heat-treated steel in the head and blade. This process eliminates weak points and prevents chipping. Check the blade thickness—a heavy-duty shovel will have a gauge of 12 or thicker, which resists bending when you pry on a rock. The connection point where the handle meets the blade is the most common failure spot. A reinforced collar or solid-strap construction that extends up the handle is non-negotiable for heavy prying. You can also read our guide on how does a chainsaw work.
Handle Matters
Your handle is the shock absorber. Fiberglass handles are the modern standard for durability. They don't rot, warp, or splinter, and they dampen vibration better than steel. Hickory and ash are classic choices—they flex beautifully and feel warm in the hand, but they demand care and can crack if left wet. For utility and longevity, fiberglass with a padded, non-slip grip is our top recommendation for most users in 2026.
Ergonomics and Mass
- Large Step Plates: A wide step plate protects your boot and lets you apply full body weight without pain.
- D-Grips: Provide superior control for twisting and pulling in tight dig situations.
- Weight and Balance: An 8-pound pick hits significantly harder than a 5-pound one, but it will exhaust you faster. Match the mass to your physical strength and the specific task.
Finish
A powder-coated finish resists rust and helps soil slide off the blade. It's a small feature that extends the life of the tool significantly. For further reading, see call811.com.
Manual vs Powered Heavy Duty Digging Tools: When To Choose Each
The debate between hand tools and powered equipment isn't about which is "better"—it's about context. Here's a practical breakdown based on field experience.
Choose Manual Tools When:
- You are digging fewer than 10 holes.
- You are working near buried utilities, irrigation lines, or sprinkler systems.
- Noise is a concern (urban areas, early mornings).
- You need precise control for clean, uniform cuts.
- The soil is mixed with roots and debris where power tools can kick violently.
Choose Powered Tools When:
- You need to set 20+ fence posts in clean loam.
- You are dealing with permafrost or heavily compacted fill.
- You need a long, continuous trench.
- Your physical stamina is the limiting factor on a big project.
Quick Selection Guide:
| Task | Recommended Tool |
|---|---|
| Planting a few shrubs | Manual spade + digging bar |
| Setting a mailbox post | Manual post hole digger |
| 50 ft of drain trench | Trenching shovel + mattock |
| 100 ft of utility line | Power trencher or mini excavator |
| Breaking up a concrete slab | Digging bar + jackhammer |
A common mistake is renting a power auger for rocky soil; the machine will torque violently and can break your wrist. Manual tools give you the "feel" needed to navigate underground obstacles safely. The best strategy blends both: use hand tools to probe and break the crust, then use power to remove the bulk.
How To Select The Right Tool By Task
Specific jobs demand specific blade geometry and weight distribution. Here’s how we break it down.
Breaking Hard Ground and Rock
The Pickaxe is your primary weapon. It concentrates force on a small point to fracture rock and break the crust. For chopping edges and scraping, use the mattock's adze side. Always follow up with a digging bar to pry apart large chunks and loosen the fractured material. Keep a spray bottle of water handy to dampen dusty soil; a little moisture also makes it easier to dig.
Cutting Roots and Sod
Use the sharp, straight edge of a spade to cleanly slice through turf. For subsurface roots, a cutter mattock with a sharp, horizontal blade is the fastest tool for severing them. For roots thicker than your wrist, use a root saw—trying to chop through a 4-inch root with a shovel will only bend the blade. A sharp tool is vital here; dull edges bounce off roots and force you into awkward, injury-prone angles.
Trenching and Drainage
Trenching shovels are non-negotiable for deep, narrow cuts. They have a long, narrow blade that pulls soil out without widening the trench. Use a mattock to loosen compacted clay, then switch to the trenching shovel to scoop it out. Score the edges of your trench with a spade first to get a perfectly straight line that won't cave in.
Post Holes and Fence Lines
Start with a digging bar to break the ground and probe for underground rocks. Then, use a clamshell post hole digger to extract the loosened soil. In clean, rock-free soil, a power auger is the right call for efficiency, but in rocky zones, the extra cost and risk of the auger aren't worth it—stick with the manual pair.
Digging in Clay or Wet Soil
Clay is sticky and heavy. A narrow, pointed shovel with a large step plate is essential to maximize leverage. Reduce friction by spraying the blade with a silicone-based lubricant or keeping it dry. Dig in short lifts and let water drain out of the hole before making deep cuts in saturated soil.
Safety, Body Mechanics, and Ergonomics
Digging is a full-body workout, and bad form leads to back injuries. Safety is not an afterthought; it's a prerequisite.
Essential Gear
- Boots: Wear steel-toe boots with a defined heel and aggressive tread.
- Gloves: Use gloves with a reinforced palm and good grip, even in wet conditions.
- Eye Protection: Always wear safety glasses—rock chips and debris fly without warning.
- Hearing Protection: Mandatory when running any power auger or trencher.
Proper Body Mechanics
- Lift with your legs, not your back. Keep your spine neutral and bend at the hips and knees.
- Don't twist. Pivot your entire body with your feet when moving soil.
- Let gravity do the work. Especially with picks and mattocks—lift the head, let it drop, and don't muscle it.
- Take breaks. Short bursts with rest are more productive than an hour of grinding.
Call Before You Dig
In the US, dial 811 at least a few days before you plan to dig. It's a free service that marks underground utility lines. When you get close to marked lines, stop using powered tools and hand-dig the final 18–24 inches, using a digging bar to gently probe for pipes and cables.
Know Your Tool's Limits
- Augers: Can kick sideways violently if they hit a rock. Maintain a firm stance with your body positioned to the side.
- Digging Bars: Can rebound sharply when prying. Keep your face away from the line of force.
- Post Hole Diggers: The handles can pinch your fingers together. Always close them with an even grip.
Care, Sharpening, and Maintenance
A heavy-duty tool is a long-term investment. Proper maintenance keeps it performing like new. Follow these steps to extend its lifespan.
Immediate After-Care
After every job, knock off caked-on mud and rinse the tool. Dry it completely to prevent rust. Wipe down the steel blade with a rag dipped in linseed oil or a light machine oil—this creates a protective barrier against moisture.
Sharpening Techniques
A sharp shovel cuts 50% faster than a dull one. Use a mill file or an angle grinder with a flap disc to maintain a 30-45 degree bevel on the cutting edge. Work in smooth, even strokes from the base to the tip. Avoid overheating the steel—it ruins the temper and makes the edge brittle. Dip the blade in water periodically to keep it cool.
Handle Inspection
Check handles for cracks, splinters, or a loose head every time you use the tool. A loose head is an accident waiting to happen. Tighten wedges or replace bolts. If the handle is cracked, replace it immediately—this is a cheap fix that keeps a good head in service for decades.
Powered Tool Servicing
For augers and trenchers, check fluid levels, air filters, and spark plugs before each season. Keep blades and teeth sharp and free of rust.
Tool Storage
Store tools on a rack, off the concrete floor, and out of direct sunlight. Sunlight degrades fiberglass handles and dries out wood.
Budget, Value, and Sustainability
Looks can be deceiving, and price tags don't always reflect value. Here’s how to make a smart economic and environmental decision.
Buy Right, Not Twice
A quality shovel might cost $50-$80, while a bargain store version is $15. The cheap one will snap under the first heavy pry. Buying a rugged tool that lasts ten years is almost always cheaper than replacing a flimsy one every season. Lifetime cost beats sticker price.
Rent vs. Buy
Rent a power auger, trencher, or mini-excavator for a one-off project. Buy only if you have a dedicated schedule of work (e.g., you set posts monthly). Maintenance and storage costs of heavy machinery are significant.
Check the Used Market
Many excellent, heavy-duty tools are sold at yard sales and estate sales. These are often older, forged-steel models that are far superior to modern consumer versions. They can be cleaned up and re-handled easily—a simple sharpening session will make them perform like new.
Sustainable Practices
Rebuilding a tool with a new handle keeps it out of a landfill. Choosing tools made with recycled steel is another small step. Remember, the greenest tool is the one you already own and maintain.
Field Notes: Lessons Learned From Years In The Dirt
Beyond the tools themselves, a few tricks make a massive difference in output and safety.
- Pre-soak the soil: a light spray from a hose the night before makes hard ground exponentially easier to dig, reduces dust, and prevents back strain.
- Score your lines: before deep excavation, cut a clean outline with a spade. This keeps your edges straight and acts as a guide for subsequent bites.
- Stage your "rig": Keep a standard garden shovel, a digging bar, and a mattock within arm's reach. Switching tools as the soil changes keeps you in the flow.
- Know when to stop: If a rock refuses to move, change your angle. Applying more force is how handles snap and ankles twist. The best tools help, but smart strategy wins the day.
Frequently Asked Questions
What makes a digging tool "heavy duty"?
It uses forged, heat-treated steel, a reinforced collar, and a handle made from solid fiberglass or high-quality wood. It resists bending, chipping, and breaking under sustained hard use.
Are fiberglass handles better than wood?
For utility and durability, yes. Fiberglass handles dampen vibration, won't rot, and require zero maintenance. Wood handles offer better "feel" and shock absorption but need regular oiling and can dry out and crack.
How often should I sharpen my shovel or mattock?
Touch up the edge after any job involving roots or rocks. A few passes with a file makes a huge difference. A sharp edge reduces the force needed, which prevents body strain.
What's the best tool for cutting thick roots?
A cutter mattock or a root saw. For roots over 2 inches, a saw is safer and faster than trying to chop through with an axe or shovel.
How do I dig in rocky ground?
Break the crust with a pickaxe, then use a digging bar to pry out stones. Scoop out loosened dirt in small lifts with a strong shovel. Do not attempt to "pop out" large rocks by force—dig around them until they are free.
Conclusion
The right heavy-duty digging tool turns a dreaded chore into straightforward progress. It is an investment in your body, your time, and your project's success. Remember to prioritize forged steel, a solid handle, and the correct tool for the specific task at hand.
Before you head to the store, evaluate your next project. Are you breaking new ground or maintaining an existing garden's soil health? If you're tackling a big landscaping project, also consider how you'll handle cleanup—perhaps a powerful leaf blower will be your next best friend. Start with one quality upgrade, use the field techniques we've outlined, and build your kit one solid piece at a time. Your back and your landscape will thank you.