How To Sharpen Lawn Mower Blades At Home: Pro Guide 2026
A ragged, brown-tipped lawn after mowing is the clearest sign your blade has gone dull. When a blade stops slicing and starts tearing, your grass pays the price — and so does your mower's engine, which has to work harder with every pass. The good news? Sharpening a mower blade is a straightforward DIY job that takes under an hour, costs almost nothing, and pays off in a healthier lawn all season.
In this guide, I'll walk you through the complete process: the tools you actually need, the safe way to remove the blade, how to match the factory bevel, and why balancing matters more than most homeowners realize. Whether you're working with a hand file or an angle grinder, you'll finish with a blade that cuts clean and stays sharp longer. You can also read our guide on how to change lawn mower oil.
Image source: speechandvoice.com
Why Sharp Mower Blades Matter More Than You Think
A sharp blade cuts grass like a pair of scissors — clean, crisp, and quick to heal. A dull blade, by contrast, hammers and tears each grass blade, leaving frayed edges that turn brown within a day. Those damaged tips become entry points for disease and pests, and the grass spends energy repairing itself instead of growing thick and green.
The benefits of sharpening extend beyond looks:
- Healthier turf. Clean cuts seal faster, reducing moisture loss and disease risk.
- Less engine strain. A sharp blade requires less horsepower to spin through grass, which means less fuel consumption and less vibration.
- A tidier finish. No more streaky, uneven patches or white-tipped grass two days after mowing.
- Longer blade life. Regular touch-ups prevent the deep nicks and rolled edges that eventually force a replacement.
In practice, I've found that most homeowners can feel the difference the moment they push a sharpened mower through thick grass. The machine pulls forward more easily, the cut looks uniform, and you stop making second passes.
Tools and Materials You'll Need
You don't need a fully equipped workshop to sharpen a mower blade. Here's the complete list, divided into what you must have and what makes the job easier.
Essential tools:
- Socket wrench set (usually 13mm, 14mm, or 15mm for blade bolts, depending on your model)
- Wood block or scrap 2×4 to wedge against the blade
- Flat mill file (8–12 inches, with a handle)
- Vise or sturdy clamps to hold the blade
- Wire brush or putty knife for cleaning
- Safety glasses and heavy work gloves
- Permanent marker or paint pen
Nice-to-have upgrades:
- Breaker bar for stubborn, rusted bolts
- Angle grinder with a flap disc for faster sharpening
- Blade balancer (or a nail set level in a wall)
- Torque wrench for precise reinstallation
- Penetrating oil (like WD-40) for seized hardware
If you're serious about keeping every cutting tool on your property in good shape, investing in a quality sharpening setup pays off quickly. A good file and a reliable angle grinder will handle everything from mower blades to shovels and hoes — the same gear you'd use for sharpening garden tools more broadly.

Image source: youtube.com
Safety First: Prepare the Mower Properly
Before you flip the mower over, take five minutes to eliminate every risk of accidental starting. This is the step most people rush — and the one that causes the most injuries.
- Disconnect the spark plug wire on gas mowers. Pull the boot off the spark plug and tuck it away from the terminal so it can't accidentally reconnect.
- Remove the battery on electric or cordless models. On corded electric mowers, unplug them completely.
- Turn the fuel valve off if your mower has one. This prevents fuel from flooding the carburetor when you tilt the machine.
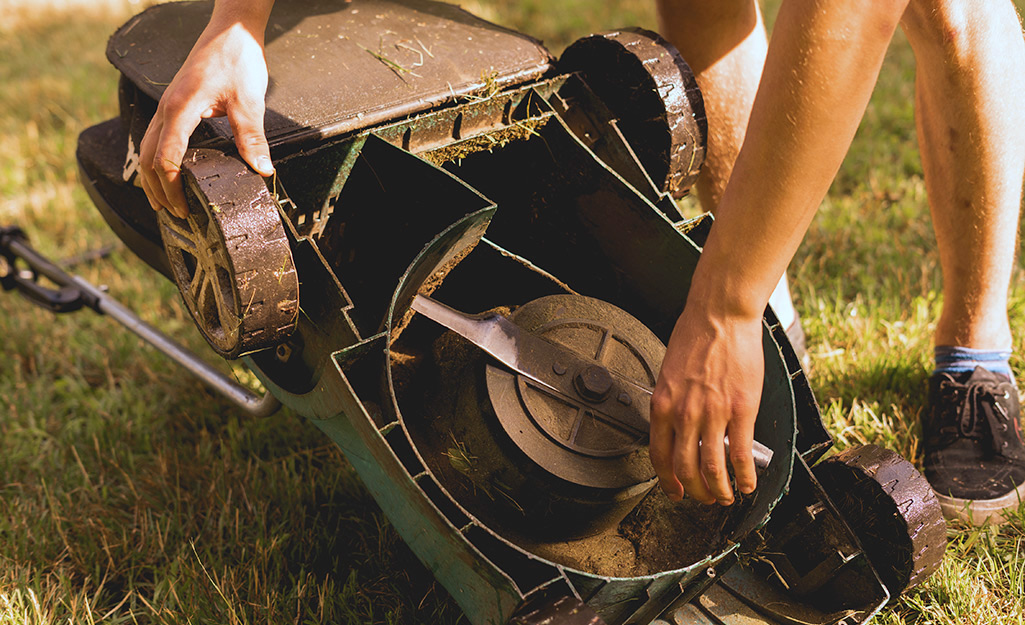
- Tip the mower correctly. Tilt it so the carburetor and air filter face upward. Tipping the wrong way can leak oil into the air filter and cause serious engine damage.
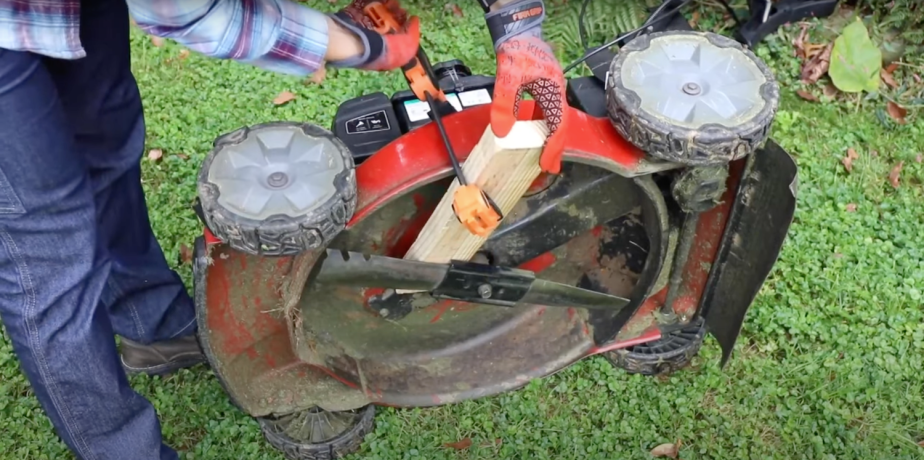
- Wedge a wood block between the blade and the mower deck to stop rotation while you work on the bolt.
Wear gloves and eye protection throughout. The blade is sharp even when dull, and grinding debris can fly in unexpected directions.
Once the mower is secure, you're ready to move to the bench. If you're also planning routine maintenance while the mower is tipped over, it's a convenient moment to address the correct fluid level or clean out the deck — two jobs that pair naturally with blade service.

Image source: thorfamilylaw.com
Step-by-Step: How to Sharpen Lawn Mower Blades at Home
Follow these steps in order, and you'll have a balanced, sharp blade back on the mower in under an hour.
Step 1: Mark the Blade Before Removal
Before you touch the bolt, grab a permanent marker and draw an arrow on the underside of the blade pointing toward the cutting edge. Also mark which side faces down (toward the ground). This small step eliminates the most common installation error: putting the blade back on upside down.
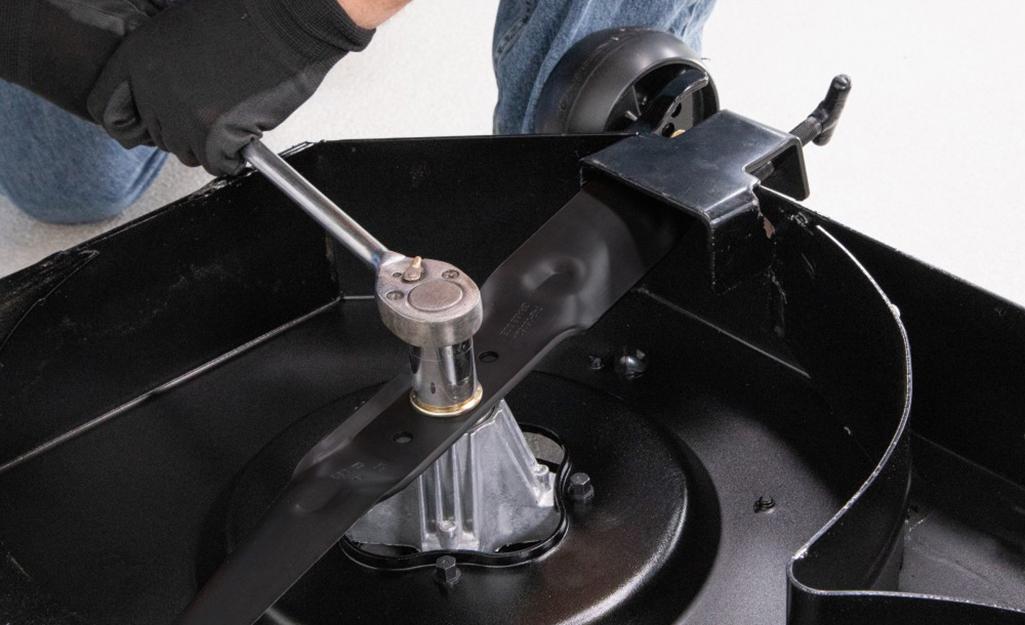
Step 2: Remove the Blade
Wedge the wood block between the blade and deck to lock it in place. Use your socket wrench to loosen the center bolt. If it's stubborn, apply penetrating oil and wait five minutes, then use a breaker bar for extra leverage.
On most walk-behind mowers, the bolt loosens counterclockwise (standard threads). Some models use reverse threads, so check your manual if the bolt won't budge in the expected direction.
Step 3: Clean and Inspect
Scrape off caked grass and dirt with your putty knife, then brush the blade with a wire brush to remove rust. Now examine the blade carefully:
- Cracks — any crack, no matter how small, means replacement. A blade can snap at speed and become a dangerous projectile.
- Deep chips or rolled edges — from hitting rocks or curbs. If a chunk is missing, replace the blade.
- Bent or warped blades — lay the blade flat on a level surface. If it rocks or shows a visible gap, replace it.
Light surface nicks are normal and sharpen out fine. But structurally compromised blades aren't worth the risk.
Step 4: Match the Factory Bevel Angle
Most mower blades have a cutting bevel between 30 and 35 degrees. This angle balances sharpness with durability — enough edge to slice grass cleanly, but enough metal behind it to survive the occasional rock or stick.
Do not try to create a razor-thin edge. That's the most common mistake I see in home sharpening. A too-thin edge dulls faster, chips on the first impact, and gives you a worse cut within a single season. Match the existing bevel and keep it consistent across the entire cutting edge.
Step 5: Sharpen with a Hand File (Recommended for Beginners)
Clamp the blade securely in a vise with the cutting edge facing up. Use a flat mill file held at the same angle as the factory bevel.
- Push the file in one direction — from the inside of the blade toward the tip.
- Apply firm, even pressure on the forward stroke; lift the file on the return.
- Count your strokes and repeat the same number on each cutting edge to keep them even.
- Work until you feel a consistent burr along the full edge — that's the sign you've reached fresh metal.
- Remove the burr with a few light passes flat against the back of the blade.
A file is slower than a grinder, but it's nearly impossible to overheat the metal or remove too much material. For your first few attempts at sharpening, the file is the safer choice. As you build confidence, you can explore faster methods.
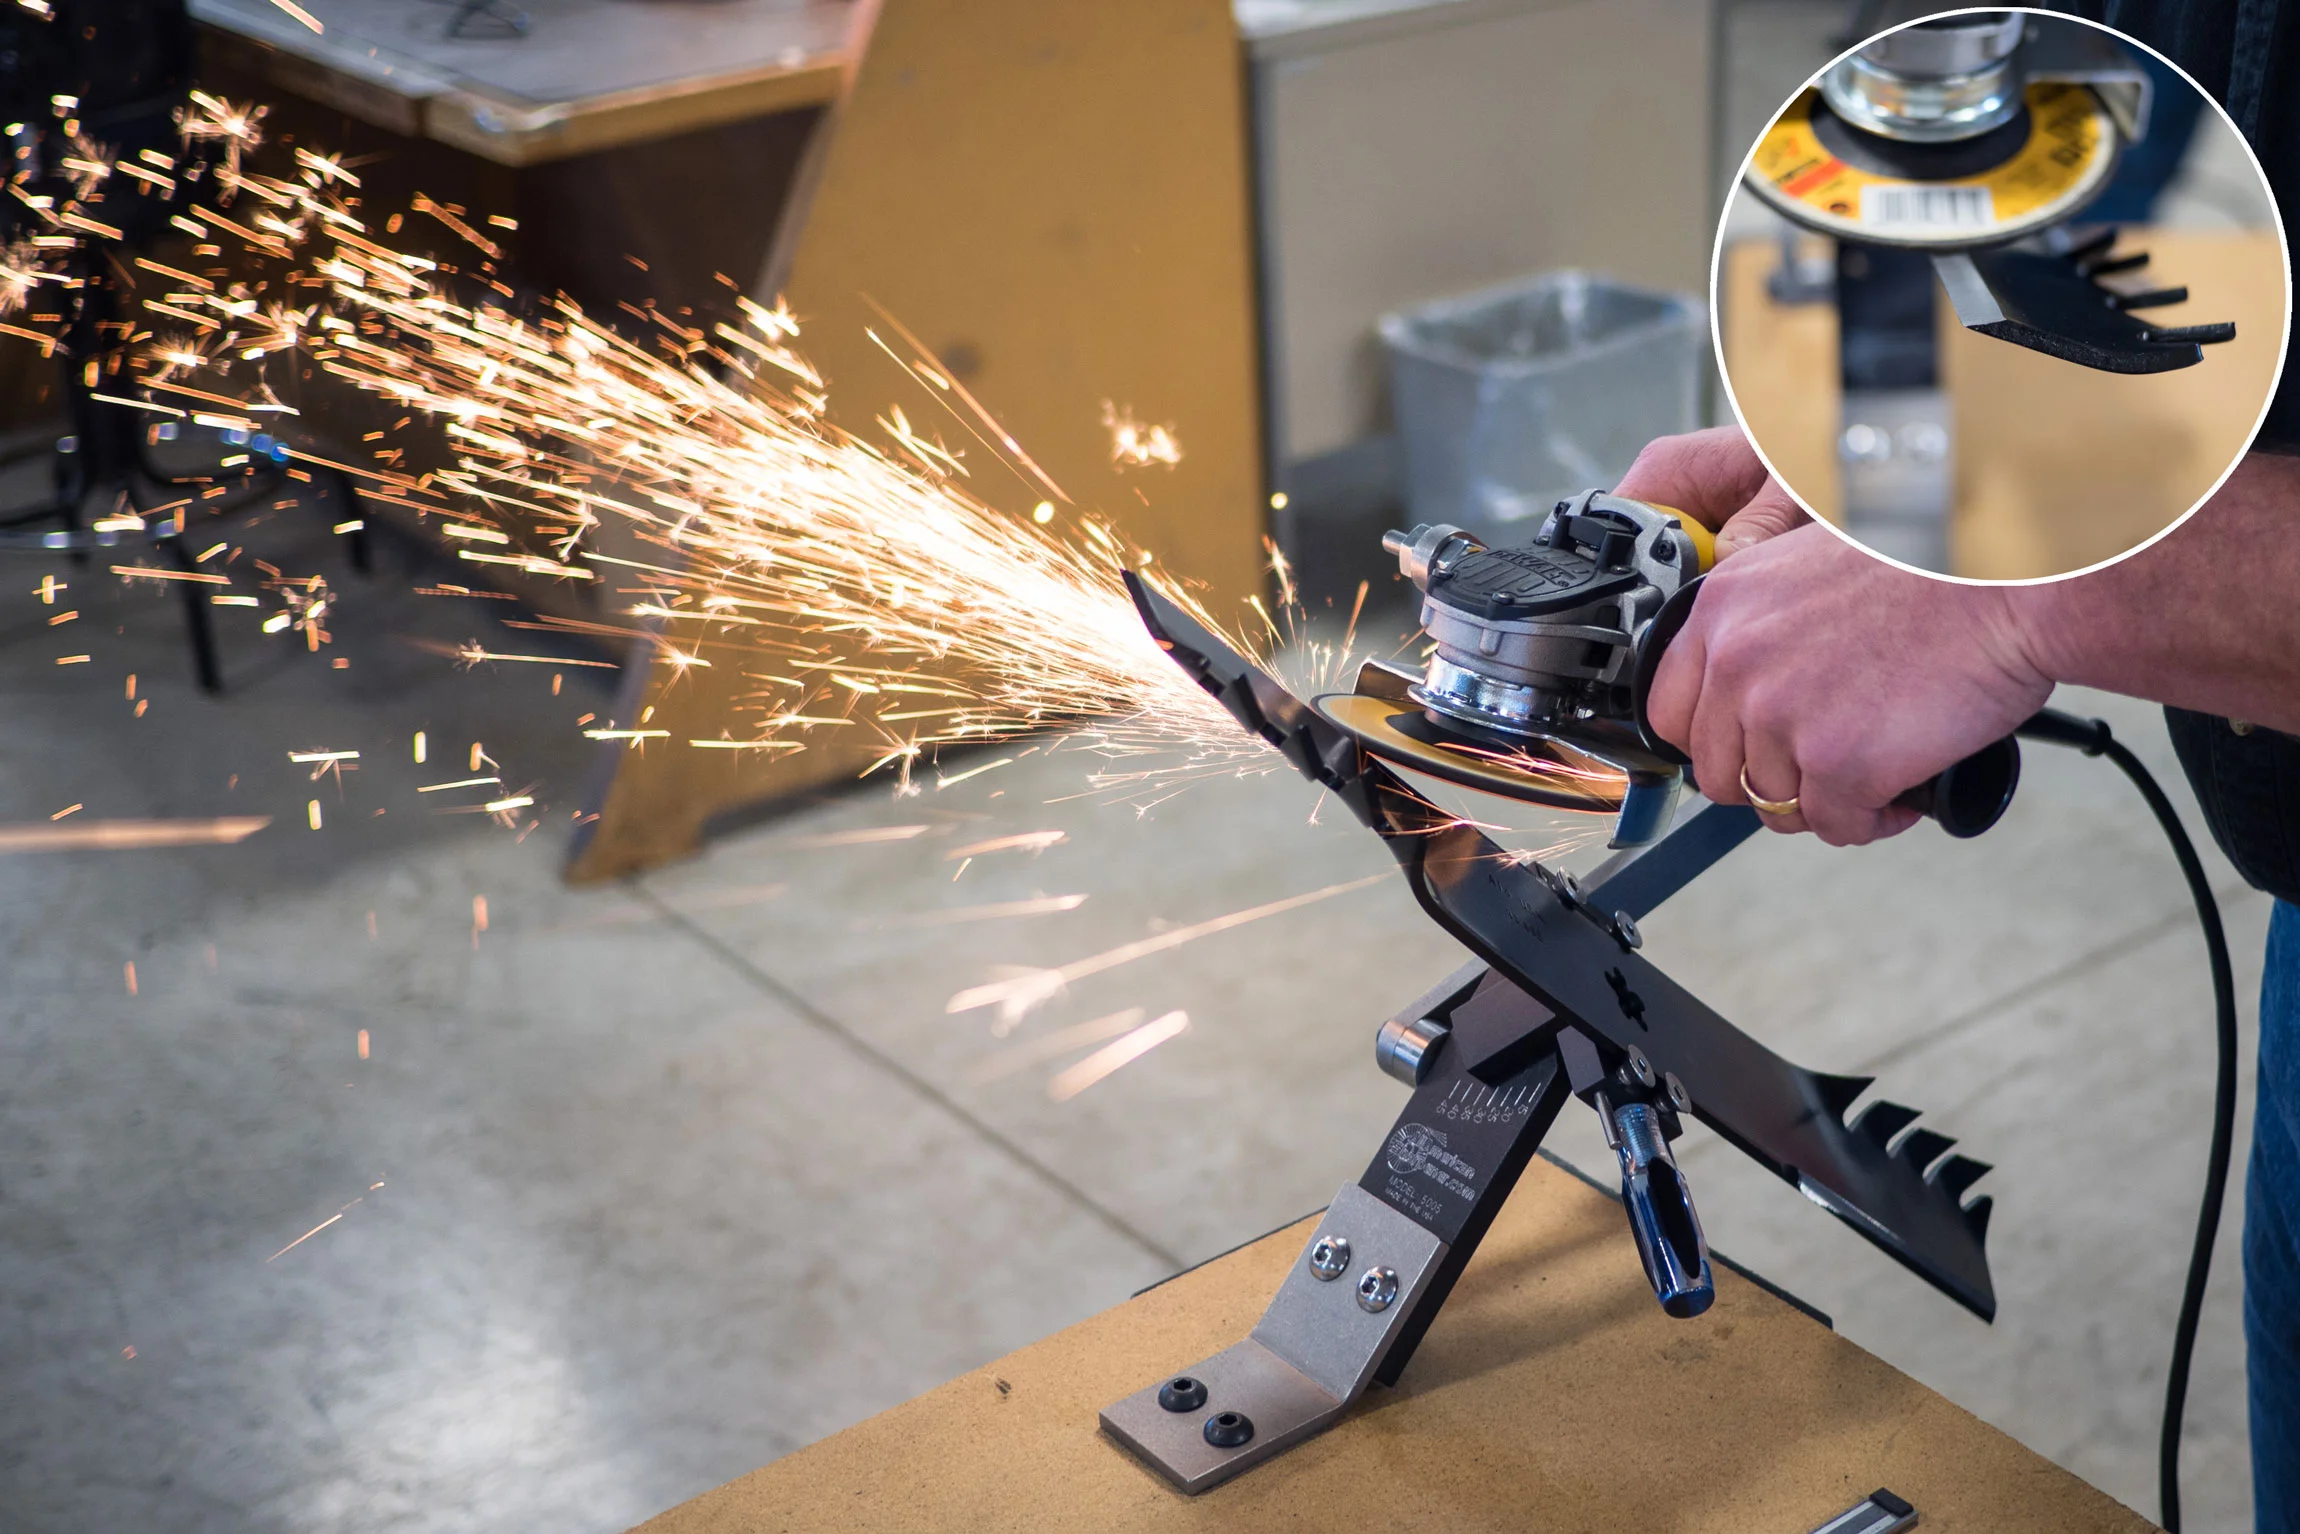
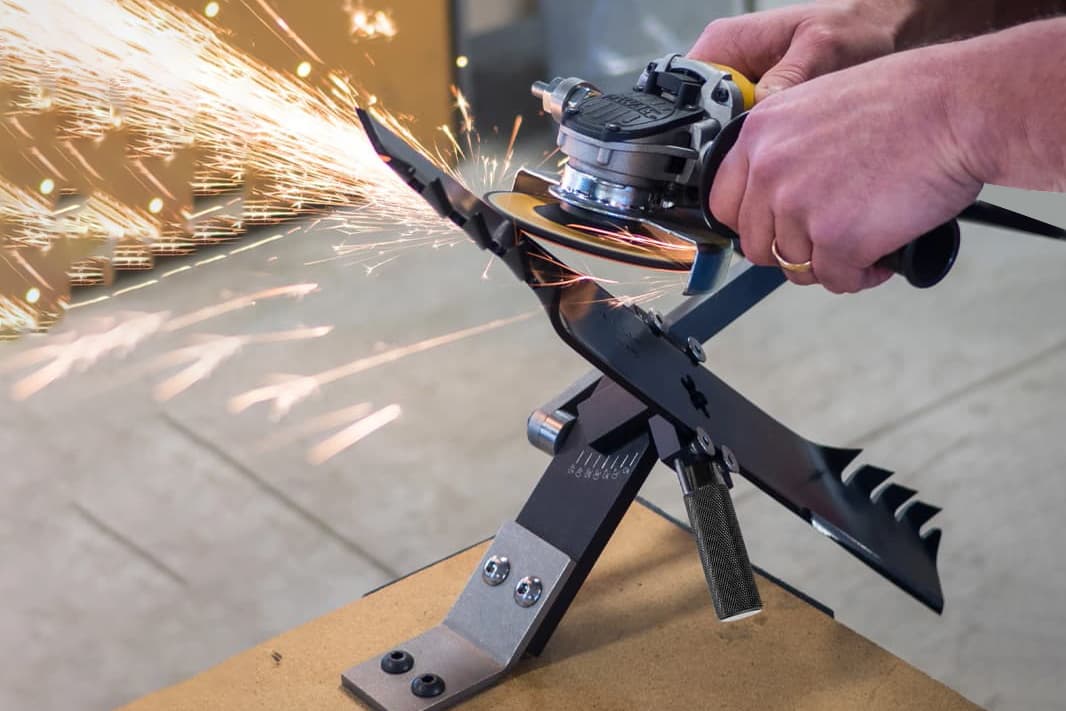
Step 6: Use an Angle Grinder for Speed (Optional)
If you have several blades to do or you're short on time, an angle grinder with a flap disc removes metal quickly.
- Work in light, even passes, keeping the grinder moving constantly.
- Match the factory bevel angle and don't linger in any one spot.
- Stop frequently and let the blade cool. If the edge turns blue, you've overheated it and ruined the temper — at that point, the steel will dull almost immediately, and you're better off replacing the blade.
- Never quench a hot blade in water. Let it air cool naturally.
The risk with grinders is removing too much metal too fast. Take your time, check your work often, and remember you can always remove more.
Step 7: Balance the Blade
This step is non-negotiable, and it's the one most home sharpeners skip. An unbalanced blade causes vibration that:
- Wears out the spindle bearings
- Puts stress on the crankshaft
- Loosens bolts over time
- Leaves an uneven cut
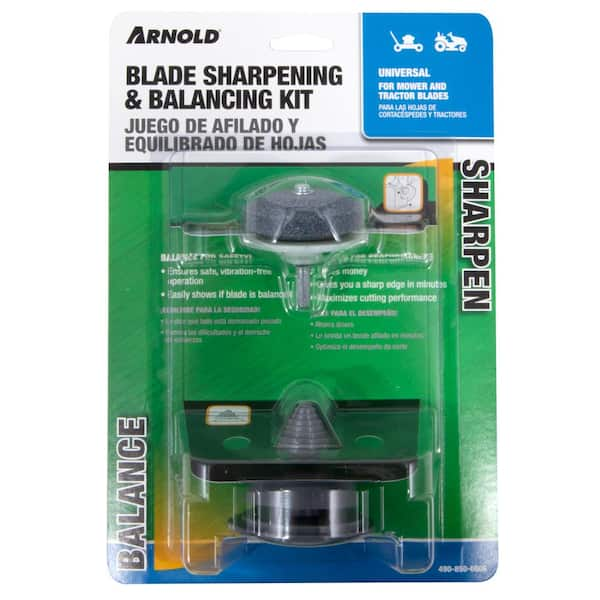
To check balance, hang the blade on a cone balancer designed for the purpose, or use a nail set level in a wall. The blade should rest horizontally. If one side drops, that side is heavier — remove a little more metal from that edge and recheck.
In practice, it only takes a few extra minutes, and the difference is immediately obvious in how smoothly the mower runs.
Step 8: Reinstall and Torque
Position the blade with your marked side facing toward the ground. The lift wings (the curved sections near the ends) must face up into the mower deck — that's what creates the vacuum that stands grass up for a clean cut.
Tighten the bolt to your manual's specification. Most walk-behind mowers call for 35–60 ft-lb. If you don't have the manual, check the manufacturer's website. A torque wrench is worth the investment here — too loose and the blade can slip; too tight and you risk stripping the threads or cracking the blade adapter.
Reconnect the spark plug or battery, and you're done.
Step 9: Test Your Work
Mow a small patch and inspect the results. The grass tips should look clean and even, not frayed. If you see tearing, the edge needs a touch-up. If you feel vibration, recheck the balance.

Image source: homedepot.com
Can You Sharpen Without Removing the Blade?
Yes, but it's a compromise. If you're in a hurry, you can file the edge with the blade still mounted:
- Disconnect power and tip the mower correctly.
- Wedge a wood block to stop rotation.
- File along the factory bevel, working carefully around the deck.
The downside is that you can't inspect the blade thoroughly, can't clean it properly, and most importantly, can't check balance. Since balance is half the job, I recommend removing the blade whenever possible. A full removal costs an extra ten minutes and produces a measurably better result.
How Often Should You Sharpen? Signs It's Time
Most homeowners should sharpen every 20–25 hours of mowing. For a typical quarter-acre lawn mowed weekly through the growing season, that works out to roughly twice a year: once in early spring and again in mid-summer.
Several factors accelerate dulling:
- Sandy soil — sand is abrasive and dulls blades quickly
- Frequent debris — sticks, acorns, and pine cones take a toll
- Large lawns — more mowing hours mean more frequent sharpening
- Mulching — mulching blades work harder and dull faster than side-discharge blades
Here are the signs your blade needs attention:
- Grass tips look white, brown, or frayed a day after mowing
- The mower bogs down or requires extra passes
- You notice increased vibration while mowing
- The cut looks uneven, with patches of taller grass
- You've hit a rock or stump recently — even if the cut still looks fine
If you let the blade go too long, you're not just getting a worse cut — you're also making the engine work harder and burn more fuel. Keeping the correct fluid level and a sharp blade are the two cheapest, highest-impact maintenance tasks you can do for your mower.

Image source: homedepot.com
Common Mistakes to Avoid
Over the years, I've seen the same errors repeat in garages and workshops. Here's what to watch for:
Sharpening to a knife edge. A razor-thin edge might look impressive, but it will dull after one or two mows and chip on the first rock. Keep a strong, blunt-ish bevel at the factory angle.
Changing the angle. If your blade came with a 30-degree bevel, keep it at 30 degrees. Don't "improve" it to 25 or 40 degrees. The factory geometry is engineered for your specific deck and cutting conditions.
Overheating the edge. Blue discoloration means the steel has lost its temper. The blade will dull almost immediately. If you see blue, you've gone too far — consider replacing the blade.
Skipping the balance check. Even a small imbalance creates noticeable vibration that damages the mower over time. This step takes two minutes; the repair bill for a bent crankshaft is not worth skipping it.
Installing the blade upside down. The lift wings must face up into the deck. Install it backward and you'll get a terrible cut and possibly damage the blade adapter. This is why the marker trick matters.
Tipping the mower on the wrong side. If the air filter and carburetor point down, oil can flood the intake. Always tip so those components face up.
Using a damaged blade. Cracks, major bends, and missing chunks mean replacement, not sharpening. A blade failure at 3,000 RPM can send steel through the deck — not worth the risk.
Guessing torque. Under-tightened bolts slip and wallow out the mounting hole. Over-tightened bolts strip threads or crack the adapter. Use a torque wrench.
Pro Tips for a Pro-Level Edge
These are the techniques that separate a good sharpening job from a great one:
Keep a spare blade set. Buy a second blade for your mower model. When one dulls, swap it in ten minutes and sharpen the dull one at your leisure. This is the single biggest time-saver for anyone with a large lawn.
Mark your blade with paint. A dot of paint on the underside tells you at a glance which way the blade installs. It takes five seconds and removes all guesswork.
Touch up after impacts. Hit a rock or a stump? Pull the blade off and check for rolled edges or nicks immediately. A quick file pass fixes most minor damage before it becomes a bigger problem.
Protect against rust. Before winter storage, wipe the blade with a light coat of oil. This prevents pitting that will make sharpening harder in spring.
Keep your other tools sharp too. The same file and grinder you use for mower blades work on hoes, shovels, and edgers. The principles are identical — match the bevel, avoid overheating, and keep the edge even. It's the same approach you'd use for routine upkeep on any cutting tool.
Learn your mower model. Different mowers have different blade configurations, bolt sizes, and torque specs. Keep your manual accessible, or bookmark the manufacturer's support page for quick reference. If you're unsure whether your specific mower is worth maintaining or replacing, plenty of owners have asked the same question about Troy-Bilt reliability before committing to a repair.

Image source: youtube.com
Frequently Asked Questions
How do I know if my mower blade is dull?
The most reliable sign is the cut itself. If grass tips look brown, white, or frayed a day after mowing, your blade is tearing instead of slicing. You might also notice the mower bogging down in normal grass or requiring multiple passes to achieve a clean cut.
Can I sharpen a mulching blade the same way?
Yes. Mulching blades use the same basic sharpening principles, but they have more complex curves along the cutting edge. Follow the factory bevels carefully and keep the edge even across all the contours. Balance is even more important on mulching blades because the extra metal makes imbalance more noticeable.
What angle should I use?
Most mower blades use a 30–35 degree bevel. Match the existing factory angle rather than guessing a new one. If you're unsure, hold the file or grinder at roughly the same angle as the existing bevel and follow it consistently.
Is a grinder better than a file?
It depends on your skill level. A grinder is much faster and works well on heavily damaged edges. A file is safer, more controlled, and essentially impossible to overheat. For beginners, I always recommend starting with a file — it teaches you the correct angle and feel before you introduce power tools. Many experienced sharpeners still use a file for touch-ups because it removes so little metal.
Do I need a blade balancer?
A simple nail set level in a wall works well enough to check balance. A cone balancer is more accurate and easier to use, and it's cheap — typically under $15. Given that balance problems cause real mechanical damage over time, it's a worthwhile investment.
How tight should the blade bolt be?
Most walk-behind mowers specify 35–60 ft-lb of torque. Check your owner's manual for the exact spec. If you don't have the manual, many manufacturers publish specifications online. When in doubt, err toward the middle of the range and re-check after the first hour of mowing.
Can I sharpen without removing the spark plug?
Never work on a mower blade with the spark plug connected or the battery installed. A mower can start accidentally if the blade is turned while the ignition system is live. Always disconnect power completely before touching the blade.
The Bottom Line
Sharpening your mower blade is one of the highest-return maintenance jobs in lawn care. It takes under an hour, requires minimal tools, and delivers a visibly healthier lawn every single time you mow. Once you've done it a few times, the whole process becomes routine — you'll recognize the signs of dullness earlier and handle touch-ups in minutes.
Start with a hand file for your first attempt, match the factory angle, remove light, even passes, and always check balance before reinstalling. Set a reminder to inspect the blade every 20–25 mowing hours, or keep a spare blade set on hand for instant swaps.
A sharp blade means cleaner cuts, less fuel burned, and a lawn that looks like it was professionally maintained. Spend an hour this weekend, and your grass will thank you all season.