How To Improve Lawn Soil Health: Pro Tips For 2026
Beneath every great lawn is soil that acts like a living sponge. In 2026, the most successful lawn care strategies focus less on quick chemical fixes and more on feeding the ground itself. Healthy soil stores water, cycles nutrients, supports deeper roots, and naturally suppresses weeds. This guide walks you through the full process of improving lawn soil health — from identifying your soil type and running a test to building organic matter, balancing pH, relieving compaction, and setting up a seasonal plan that keeps improving year after year.
Why Soil Health Is the Real Key to a Better Lawn
Your grass is only as strong as the soil it grows in. If the soil below is compacted, lifeless, or lacking organic matter, no amount of fertilizer or watering will give you the thick green lawn you want. Top growth follows root growth, and roots follow soil conditions. You can also read our guide on how to water lawn efficiently.
Healthy soil does three critical things: it holds moisture like a sponge, stores and releases nutrients steadily, and gives roots room to breathe. When those functions are off, the whole lawn struggles. When they are right, the grass becomes naturally resilient to heat, drought, weeds, and disease.
Most homeowners avoid soil work because it feels complicated. It is not. You just need to learn the basics and follow a logical sequence of steps. You can also read our guide on how to remove weeds from lawn permanently.
What Healthy Lawn Soil Looks Like
Before you change anything, know your target. Healthy soil is not just dirt — it is a living ecosystem. If you dig a small plug from a thriving lawn, here is what you should see:
- Dark, crumbly texture that breaks apart easily in your fingers
- Earthworms and white root tips throughout the top few inches
- A pleasant, earthy smell — sour or rotten odors mean poor drainage
- Moisture that holds together when squeezed but crumbles when poked
- Water that soaks in quickly instead of pooling after rain
If your soil is pale, rock-hard, or smells like a swamp, do not panic. Every one of those problems can be corrected with the steps below.

Healthy soil is dark, crumbly, and alive with roots and earthworms.
Step 1: Identify Your Soil Type Before You Change Anything
Soil texture determines how often you water, how compacted the ground gets, and how much organic matter you need. The easiest way to check at home is the ribbon test. You can also read our guide on how to improve garden soil naturally.
Take a handful of slightly damp soil and squeeze it into a ball. Then press it between your thumb and index finger to form a ribbon. If it forms a long ribbon more than 2 inches long, you have clay-heavy soil. If it crumbles immediately and feels gritty, you have sandy soil. If it forms a short ribbon then breaks, you have the ideal loamy mix.
A jar test gives even clearer answers. Fill a clear jar about halfway with soil, add water, shake it well, and let it settle overnight. The bottom layer is sand, the middle is silt, and the top is clay. That simple visual tells you which problems to expect. You can also read our guide on what gas is best for lawn mower.
Clay compacts easily and drains slowly. Sand drains fast and loses nutrients quickly. Loam behaves like a balance between the two. Once you know your texture, you can adjust your compost, watering, and aeration plan accordingly.
Step 2: Start With a Soil Test, Not a Guess
The single biggest mistake homeowners make is throwing products at a lawn without knowing what it actually needs. A soil test removes the guesswork, saves money, and is the foundation of every smart soil improvement plan. You can also read our guide on how to use leaf mulcher.
Here is how to take a reliable sample:
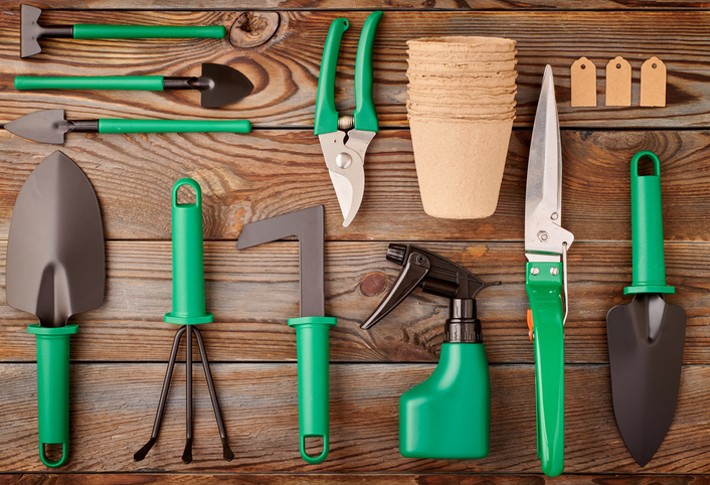
- Use a clean trowel or a sturdy digging implement to pull 10–12 small plugs from different areas of the lawn
- Dig 3–4 inches deep, where most grass roots live
- Remove any thatch or grass blades from each plug
- Mix all the plugs together in a clean plastic bucket
- Send about 1–2 cups of the mixed soil to a lab or local cooperative extension office
Most public testing labs return results within one to two weeks and include clear recommendations. Testing every 2–3 years is enough for an established lawn. If you are correcting a serious problem, test annually until the numbers stabilize.
Your soil test report will tell you three main things: pH, available phosphorus, and available potassium. Many labs also measure organic matter and micronutrients. Use this quick reference to understand the numbers:
| Soil Factor | Cool-Season Grass | Warm-Season Grass |
|---|---|---|
| pH Range | 6.0–7.0 | 5.5–6.5 |
| Phosphorus | Medium or higher | Medium or higher |
| Potassium | Medium or higher | Medium or higher |
| Organic Matter | 4–8% | 3–6% |
Most county extension offices offer low-cost soil testing. The USDA Natural Resources Conservation Service publishes practical guides to soil health and can help you understand what the results mean. For regional testing labs and local recommendations, many state university extension websites, such as University of Minnesota Extension, provide accurate and up-to-date guidance. You can also read our guide on how to grow herbs at home.
A soil test is the best few dollars you can spend. Without one, you are guessing your way through every other step in this guide.
Step 3: Build Organic Matter With Compost
Organic matter is the engine of soil health. It feeds beneficial microbes, improves drainage in clay soils, helps sandy soil hold moisture, and slowly releases nutrients to grass roots. More organic matter simply equals a more resilient lawn. You can also read our guide on how to clean up dog poop in yard.
The best source for most lawns is well-aged, screened compost. Leaf compost, yard-waste compost, and mature composted manure all work well. Fresh manure is the exception — it can burn grass roots and introduce unwanted pathogens.
How to apply compost to an established lawn:
- Topdress with a thin layer, about ¼ to ½ inch, in spring or fall
- Rake it in gently so it settles between the grass blades and reaches the soil surface
- After core aeration, sweep compost into the holes to deliver organic matter directly to the root zone
- Mulch-mow grass clippings and fallen leaves so they recycle nutrients back into the soil
Start with a quarter-inch layer if you are new to topdressing. Too much compost in one application can smother the grass. Two light applications a year will build organic matter steadily without the shock.
One of the simplest ways to generate your own organic matter is to keep your leaves in the fall. If you have more leaves than the mower can chew through, shredding leaves into mulch gives you a free stockpile of soil-building material for spring.
Step 4: Balance Soil pH for Maximum Nutrient Uptake
Soil pH controls how well grass can absorb the nutrients already in the ground. If the pH is off, nutrients can be physically present but locked up in forms the roots cannot access.
For cool-season grasses, aim for a pH between 6.0 and 7.0. Warm-season grasses perform best between 5.5 and 6.5. A soil test is the only reliable way to know where you stand.
If your pH is too low, agricultural lime will raise it. Apply the exact rate recommended by the soil test. Over-liming creates a different set of problems, so do not assume more is better.
If your pH is too high, elemental sulfur can lower it slowly. Sulfur needs moisture and microbial activity to work, so it is not an instant fix. Acidifying fertilizers can also help in small amounts.
Timing matters. Apply lime or sulfur in fall or early spring so it has several months to react before peak growth. Retest after 6–12 months to confirm the adjustment worked.
A common mistake is trying to adjust pH without a soil test. Guessing the pH is like guessing your blood pressure — you might be completely wrong. Test first, then apply exactly what the report recommends.
Step 5: Relieve Compaction With Core Aeration
Compacted soil is one of the most common reasons lawns thin out. Foot traffic, heavy equipment, and even pounding rain can squeeze soil particles together, leaving no room for air or water. Roots suffocate, microbes die, and grass declines.
Core aeration is the proven fix. It pulls small plugs of soil, typically 2–3 inches long, out of the ground. Those channels give air, water, and nutrients a direct pathway to the root zone. It is different from spike aeration, which only pokes holes and can make compaction worse by pressing soil tighter around each hole.
Here is a simple at-home test: push a long screwdriver into the lawn. If it resists going deeper than 2–3 inches, your soil is compacted and needs aeration.
When to aerate:
- Cool-season grasses: early fall or early spring
- Warm-season grasses: late spring through early summer
- Clay soil or heavy-traffic lawns: once per year
- Sandy or low-traffic lawns: every 2–3 years
For best results, water the lawn the day before so the soil is moist but not muddy. Make two passes in different directions for heavily compacted areas. Leave the soil plugs on the surface — they break down and return nutrients. Then overseed and topdress with compost immediately after aeration for the biggest response.
Liquid "aerating" products can be helpful as supplements, but they do not replace mechanical core aeration on truly compacted ground. For isolated trouble spots, breaking up badly compacted ground may require a heavier tool than an aerator can provide.
Step 6: Fertilize Based on the Soil Test
Fertilizer is not a one-size-fits-all product. Your soil test should tell you exactly how much nitrogen, phosphorus, and potassium your lawn needs — and just as important, what it does not need.
Nitrogen drives green growth. Choose slow-release sources whenever possible. A typical feeding supplies about 0.5–1 pound of actual nitrogen per 1,000 square feet during the active growing season. Too much fast-release nitrogen in hot weather burns grass and feeds disease.
Phosphorus supports root development. Only add it if the soil test shows low levels. Excess phosphorus runs off into waterways, so skip it unless the report says otherwise.
Potassium boosts tolerance to heat, cold, and drought. If your test shows low potassium, apply it in the fall to help the lawn survive winter stress.
Fertilizer timing also matters:
- Cool-season lawns: feed lightly in spring and more heavily in fall when growth is strongest
- Warm-season lawns: feed during the warm months, not during winter dormancy
- Avoid heavy summer feeding for cool-season grass unless you are using a gentle slow-release formula
Compost, organic fertilizers, and slow-release granules feed both the grass and the soil food web. That makes them a better long-term choice than harsh synthetic products that leave behind salt buildup.
Step 7: Water Deep, Not Often
The way you water shapes your lawn's root structure. Frequent, shallow watering creates weak surface roots that dry out quickly. Deep, infrequent watering forces roots to grow downward, building drought tolerance and stability.
The basic numbers to remember:
- About 1 inch of water per week during the growing season, including rainfall
- One or two watering sessions per week, not daily sprinkles
- Water early morning, between 4 and 8 AM, to reduce evaporation and disease pressure
To measure output, place several empty tuna cans around the yard and run the sprinkler. When the cans collect about an inch of water, stop. A rain gauge also helps track natural rainfall so you do not overwater.
If you water a large yard, larger-diameter hoses deliver the volume needed for a deep soak in a reasonable amount of time.
Signs you are overwatering:
- Mushrooms appearing in the lawn
- Shallow root systems
- Persistent thatch buildup
- More disease pressure in summer
Signs you are underwatering:
- Grass blades folding or turning blue-gray
- Footprints that do not spring back
- Dry, cracked soil
When in doubt, let the grass tell you. Slightly wilted grass in the late afternoon will recover overnight. Grass that is getting watered shallowly every day never learns to reach deep moisture.
Step 8: Mow High and Keep Blades Sharp
Mowing height directly affects root depth, water use, and weed pressure. Taller grass grows deeper roots, shades the soil, and keeps the ground cooler in summer.
Follow these mowing guidelines:
- Cool-season lawns: mow at 3–4 inches
- Warm-season lawns: mow at 2–3 inches, depending on the specific grass type
- Never remove more than one-third of the blade at once
- Always mow with sharp blades
Dull blades tear the grass instead of cutting it cleanly. Torn edges turn brown and open the door to disease. A sharp blade keeps the plant healthy and directs more energy into root growth.
Follow the one-third rule consistently. If the grass has grown to 4 inches, mow it back to around 3 inches — not lower. During fast growth in spring, you may need to mow twice a week.
Leave the clippings on the lawn whenever possible. Clippings break down quickly and recycle nitrogen, potassium, and organic matter back into the soil.
Clean cutting also depends on a well-maintained mower. Using ethanol-free fuel prevents the varnish that gums up carburetors and leads to uneven runs. Likewise, using the right engine oil keeps the mower dependable all season long.
Step 9: Feed the Soil Food Web
Healthy soil is full of microscopic life. Bacteria, fungi, protozoa, and beneficial nematodes decompose organic matter, cycle nutrients, and build soil structure. When that ecosystem is thriving, the lawn naturally resists pests and disease.
Here is how to support soil biology:
- Add compost regularly; it is food and habitat for beneficial organisms
- Mulch-mow leaves in fall instead of bagging them
- Use slow-release or organic fertilizers to avoid salt buildup
- Limit broad-spectrum pesticides, which kill beneficial life along with target pests
- Avoid excessive dethatching or tilling that disrupts soil structure
A common mistake is treating the lawn like a sterile surface that just needs synthetic inputs. In practice, the most resilient lawns are the ones with the most active soil biology.
If your lawn is currently thin and lifeless, rebuilding the soil food web is the long-term answer. It takes time, but the compounding benefits are worth it.
Step 10: Topdress and Overseed Thin Areas
Bare spots are more than an eyesore — they invite weeds and erosion. Fixing thin areas requires two actions at once: new seed and fresh organic matter.
The topdressing process works like this:
- Loosen the top ½ inch of soil with a rake
- Broadcast quality seed suited to your sun exposure and region
- Spread a thin layer of compost, about ¼ inch, over the seed
- Keep the area consistently moist until seedlings establish, typically 2–3 weeks
Common mistakes to avoid:
- Skipping soil prep; seed needs soil contact to germinate
- Burying the seed too deep; light contact is enough
- Letting the seed dry out during the germination window
This process pairs perfectly with aeration. Aerate first, then overseed and topdress. The aeration holes give seed a protected micro-environment and give new roots an easy path into the soil.
Seasonal Lawn Soil Health Plan
You do not need to do everything at once. Spreading the work across seasons respects the grass growth cycle and keeps the workload manageable.
Spring
- Test the soil if you did not do it in fall
- Apply a light compost topdressing, about ¼ inch
- Start feeding with a slow-release fertilizer when grass is actively growing
- Fix drainage problems before heavy spring rain arrives
Summer
- Mow high and water deeply
- Spot-treat weeds instead of blanket spraying
- Watch for runoff on slopes and compacted areas
- Avoid heavy nitrogen applications during heat stress
Fall
- Core aerate and overseed; this is the most important window for cool-season lawns
- Apply another compost topdressing if your schedule and budget allow
- Add potassium if your soil test showed low levels
- Continue mowing until the grass stops growing
Winter
- Keep heavy equipment off frozen turf
- Avoid walking on frost-covered grass, which damages the cells
- Service the mower and sharpen the blades
- Plan next year's soil improvement steps
If you store a riding mower over winter, treat the fuel before storage to protect the carburetor from gum and varnish.
Common Soil Mistakes and How to Avoid Them
Even well-intentioned lawn care can backfire. These are the most common mistakes homeowners make:
- Skipping the soil test. Without baseline data, every other decision is a guess.
- Overwatering. It creates shallow roots, disease, and wasted water. Stick to deep, infrequent watering.
- Heavy nitrogen in heat. It burns the turf and feeds disease. Use slow-release products and wait for cooler weather.
- Ignoring pH. Nutrients lock up no matter how much fertilizer you apply. Fix pH first.
- Bagging clippings. You are removing free organic matter and nutrients. Mulch-mow instead.
- Aerating at the wrong time. Aerating during dormancy stresses grass. Time it to active growth.
- Applying fresh manure. It burns roots and can introduce pathogens. Always use mature compost.
Avoiding these mistakes is often more important than adding anything new.
Simple DIY Topdressing Mix
You do not need expensive specialty products to build healthy soil. This simple mix works well for filling bare spots or improving thin areas.
The recipe:
- 2 parts screened compost
- 1 part washed sand
This combination spreads smoothly, drains well, and feeds roots at the same time. The sand prevents compaction while the compost adds organic matter and nutrients. For clay soil, increase the sand slightly. For sandy soil, reduce it.
Apply the mix at ¼ inch depth, rake it even, and follow with overseeding if needed. This is a practical way to improve lawn soil health without buying anything complicated.
Conclusion
Improving lawn soil health is not a single task. It is a sequence of smart, consistent decisions: test the soil, add organic matter, balance pH, relieve compaction, and water and mow for deep roots.
You do not have to do everything at once. Start with a soil test this week — it tells you exactly what your lawn needs and stops you from wasting money on products it does not. That one step is the fastest path to a thicker, greener lawn in 2026 and for every season after.
Frequently Asked Questions
How often should I aerate my lawn?
Most lawns with clay soil or heavy foot traffic need core aeration once a year. Sandy or low-traffic lawns can go two to three years between aerations. Time it to active growth: early fall for cool-season grass, late spring to early summer for warm-season grass.
What is the best compost for lawns?
Use well-aged, screened compost that smells earthy and contains no fresh manure. Leaf compost, yard-waste compost, and mature composted manure all work well. Spread it no more than ¼ to ½ inch thick so the grass does not get smothered.
Do grass clippings cause thatch?
No. Grass clippings are mostly water and break down quickly, returning nitrogen and organic matter. Thatch forms when stems and roots accumulate faster than soil organisms can decompose them, usually from overfeeding or lifeless, compacted soil.
Can I fix soil pH without a soil test?
You should not try. Without knowing your starting pH, lime and sulfur applications are guesswork and can easily push the soil too far in the wrong direction. A low-cost soil test tells you exactly what to add and how much.
How long does it take to improve lawn soil?
You can see small improvements in the first growing season, but meaningful change usually takes two to three years of consistent compost, aeration, and adjusted watering and mowing. Soil is a living system that needs time to rebuild structure and biology.
What is the best way to apply compost to an existing lawn?
Topdress lightly with ¼ to ½ inch of screened compost, then rake it into the grass so it reaches the soil surface. For an extra boost, core aerate first and sweep compost into the holes. Do this in spring or fall when grass is actively growing.