
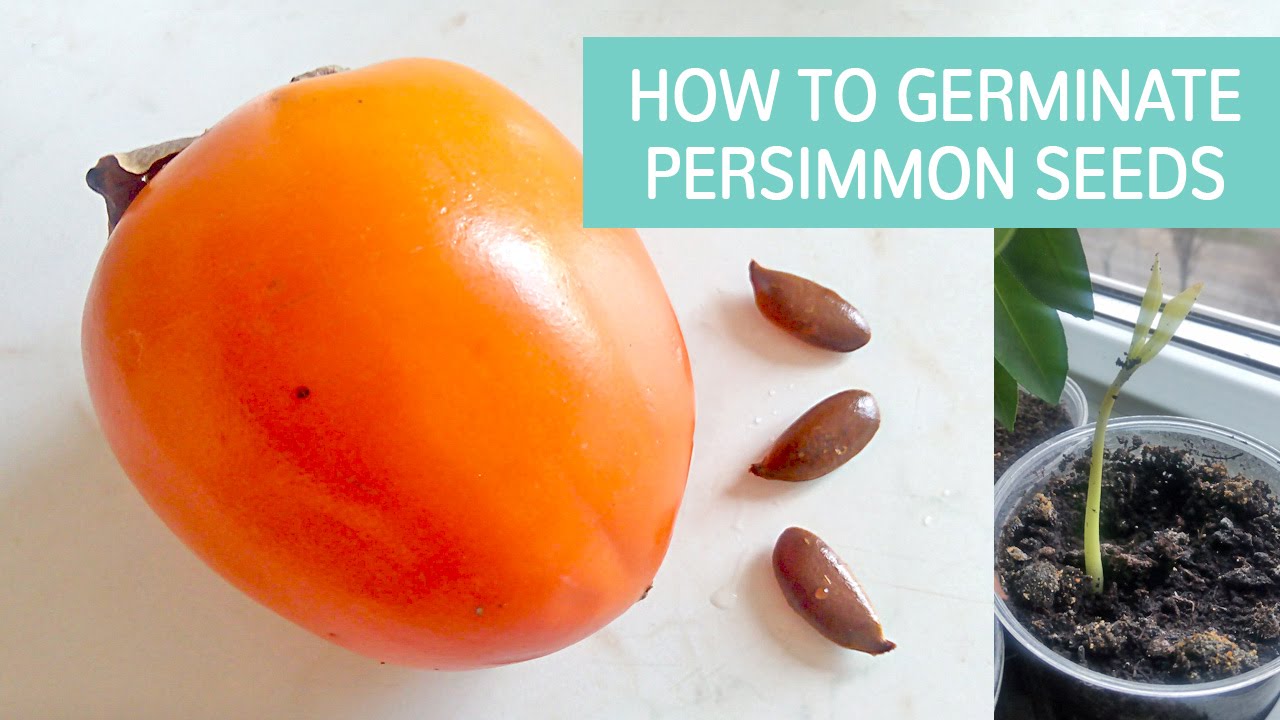
Clean fresh seeds, cold-stratify 8–12 weeks, then sow warm in deep pots.
If you want a crisp, reliable guide on how to germinate persimmon seeds, you are in the right place. I have started hundreds of seedlings for rootstock and backyard trials, and I’ll share practical steps, research-backed methods, and the small tricks that boost success. Follow this plan to master how to germinate persimmon seeds from kitchen fruit to healthy saplings.
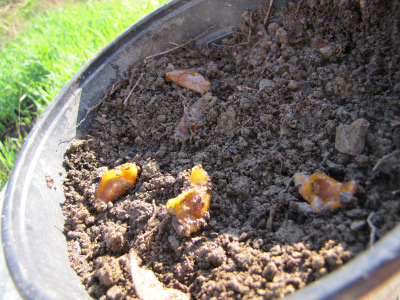
Key facts before you start
Understanding your seed helps you plan your method and timeline. The species and origin matter because they affect dormancy, germination time, and vigor.
• Common species: Asian persimmon (Diospyros kaki) and American persimmon (Diospyros virginiana).
• Dormancy: Both benefit from cold stratification for 8–14 weeks at 34–41°F.
• Seed source: Choose fully ripe fruit. Seeds from unripe fruit have lower vigor.
• Variability: Seedlings may not match the parent. Many growers graft later.
• Containers: Use deep pots. Persimmons form a long taproot early.
From my own trials, American persimmon seeds tend to wake a bit faster after stratification, but both types respond well with steady temperatures and moisture control. If you’re learning how to germinate persimmon seeds for the first time, start with 10–20 seeds to hedge your odds.

Step-by-step: how to germinate persimmon seeds
-
Collect and clean
• Remove seeds from fully ripe fruit. Rinse well to remove pulp.
• Soak in room-temperature water for 12–24 hours. Discard floaters if many float, but keep a few to test; float tests can be unreliable. -
Optional sanitation
• Briefly dip seeds in a 3% hydrogen peroxide solution for 5 minutes. Rinse.
• This helps reduce mold during stratification. -
Prepare a moist medium
• Use a 1:1 mix of peat or coco and perlite or sand. It should be moist, not wet.
• Squeeze a handful; only one or two drops should fall. -
Cold stratify
• Place seeds in the medium inside a labeled, vented bag or box.
• Keep at 34–41°F for 8–12 weeks. Check weekly for mold and moisture. -
Check for sprouting
• After week 8, watch for the radicle (root tip) starting to emerge.
• Sow sprouted seeds right away. Continue chilling the rest until 12–14 weeks if needed. -
Sow and warm
• Plant 1 inch deep in deep pots. Position the root tip down.
• Keep at 70–75°F with bright light. Keep the mix evenly moist. -
Grow on
• Provide strong light for 12–14 hours daily.
• Water when the top inch is dry. Do not overwater. -
Transplant
• Move to a larger deep pot when roots reach the bottom.
• Harden off outside over 10–14 days before planting in ground after frost risk.
If your goal is how to germinate persimmon seeds with the highest success, be patient during stratification. Rushing this phase is the most common reason for failure.
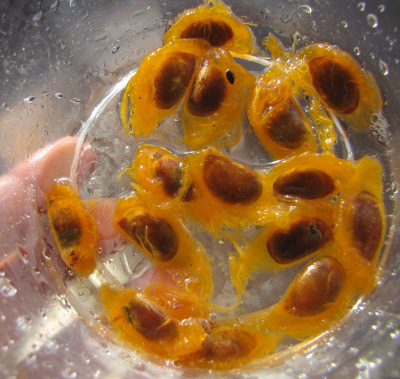
Preparing seeds for success
Small details add up. Clean, viable seeds and the right moisture level make germination predictable.
• Timing: Extract seeds soon after eating the fruit. Do not let them dry out for long.
• Cleaning tip: Rub seeds in a small bowl of water to remove all pulp. Pulp left on the seed can fuel mold.
• Viability check: Fresh, plump seeds with a firm coat are best. Shriveled seeds rarely sprout.
• Moisture balance: Too wet leads to rot. Too dry resets dormancy cues. Aim for barely moist.
A simple routine is to rinse, soak, sanitize, then stratify. This sequence has given me consistent results year after year when teaching new growers how to germinate persimmon seeds at home.

Cold stratification that works
Cold, time, and oxygen signal the seed that winter has passed. Do not skip this step unless you use advanced treatments.
• Temperature: 34–41°F is ideal. A household refrigerator works well.
• Duration: 8–12 weeks for most seeds; up to 14 weeks if dormant.
• Medium: Use a sterile, airy mix to limit mold.
• Air: Poke a few tiny holes in the bag or open it weekly for airflow.
• Mold control: If you see fuzzy growth, wipe seeds gently and dust with cinnamon. Reset with fresh medium.
Advanced option if you’re experienced: A gibberellic acid soak before warming can shorten time to sprout. Use it sparingly and follow label rates. It is not required if you follow classic stratification for how to germinate persimmon seeds.

Germination methods compared
Several methods work. Pick the one that fits your space and tools.
• Paper towel in bag: Easy to monitor sprouting. Risk of roots tangling in fibers; transplant with care.
• Direct sow in pots: Less handling and lower damage risk. You cannot see progress until emergence.
• Nursery flats with cells: Efficient for many seeds. Cells can be too shallow for taproots; use deep inserts.
• Tree pots or root trainers: Best for taproot development. Higher upfront cost; excellent long-term results.
For teaching beginners how to germinate persimmon seeds, I start in deep pots. It saves the root and reduces shock later.

Aftercare: light, water, nutrition, and transplanting
Young persimmons are tough but dislike extremes. Protect the taproot and avoid soggy soil.
• Light: Bright light or a grow light kept close. Avoid weak windowsill light.
• Water: Keep even moisture. Let the top inch dry slightly before watering again.
• Fertilizer: Start mild feeding after first true leaves. Use a balanced, diluted fertilizer every 2–3 weeks.
• Temperature: 65–80°F is safe. Avoid sudden cold drafts after stratification.
• Potting up: Move to a deeper pot before roots circle.
• Hardening off: Increase outdoor time gradually over two weeks. Then plant after frost danger passes.
This routine has given me 70–90% success across seasons. It is a steady, low-stress plan for how to germinate persimmon seeds and raise vigorous seedlings.

Troubleshooting and common pitfalls
Most issues trace back to moisture or timing. Use this quick guide to fix problems fast.
• No sprout after 12 weeks of cold: Extend stratification 2–4 more weeks and keep 34–41°F.
• Mold in the bag: Reduce moisture, increase airflow, sanitize seeds, and refresh medium.
• Seeds rot after sowing: Your mix is too wet or too dense. Loosen with perlite and water less often.
• Seedling collapses: Likely damping-off fungus. Improve airflow, sterilize tools, and avoid overwatering.
• Bent or broken root during transplant: Use deeper pots from the start to reduce handling.
• Uneven sprouting: Seeds vary. Sow more seeds than you need and cull the weak.
With a careful stratification window and even moisture, learning how to germinate persimmon seeds becomes repeatable, even for beginners.

Timeline and expectations
Know the road ahead so you stay patient and plan your orchard space.
• Days 0–1: Clean and soak fresh seeds.
• Weeks 1–12: Cold stratification at 34–41°F.
• Weeks 13–18: Warm sowing and emergence in 2–5 weeks.
• Months 3–6: Pot up and grow on with strong light.
• First year: Establish a deep root system; protect from frost and heat stress.
• Fruiting window: Seedlings may fruit in 5–8 years for American types; Asian seedlings can be similar or longer. Grafted trees fruit sooner.
Note that seedlings from named cultivars do not run true. Many growers who study how to germinate persimmon seeds do so to raise rootstocks, then graft a known variety later for reliable fruit quality.
:strip_icc()/bhg-persimmon-2152101_HOMEG095M_VG-c3d13623372a49e08dd0d7c33c9c9564.jpg)
Tools and supplies checklist
Gather everything up front to keep the process smooth.
• Fresh persimmon seeds from ripe fruit
• Labels and a waterproof marker
• 3% hydrogen peroxide (optional sanitation)
• Peat or coco plus perlite or sand
• Zip bags or vented boxes for stratification
• Refrigerator space set to 34–41°F
• Deep pots or tree pots and a well-draining seed mix
• Grow light or a very bright window
• Spray bottle and watering can with a fine rose
With this kit, you have all you need for how to germinate persimmon seeds in a small home setup.
Frequently Asked Questions of how to germinate persimmon seeds
Do persimmon seeds need cold stratification?
Yes. Most persimmon seeds need 8–12 weeks at 34–41°F to break dormancy. Skipping this step causes slow or uneven germination.
How deep should I plant the seeds after stratification?
Plant about 1 inch deep with the root tip down if it has emerged. Keep the mix evenly moist, not soggy.
What temperature is best for germination after chilling?
Aim for 70–75°F with bright light. Warmer than 80°F can dry the mix and stress seedlings.
Can I germinate seeds without the refrigerator method?
You can winter-sow outdoors in a protected container for natural chilling. Results vary with climate, but it can work well in cold regions.
Why did my seeds mold during stratification?
The medium was too wet or had low airflow. Reduce moisture, add ventilation holes, and sanitize seeds before restarting.
Will seedlings be the same as the parent tree?
Not usually. Seedlings vary. Many growers graft a known variety onto a strong seedling later.
How long until I see sprouts after stratification?
Expect 2–5 weeks at warm temperatures. Some seeds take longer, so keep them warm and moist.
Conclusion
You now have a clear, proven path for how to germinate persimmon seeds from kitchen fruit to sturdy seedlings. Focus on fresh seed, a clean setup, 8–12 weeks of cold stratification, and warm, steady conditions for sprouting. Protect the taproot with deep pots, and your success rates will climb.
Start a small batch this week and track your steps. Share your results, ask questions, or subscribe for more orchard-ready guides and grafting tips.

