
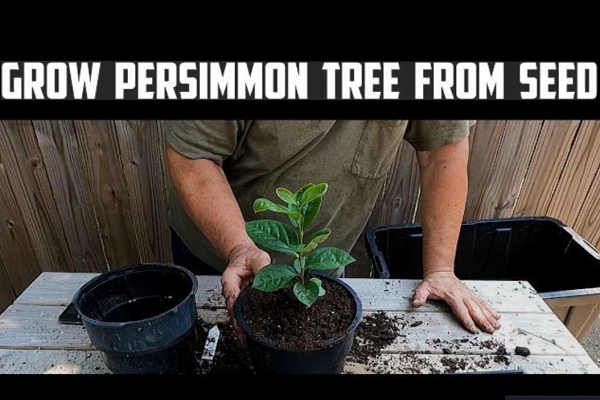
How To Grow Persimmon Trees From Seeds: Easy Guide 2026
Growing a persimmon tree from seed is one of the most patient, rewarding projects a gardener can take on. You plant a small brown seed, wait through a long cold winter, and years later you’re picking fruit from a tree you started yourself. It’s not the fastest way to get fruit — a grafted nursery tree will beat it by years — but it’s deeply satisfying, far cheaper, and gives you a uniquely hardy, well-adapted tree.
This guide walks you through every stage: sourcing seeds, breaking dormancy with cold stratification, germinating indoors, raising strong seedlings, and transplanting into the ground. By the end, you’ll know exactly what to do at each step — and what mistakes are quietly killing your chances. You can also read our guide on how to choose the right garden hose length.
Choosing the Right Persimmon Species for Your Climate
Before you soak a single seed, you need to know which persimmon you’re growing. There are two main options, and picking the wrong one for your region is the most common early mistake.
Asian persimmon (Diospyros kaki) is what you’ll find at most grocery stores. It thrives in warmer climates, roughly USDA Zones 7–10, and produces the large, sweet fruit most people picture. It needs mild winters and a long warm season to ripen properly. You can also read our guide on how to care for lawn during dry season.
American persimmon (Diospyros virginiana) is native to the eastern United States and is far more cold-hardy, handling Zones 5 through 9 with ease. The fruit is smaller — about the size of a plum — but intensely sweet when fully ripe. It’s also more disease-resistant and tolerant of a wider range of soils.
A third option, the date-plum (Diospyros lotus), is less common but worth mentioning. It’s often used as a rootstock because it’s vigorous and adaptable.
Other decisions to make before you start
- Expect genetic variation. Seeds do not grow true to their parent. A seed from a Hachiya persimmon will not produce a Hachiya tree. You’ll get a unique seedling with its own fruit characteristics — some great, some mediocre. If you want a specific named variety, you’ll need to graft later.
- Plan space for multiple trees. Some seedlings end up male and produce no fruit at all. Others need a pollinator nearby to set a good crop. Starting several seeds improves your odds dramatically.
- Consider grafting from day one. If you have a known variety you love, your seedling can become a vigorous rootstock. Graft a scion from the variety onto your seedling once the trunk reaches pencil thickness. You get the hardiness of the seedling with the guaranteed fruit quality of the cultivar.
A good rule: start at least three to five seeds if you want one reliable fruiting tree. Seedlings are cheap to grow, and the extra insurance is worth every bit of space.
Sourcing and Preparing Persimmon Seeds
Your germination success starts long before stratification. Seed quality is everything, and fresher is always better.
Where to find viable seeds
- Local trees are your best source. Look for ripe fruit in autumn, ideally from an area with a climate similar to yours — those seeds are already adapted to your conditions.
- Farmers’ markets are excellent for finding ripe, locally grown persimmons with mature seeds.
- Store-bought fruit works, but with a catch: many commercial Asian persimmons are seedless or have underdeveloped seeds. If you find seeds, they can still sprout, but success depends on fruit freshness and whether the seeds were mature.
Cleaning and preparing your seeds
Once you have ripe fruit, follow this process:
- Extract the seeds from the flesh. Rinse them under cool water and gently rub away clinging pulp. A soft brush helps with stubborn bits.
- Do the float test. Place seeds in a glass of water and wait a minute or two. Seeds that float are usually hollow or immature — discard them. Seeds that sink are your keepers.
- Sanitize to prevent mold. Soak seeds for 10 minutes in a 3% hydrogen peroxide solution, then rinse well. This simple step dramatically reduces mold problems during the long stratification period.
- Dry properly. Spread seeds on a paper towel and let them dry for 24 hours. You want surface moisture gone, but don’t let them become bone-dry.
- Store short-term if needed. Keep seeds in a labeled plastic bag in the refrigerator at 37–41°F. They’ll hold for a few weeks until you’re ready to stratify.
A note on fruit maturity
Seeds from fruit that was picked green or ripened off the tree often have poor viability. Fully ripe fruit that falls naturally or yields easily to gentle pressure produces the best seeds. If you’re collecting from the ground, gather fruit promptly — wildlife loves persimmons just as much as you do.
Cold Stratification: The Non-Negotiable Step
Persimmon seeds have deep dormancy. In nature, they spend winter in the cold, moist ground before germinating in spring. If you skip this cold period, your germination rate will drop to nearly zero. Cold stratification is not optional — it’s the single most important step in this entire process.
How cold stratification works
Cold, moist conditions break down the seed coat and wake the embryo from its dormancy. The science is straightforward: exposure to temperatures around 34–41°F for a set period signals to the seed that winter has passed and it’s safe to sprout. University extension guides consistently recommend 60–120 days of cold, moist stratification for persimmon seeds.
Step-by-step stratification
- Mix your medium. Use a 1:1 blend of peat moss and perlite, or simply moist sand. The medium should feel like a wrung-out sponge — damp but not dripping wet.
- Combine seeds and medium. Mix the seeds into the medium so they’re evenly distributed and surrounded on all sides.
- Bag it and label it. Place everything in a zip-top bag or small vented container. Write the date and species on the label — you’ll forget by week six if you don’t.
- Refrigerate at 34–41°F. A crisper drawer is ideal because it maintains steady temperature. Avoid the main fridge shelf if it’s drafty or inconsistent.
- Check weekly. Open the bag briefly to let fresh air in. Watch for mold — if you see fuzz developing, rinse the seeds and replace the medium.
- Start checking for germination at week 8. Some seeds will sprout a small root tip (called a radicle) during stratification. When that happens, sow that seed immediately. Don’t wait for the full 12 weeks.
Patience pays off
In practice, germination improves significantly with longer stratification. At the 8-week mark, you’ll see some sprouting. At 12 weeks, rates are typically much better. If you’re the impatient type, remind yourself that this one step determines whether you get six seedlings or none. There’s no shortcut that works reliably.
Sowing and Germinating Indoors
Once stratification is complete, it’s time to sow. This is where many beginners trip up — mainly by using shallow containers that damage the tree’s most important root.
Why deep containers matter
Persimmon seedlings develop a long taproot very early. In shallow pots, the taproot hits the bottom, coils, and growth stalls. The result is a stunted, stressed seedling that never fully recovers. Use deep pots — at least 6 inches, and taller is better. Deep tree pots or nursery containers are ideal.
Sowing step-by-step
- Fill containers with a well-draining mix. A good blend is 60% quality potting mix, 20% perlite, and 20% composted bark. This balances moisture retention with aeration.
- Plant seeds 0.5–1 inch deep. Lay each seed flat in the soil, cover lightly, and firm gently. Plant one seed per pot to avoid root disturbance later.
- Water thoroughly. Use a watering can with a fine rose to settle the soil around the seed. Keep the mix evenly moist but never soggy.
- Provide bottom heat. A heat mat set to 70–80°F speeds germination significantly. Light isn’t important until sprouts emerge, so a warm location works even before the heat mat.
- Move to bright light once green appears. A south-facing window or 14–16 hours under LED grow lights works well. Keep lights 6–12 inches above the canopy and raise them as the seedlings grow.
Preventing damping-off
Damping-off is a fungal disease that kills young seedlings seemingly overnight. Prevention beats treatment every time:
- Don’t overwater. The top inch of soil should dry slightly between waterings.
- Use clean pots and fresh mix. Old soil can harbor fungal spores.
- Water from the bottom when possible. Sitting trays in a shallow water dish keeps stems dry and prevents disease.
- Ensure air circulation. A small fan on low for a few hours daily strengthens stems and reduces humidity.
Germination typically takes 2–6 weeks after stratification. Some seeds sprout fast; others are stubborn. Track sowing dates on a simple calendar — it helps you notice patterns and adjust your approach next season.
Seedling Care: The First Three Months
You’ve got sprouts. Now comes the phase that determines whether you grow a strong, healthy tree or a weak, leggy one.
Light is the main driver
Seedlings stretch toward light — if they don’t get enough, they grow tall, thin, and fragile. Give them 14–16 hours of bright light daily. Under grow lights, keep the fixture close enough that seedlings grow compact and sturdy. A leggy seedling is hard to fix; prevention is the real strategy.
Watering and feeding
- Water when the top inch is dry. Bottom watering (placing pots in a tray with water) keeps stems dry and minimizes disease risk.
- Begin feeding at the first true leaf. Use a balanced liquid fertilizer at quarter strength every two weeks. The roots are tiny at this stage, so dilute is better than strong.
- Flush salts monthly. Every fourth watering, use plain water and let it run through the pot fully. This washes out accumulated fertilizer salts that can burn young roots.
Potting up without breaking the taproot
When roots reach the bottom drainage holes, it’s time to move up to a larger container. Here’s the critical part: do not disturb the taproot. Handle the seedling by the leaves or rootball, never tug on the stem. If the taproot has started coiling at the pot bottom, up-pot rather than attempt to straighten it — cutting or breaking the taproot at this stage can set the tree back badly.
Keep room temperatures around 65–75°F and avoid cold drafts. Seedlings are hardy, but they’re not invincible.
Hardening off: The step everyone rushes
Before seedlings can live outdoors full-time, they need a gradual introduction to sun, wind, and temperature swings. This process, called hardening off, takes 7–10 days:
- Start with a shaded, sheltered spot for 2–3 days.
- Move to dappled light for another 2–3 days.
- Introduce a few hours of direct morning sun, increasing daily.
- Leave them out overnight only after they’ve handled full sun for several days.
Skipping this step causes leaf scorch, drooping, and sometimes death. It feels slow, but it saves weeks of recovery — or complete loss.
Transplanting Outdoors: Site Selection and Planting
When your seedling is hardened off and all frost danger is past, it’s time for the ground. This is a permanent decision — the tree will live there for decades — so get it right.
Choosing the right site
- Full sun is non-negotiable. Persimmons produce best with at least 6–8 hours of direct sunlight daily.
- Good air flow reduces fungal disease pressure.
- Excellent drainage is critical. Persimmons tolerate many soil types but will not tolerate wet feet. Heavy clay needs drainage improvement or a raised bed.
- Soil pH should be between 6.0 and 7.5. A simple soil test from your local extension office is worth the small investment.
Planting step-by-step
- Wait for warm soil. After all frost danger has passed, let the soil warm before planting.
- Dig a wide, shallow hole. Twice as wide as the pot and exactly as deep. A wide hole encourages roots to spread horizontally.
- Backfill with native soil. Resist the urge to amend heavily with compost. Amended soil in the hole can create a perched water table that drowns roots. Save the compost for the top-dressing.
- Set the root flare at soil level. This is the point where the trunk widens at the base — it must not be buried.
- Water deeply. Settle the soil and eliminate air pockets around the roots.
- Mulch 2–3 inches thick. Keep mulch several inches away from the trunk to prevent bark rot.
- Stake only if necessary. In windy areas, a single stake for the first season helps. Remove it after one year.
- Install a trunk guard. Rabbits and voles find young persimmon bark delicious. A plastic guard or wire mesh ring to soil level is cheap insurance.
Spacing for the future
Seedlings grow into substantial trees. Plan 15–20 feet between trees, and more if you’re in a frost-prone area where you’ll want to avoid canopy crowding. If you’re planning to graft, match spacing to the mature size of the grafted variety.
Care in Years One Through Three
The first three years shape the tree for its entire life. Water, feeding, and training done right mean a strong structure and earlier fruiting. Done wrong, you’ll spend years correcting problems.
Watering: Deep and steady
In the first year, give your tree about 1 inch of water per week, more during heat waves. The key is deep, slow watering that reaches the entire root zone rather than frequent light sprinkles that keep roots shallow. A soaker hose on a timer works beautifully.
Feeding: Less is more
- Use a light, slow-release fertilizer in spring. A balanced formula like 10-10-10 at half the recommended rate is plenty.
- Avoid heavy nitrogen. Excessive nitrogen pushes tall, weak, brittle growth that attracts pests and breaks in wind.
- Maintain a wide mulch ring. Refill each spring to a depth of 2–3 inches. This conserves moisture, suppresses weeds, and feeds the soil as it decomposes.
Training: Building a strong framework
- Year one: Select one strong central leader and remove any competing shoots. Remove crossing or rubbing branches.
- Year two: Choose three to four well-spaced scaffolding branches around the trunk. Aim for even spacing, roughly 6–8 inches apart vertically.
- Year three onward: Continue shaping while the tree is dormant in late winter. Make clean cuts with sharp tools — a pair of quality pruning shears makes a huge difference.
Protecting young bark
Young persimmon bark is thin and prone to sunscald in hot climates. White trunk wrap or shade cloth on the south side of the tree during summer prevents damage. Remove the wrap in winter so it doesn’t trap moisture.
Pollination, Fruit Set, and Patience
Here’s the honest timeline: seed-grown persimmons typically take 4 to 8 years to bear fruit. Some fast growers flower at year three; others dawdle until year eight. Climate, species, and vigor all influence when your tree decides to fruit.
Do you need two trees?
- Asian persimmons can set fruit without a pollinizer. They’re largely self-fertile, though having a second tree often improves yield.
- American persimmons generally benefit from cross-pollination. A male tree in the neighborhood helps greatly. With several seedlings, you’ve naturally increased the odds of having both sexes.
The grafting shortcut
If you want guaranteed fruit quality sooner, graft a known cultivar onto your sturdiest seedling once the trunk reaches pencil thickness. This is one of the best moves you can make — you keep the seedling’s vigorous root system and cold hardiness while gaining the fruit quality of a proven variety.
Manage your expectations
Wait, watch, and resist the urge to over-fertilize to force fruiting. Juvenile trees that are pushed hard with nitrogen produce lush growth but delay flowering. Steady, consistent care genuinely is the fastest path.
Pests, Diseases, and Wildlife Management
Persimmons are tough trees, but they’re not invincible. A quick weekly inspection during warm months catches problems before they escalate.
Common pests
- Scale and mealybugs: sap-sucking insects that weaken branches and excrete sticky honeydew. A strong water spray dislodges early infestations; horticultural oil smothers established colonies.
- Twig girdlers: beetles that cut rings around young twigs, causing them to die and fall. Prune out affected twigs below the damage.
- Leaf spots: common in wet summers. Improve airflow through pruning, and remove fallen leaves to reduce overwintering spores.
Root rot: The silent killer
Persimmons in poorly drained soil develop root rot quickly. The cure is prevention — ensure good drainage at planting. Fungicides won’t save a tree with rotting roots.
Wildlife pressure
- Deer browse young shoots and leaves. Fencing with 6-foot or taller mesh is the only reliable defense.
- Voles and rabbits girdle trunks at ground level. Trunk guards to soil level are essential in the first several years.
- Birds love ripe persimmons as much as you do. Netting the canopy near harvest is the practical answer.
Integrated pest management
Start with prevention and monitoring. Identify problems before spraying anything. Simple controls — hand-picking, water sprays, pruning out affected twigs — handle most situations without chemicals. The University of Minnesota extension service publishes excellent guidance on managing orchard pests that applies well to home growers.
Common Mistakes and How to Avoid Them
Every gardener makes mistakes. The trick is making them only once. Here are the most common persimmon-growing errors and how to sidestep them:
- Skipping cold stratification. Germination drops to almost nothing without it. Don’t be tempted to skip — there’s no reliable shortcut.
- Overwatering seedlings. This invites damping-off and root rot. When in doubt, check the top inch of soil before watering.
- Using shallow pots. The taproot coils, growth stalls, and the tree may never reach its potential.
- Planting too deep outdoors. Burying the root flare is a leading cause of young tree death.
- Heavy nitrogen feeding. You get tall, weak, pest-prone growth instead of a sturdy tree.
- Rushing hardening off. Leaves scorch, drop, and set the seedling back weeks.
Write out a simple checklist before each major step. It sounds basic, but it genuinely saves time and seedlings.
Timeline, Yields, and What to Expect
Year 0–1: Establishment
- Stratify, germinate, and grow a sturdy seedling indoors.
- Transplant after frost and establish roots in the ground.
- Protect the trunk from wildlife and maintain steady moisture.
Year 2–3: Structure
- Build a strong trunk and branching framework.
- Some fast-growing seedlings may produce their first flowers.
Year 4–8: Production
- First real crops begin on many seedlings.
- Thin developing fruit to improve size, flavor, and branch safety.
- If fruit quality disappoints, top-work the best seedling with a proven cultivar.
Yields vary — a lot
A mature persimmon tree can carry impressive crops in good years, but yield depends heavily on genetics, weather, and pollinator presence. The seedling you grow might be a heavy producer or a light one. That’s part of the gamble with seed-grown trees.
The smart endgame
Grow several seedlings, observe their vigor and adaptation to your site, then graft your favorite variety onto the strongest one. This combines the best of both worlds — a well-adapted, vigorous root system with guaranteed tasty fruit.
Frequently Asked Questions
Can I grow persimmons from store-bought fruit?
Yes, if the fruit contains mature seeds. Many commercial varieties are seedless, so check before buying a large quantity. Persimmons from farmers’ markets are a better bet for finding viable seeds.
Do seedlings grow true to the parent variety?
No. Seedlings are genetically unique and vary in fruit size, flavor, astringency, and productivity. For specific named varieties, grafting is the only reliable method.
How long until a seed-grown tree bears fruit?
Most take 4–8 years. Good sun, steady water, and proper training can shorten the wait, but patience is part of the process.
Do I need two trees for pollination?
Asian persimmons often set fruit without a pollinizer. American persimmons benefit significantly from a second tree or a nearby male for best yields.
Why didn’t my seeds sprout?
The most common causes are incomplete stratification, old seeds, or seeds that dried out. Try fresh seeds and a full 12 weeks of cold, moist stratification.
What soil do persimmons prefer?
They like pH 6.0–7.5 and well-drained loam or sandy loam. Heavy clay needs drainage fixes or raised beds before planting.
Can I keep a persimmon in a container long-term?
It’s difficult. The long taproot and eventual tree size make long-term container growing problematic. Short-term container growing works fine, but plan for ground planting.
How can I speed up the process?
Use fresh seed, complete the full stratification period, provide strong light, and keep moisture steady. Then graft a known variety onto your most vigorous seedling to reduce time to quality fruit.
Conclusion
Growing persimmons from seed is a slow craft, not a race. Start with the right species for your climate, stratify properly, sow in deep pots, and give your seedling steady, patient care through the first few years. Expect genetic variation, plan for pollination, and consider grafting as your endgame for guaranteed fruit quality.
The payoff is real: a tree you started from a seed, thriving in your soil, producing fruit that no one else has ever tasted. It’s one of the most personal things you can grow in a garden.
Start a small batch of seeds this fall and track every step. The quickest way to get growing is to get started — every tree you see today began as someone’s first attempt.


