
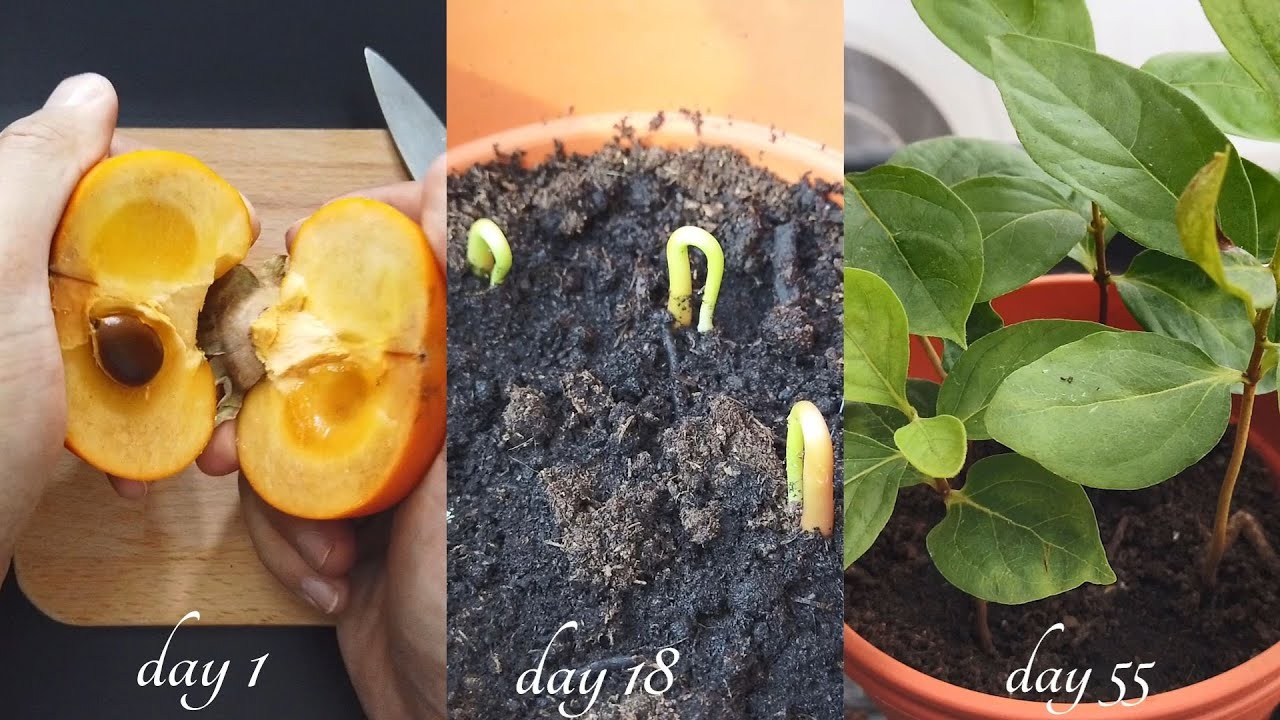
How To Germinate Persimmon Seeds: Step-By-Step Guide
Growing a persimmon tree from seed is one of the most rewarding projects a home gardener can take on. It requires patience, a little precision, and an understanding of what these seeds need to break dormancy. Whether you are growing rootstock for grafting or just want to see what your own tree produces, the process is straightforward once you know the rules.
This guide walks you through every stage—from selecting fruit to planting out your seedling—with the timing, temperatures, and troubleshooting you need to succeed. No fluff, just a proven method. You can also read our guide on how to choose the right garden hose length.
Why Persimmon Seeds Need Special Treatment
Persimmon seeds have a built-in survival mechanism: they will not germinate until they have experienced a period of cold, moist conditions. This is called cold stratification, and it mimics the winter the seed would naturally endure on the forest floor. Skip this step, and your germination rate will plummet.
There are two main species you are likely to work with:
- American persimmon (Diospyros virginiana) – Native to the eastern United States, highly cold hardy, and commonly used as rootstock. These are generally easier to germinate.
- Asian persimmon (Diospyros kaki) – The type found in most grocery stores. These can be slower to sprout and may require a longer cold period.
Both species follow the same basic steps, but timing and patience levels differ. One thing to know before you start: seedlings will not produce fruit identical to the parent tree. If you want a specific variety like Fuyu or Hachiya, you will need to graft a cutting onto your seedling later. Growing from seed is about the journey, learning the process, and producing hardy rootstock. You can also read our guide on how to care for lawn during dry season.
Selecting and Testing Seeds for Viability
Your success rate is determined before you even put a seed in the fridge. Start with the right material, or nothing else will matter.
How to Choose the Right Fruit
- Use fully ripe, soft fruit in the fall. Under-ripe fruit often contains immature seeds that will not germinate.
- Pick fruit from healthy, vigorous trees. Avoid fruit with signs of disease or pest damage.
- Squeeze the fruit gently. If you feel hard, solid seeds inside, it is a good candidate. Some persimmons are seedless, so check before you commit to a batch.
The Float Test
This is a quick, reliable way to weed out duds:
- Place your seeds in a bowl of water.
- Wait 15 minutes.
- Seeds that float are often hollow or non-viable. Discard them.
- Sinkers are your keepers.
The float test is not perfect, but it is a solid first filter. I typically start with at least two to three times more seeds than the number of trees I actually want. Germination rates in the 50–70% range are normal, even with careful handling.
Cleaning Seeds Properly
Pulp left on a seed is an open invitation for mold. And mold in your stratification medium is the fastest way to ruin a whole batch. Cleaning takes five minutes and prevents weeks of headaches.
Step-by-Step Cleaning Process
- Rinse – Hold the seeds under cool running water and rub off all visible fruit residue.
- Soak – Place the seeds in clean water for 12–24 hours. This rehydrates them and loosens any remaining pulp.
- Optional sterilisation – Soak the seeds for 10 minutes in a weak 3% hydrogen peroxide solution. Rinse them thoroughly afterward. This kills surface fungi without harming the embryo.
- Dry – Spread the seeds on a paper towel for about an hour. You want them surface-dry, not bone-dry.
Do not let the seeds dry out completely at this stage. They need to enter the cold stratification process with some internal moisture.
Cold Stratification: The Step You Cannot Skip
This is the heartbeat of the entire process. Cold stratification tricks the seed into thinking winter has come and gone, which triggers the release of enzymes that break dormancy.
What You Need
- A plastic zip-top bag or small container
- A moist medium (peat moss, coco coir, or vermiculite)
- A refrigerator
Timing and Temperature
Aim for a cold period of 8–12 weeks at a consistent temperature of 34–41°F (1–5°C) . The crisper drawer of your fridge is ideal because it is stable and slightly less cold than the main compartment. In practice, 10 weeks is the sweet spot for most American persimmon seeds. Asian varieties may need closer to the full 12 weeks.
The Right Mix
Your medium must hold moisture without becoming waterlogged. Squeeze the medium in your fist: if a few drops of water come out, it is perfect. If water streams out, it is too wet.
The Process
- Mix the seeds into the medium inside your bag or container.
- Leave a small air gap in the bag. Do not vacuum-seal it.
- Label with the date and species.
- Place in the fridge and open the bag once every two weeks for 10 seconds to refresh the air.
- Check for mold regularly. If you see any, remove the affected seeds, rinse all seeds, and replace the medium with fresh, drier mix.
You may notice some seeds sprout a tiny root while still in the fridge. This is completely normal. Pot those up immediately once you see a white root tip emerging.
Germination Methods After Stratification
Once the cold period is complete, it is time for warmth. Persimmon seeds germinate best at 70–80°F (21–27°C) . If your home runs cool in late winter, use a heat mat designed for seed starting.
There are three main methods, and each has its strengths.
Paper Towel Method
This is the fastest way to see visible results and is great for testing viability.
- Dampen a paper towel. It should be moist, not dripping.
- Place the seeds in a single layer between two sheets.
- Slip the towel into a vented polyethylene bag or a clear container with a loose lid.
- Keep it in a warm spot with bright, indirect light.
- Check every three days. Plant the seed as soon as you see a white root tip.
The paper towel method exposes seeds to more handling, which risks root damage if you are not careful. But it is unmatched for monitoring progress.
Soil Method
This is the lower-stress option with no transplant shock at the earliest stage.
- Use deep pots (at least 4 inches) filled with a sterile, well-draining seed-starting mix. A 60% seed mix and 40% perlite blend works well.
- Plant seeds 1 inch deep, positioned sideways or with the pointed end facing down.
- Water gently to settle the soil.
- Keep the mix evenly moist and warm.
Direct Outdoor Sowing
This works in mild zones where winters are not severe.
- Sow seeds in the fall at a depth of 1–1.5 inches.
- Mulch lightly to buffer temperature swings.
- Protect the area from rodents, which love to dig up seeds.
Outdoor sowing relies entirely on natural winter conditions, so germination rates are less predictable. It is best for gardeners who want a low-effort, “let nature handle it” approach.
Potting Up and Early Care
The taproot of a persimmon seedling grows long, fast, and does not like being cramped. Pot selection matters more than you might think.
Potting Up Sprouted Seeds
- Use tall, narrow pots (at least 6 inches deep) to give the taproot room to grow straight.
- Handle the seedling by the seed shell or the cotyledon leaves, never the delicate root.
- Pot when the root is 0.5–1 inch long.
- Plant the root pointing down and keep the top of the seed level with the soil surface.
Light and Water
- Provide bright light immediately. A sunny south-facing window works, but 16 hours under LED grow lights produces stronger, stockier seedlings.
- Water when the top inch of soil feels dry. Persistent sogginess leads to damping-off, a fungal disease that kills seedlings at the soil line.
- Use sterile pots and fresh mix to minimise disease risk. Gentle airflow from a small fan helps strengthen stems and prevents fungal growth.
This stage is where most home growers lose their seedlings. The culprit is almost always overwatering combined with insufficient light.
Moving Seedlings Outdoors
Your seedlings need a gradual transition to outdoor conditions, a process called hardening off. Skipping it causes leaf scorch and can set your trees back weeks.
Hardening Off Schedule
- Start with 1–2 hours of shaded, sheltered outdoor time.
- Gradually increase exposure over 10–14 days.
- Introduce morning sun first, then move to longer periods of indirect sunlight.
- Watch for leaf discoloration or wilting and reduce exposure if needed.
Planting Out
Choose a site with full sun and well-drained soil. Persimmons tolerate a range of soil types but dislike standing water. Neutral to slightly acidic pH is ideal.
- Space trees 15–20 feet apart—they grow larger than you expect.
- Water deeply once a week during dry spells for the first two years.
- Apply 2–3 inches of mulch in a ring, but keep it 2 inches away from the trunk to prevent rot.
If you are growing seedlings as rootstock for grafting, let them establish for a full season. Grafting in the second year gives you the best success rate.
Troubleshooting Common Problems
Even with perfect technique, you will hit snags. Here are the most common failures and how to fix them.
| Problem | Likely Cause | Solution |
|---|---|---|
| Seeds mold in the fridge | Medium too wet; poor airflow | Replace with drier mix, clean seeds, open bag more often |
| No sprout after 12 weeks warm | Cold period too short; temperature too low | Re-chill for 3–6 more weeks; raise temperature to 75–80°F |
| Seedlings collapse at soil line | Damping-off fungus | Use sterile mix, water less, improve airflow |
| Slow or stunted growth | Root bound; low light | Move to deeper pot; increase light hours to 16/day |
| Leaf edges scorch after moving outside | Hardening off was too fast | Move back to shade and reintroduce gradually |
Working in batches of 10–20 seeds smooths out the natural variance. Some seeds will simply be duds, and that is normal. Track your temperatures and dates in a notebook; next season you will have your own reliable data.
Frequently Asked Questions
How long does it take to germinate persimmon seeds?
After the cold stratification period, most seeds sprout within 2–6 weeks of warm conditions. Some are slow, so keep the medium warm and evenly moist for up to 8 weeks before giving up.
Can I skip cold stratification?
You can try, but your germination rate will be very low. Cold time triggers the hormonal changes that end dormancy. Without it, the hard seed coat and dormant embryo simply do not respond to warmth.
What temperature is best for sprouting?
Persimmon seeds germinate best at 70–80°F. Below 65°F, germination slows dramatically and the risk of rot increases.
Will seedlings be true to the parent tree?
No. Seedlings are genetically unique and will produce fruit of unpredictable quality and size. For known fruit, graft a named variety onto your seedling once it is established.
How many seeds should I start?
Start far more than you need. A good rule of thumb is 8–10 seeds for every strong tree you want to end up with.
Do I need to scarify persimmon seeds?
Light scarification is optional. If you choose to do it, rub the seed gently with fine-grit sandpaper on one side, avoiding the pointed end where the embryo sits. This helps some seeds take up water, but cold stratification remains the essential step.
Can I germinate seeds from store-bought fruit?
Yes, if the fruit contains mature seeds. Many commercially sold persimmons are seedless, so cut one open and check before you plan a batch.
Final Thoughts: Patience Pays Off
Germinating persimmon seeds is not difficult, but it does require you to respect the process. Clean your seeds, give them their cold rest, provide warmth and light, and protect that taproot. Do those four things consistently, and you will have healthy seedlings ready for their first season outdoors.
Start your first batch now. Keep notes on your timing, temperatures, and success rates. Adjust next season based on what you observe. This is a skill that improves with practice, and every seed you sprout teaches you something useful for the next batch.
If you are planning a larger orchard project, make sure your site preparation and soil health are in order before those seedlings are ready to plant out. And if you are setting up a dedicated seed-starting area, a proper hole digging tool makes planting out far easier on your back.


