How To Use Mini Chainsaw: Safe, Easy Steps For 2026
A mini chainsaw is one of the most useful tools you can own for pruning branches, cutting firewood, and tackling small yard jobs. But before you pull that trigger, you need to understand the right techniques—and the common mistakes that lead to accidents. This complete guide walks you through every step, from safety gear and setup to cutting techniques and maintenance, so you can work with confidence in 2026.

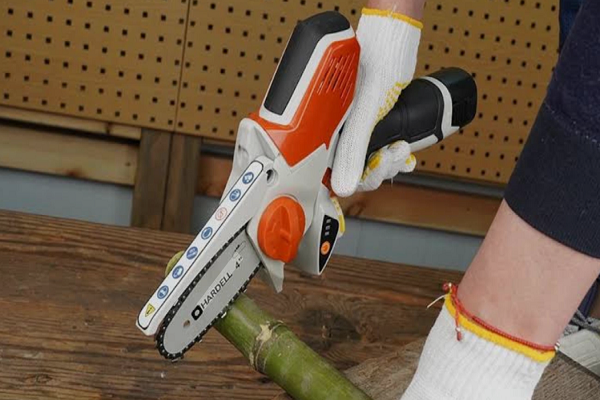
Photo source: YouTube — essential protective equipment for operating a mini chainsaw.
Why Mini Chainsaws Are Worth Learning
Mini chainsaws have exploded in popularity because they’re lightweight, easy to handle, and perfect for homeowners who don’t need a heavy gas-powered machine. Most models weigh between 2 and 4 pounds, making them ideal for overhead pruning and quick trimming tasks. They’re powered by rechargeable batteries, which means no pulling cords, no mixing fuel, and minimal maintenance. For further reading, see osha.gov.
But here’s the catch: their small size can make you overconfident. A mini chainsaw still has a sharp, fast-moving chain that can kick back and cause serious injury. Understanding how to use mini chainsaw tools properly isn’t just about getting clean cuts—it’s about protecting yourself.
Safety Essentials Before You Power Up
Your first task is safety, not cutting. Mini chainsaws may be small, but they can kick back and bite fast. Slow down, gear up, and set the scene before you squeeze the trigger. For further reading, see epa.gov.
Wear the Right PPE
| Gear | Why It Matters |
|---|---|
| Safety glasses with side shields | Keep wood chips and sawdust out of your eyes |
| Cut-resistant gloves | Improve grip and reduce cuts from the chain |
| Hearing protection | Lower the risk from long noise exposure |
| Long sleeves and long pants | Protect skin from debris and chain nicks |
| Boots with good tread | Give stable footing on uneven ground |
In practice, glasses are non-negotiable—even tiny branches can send debris flying straight at your face. Skip the loose-fitting hoodie, too; dangling fabric can catch on the bar or trigger.
Set a Safe Workspace
- Clear a 10-foot zone around your cutting area, keeping pets, kids, and helpers well outside it.
- Check your footing. Wet grass, loose gravel, and cluttered ground create slip hazards.
- Work in good light so you can clearly see the cut line and the direction of the wood grain.
Use Good Practices Every Time
- Keep a two-hand grip with your wrists straight and arms firm.
- Never cut above shoulder height; raising the saw compromises control and increases kickback risk.
- Don’t bypass factory guards or chain brakes.
- Read the manual—each model has unique limits and safety notes you should follow.
If you’re brand new to chainsaws of any size, it’s worth reviewing basic chainsaw handling before you start cutting.
Get to Know Your Mini Chainsaw
Before your first cut, understand the parts and how they work together. A minute here will save you from jams and dull chains later.
Key Parts to Find on Your Tool
- Bar and chain — The cutting edge; confirm chain direction matches the arrows printed on the bar.
- Trigger and safety lock — Prevents unintended starts; engage both hands when operating.
- Chain cover and sprocket — Where the chain drives; keep this area clear of sawdust.
- Tensioner knob or screw — Lets you adjust chain tightness quickly.
- Oil system — Some models auto-oil; others need manual oiling or a dab on the chain before longer cuts.
Basic Checks
- Battery fit: It should click in firmly with no wobble.
- Chain condition: Look for sharp teeth, even depth, and no blue burn marks (a sign of overheating).
- Bar tip: Avoid digging the tip into wood—this is the main kickback zone.
Knowing how to use mini chainsaw tools also means knowing their limits. A 4-inch or 6-inch bar is perfect for pruning and small logs, not for felling large-diameter trunks. If you’re cutting thick wood regularly, consider the trade-offs between battery and gas chainsaws before committing to one tool.
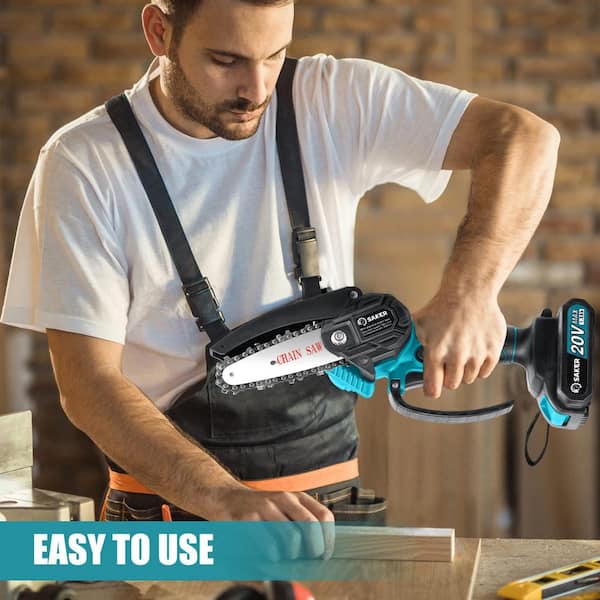
Image: The bar and chain assembly on a compact mini chainsaw.
Pre-Use Checklist and Setup
A short checklist builds a safe routine and extends tool life. Here’s what to do before every session.
Quick Checklist Before Each Session
- Inspect the chain — Look for chips, uneven teeth, or cracks.
- Set chain tension — Pull the chain mid-bar; it should lift slightly and snap back into place.
- Lube the chain — Add bar oil, or apply light oil if your model has no dedicated tank.
- Check battery charge — A low battery causes stalls and unnecessary heat.
- Confirm your workspace — Secure the wood so it cannot roll or pinch the bar.
How to Tension the Chain
- Loosen the cover only as needed while keeping the bar aligned.
- Turn the tensioner until the drive links just seat in the bar groove.
- Do the pull test: lift the chain from the center of the bar—a small gap (about 1/8 inch) is okay.
- Spin the chain by hand with gloves on; it should move smoothly, not bind.
This preparation is central to how to use mini chainsaw tools without frustration. A tight, well-oiled chain cuts cooler and straighter, and it puts far less stress on the motor.
Step-by-Step: How to Use Mini Chainsaw for Clean, Safe Cuts
This is the core sequence you should follow every time you cut. It’s simple, repeatable, and minimizes risk.
Step 1: Plan the Cut
Identify where the wood can move once cut. If a branch is under tension, cutting it straight through can cause the bar to pinch. Plan your cuts to avoid this.
Step 2: Stabilize the Work
Clamp branches on a sawhorse or crib logs with wedges. A loose branch can roll or pinch the bar mid-cut, which is the most common accident we see. Stabilizing your work is non-negotiable.
Step 3: Mark the Cut
A pencil line or simple notch improves accuracy, especially on curved or knotty wood.
Step 4: Set Your Stance
Stand with your feet shoulder-width apart, one foot slightly forward. This position gives you balance and lets you absorb any sudden movement from the saw.
Step 5: Grip the Saw
Use a firm two-hand hold whenever your model allows. Keep your wrists straight and elbows slightly bent.
Step 6: Start the Saw
Disengage the safety lock, squeeze the trigger, and let the chain reach full speed before touching the wood.
Step 7: Start the Cut
Touch the lower part of the bar to the wood, not the tip. The lower bar gives you more control and less kickback risk.
Step 8: Feed Gently
Let the chain do the work. Forcing the saw creates heat and burn marks, and it dulls the chain faster.
Step 9: Clear Chips
If chips pack around the cut, pause and lift slightly to let them exit. A clean kerf cuts faster and cooler.
Step 10: Finish with Control
Expect the cut to close as you near the end. Ease off the pressure and be ready for the saw to settle.
Step 11: Release the Trigger
Wait until the chain comes to a full stop before setting the saw down.
Step 12: Inspect the Cut
Check for tear-out or rough edges. Make a light trim pass if needed.
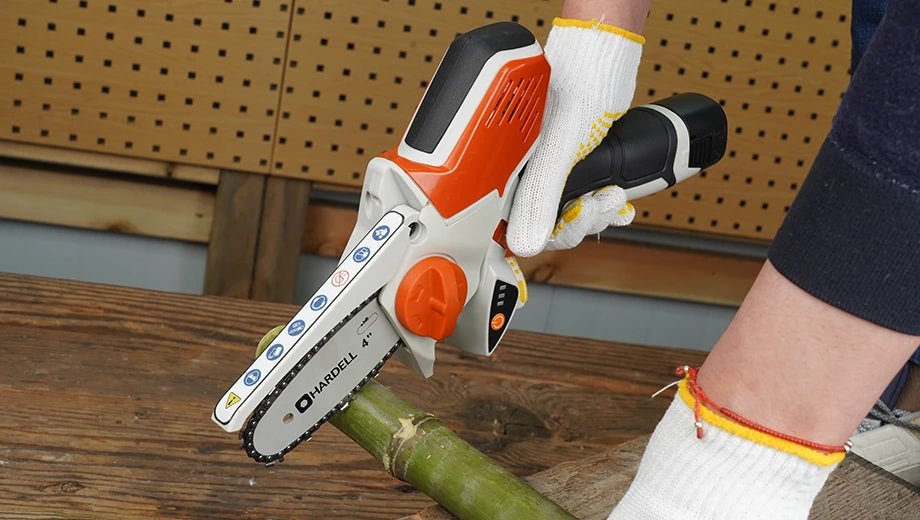
Photo: Correct hand positioning and trigger control while cutting.
Core Cutting Techniques You’ll Use Often
Sharp technique adds speed and safety. These moves cover most common tasks.
Pruning Branches
- Cut the underside first. Make a small undercut about a third of the way through to prevent bark from tearing.
- Finish from the top. Cut just outside the branch collar to protect the tree’s health.
- Work from the trunk outward. Keep your body to the side, never directly under the cut.
Bucking Small Logs
- Lift the log off the ground. Use a stand or another log so the bar doesn’t touch dirt—it will dull your chain in seconds.
- Cut from the compression side first. Then complete from the tension side to avoid pinching.
Breaking Down Pallets or Boards
- Watch for nails. Use a magnet or pry boards first. Nails will ruin a chain quickly.
- Make shallow guide cuts. Score first, then complete the cut in passes to maintain control.
Kickback Control
- Avoid the bar tip. It’s the kickback zone and should never touch the wood during a cut.
- Keep elbows slightly bent. This posture absorbs sudden movement without losing grip.
These techniques form the backbone of how to use mini chainsaw tools for smooth, predictable results.
Common Mistakes Beginners Make
Even experienced users slip up sometimes. Here’s what to watch for.
Cutting Into Dirt or Rocks
This dulls a chain instantly. Keep the bar clear of anything that isn’t wood. If you accidentally hit dirt, stop and check the chain for damage before continuing.
Forcing the Saw
Let the teeth cut. Pushing creates heat and burn marks, which not only dulls the chain but can also warp the bar.
One-Hand Operation
Even with a small bar, use two hands whenever possible. One-hand use raises kickback risk and reduces control significantly.
If you’re trying to figure out why your saw isn’t performing well after heavy use, check how long your chainsaw chain lasts—wear happens faster than most people expect.
Maintenance: Keep It Sharp, Oiled, and Ready
A well-kept tool cuts better and stays safer. Set a simple daily and weekly routine.
After Every Session
- Brush off chips. Clean the bar groove and the sprocket area thoroughly.
- Top up oil. Keep the chain wet for the next job.
- Check tension. Chains stretch as they warm up; reset when cool.
Sharpening Basics
- Use the right file size. Match the chain pitch to your manual’s specifications.
- Light, even strokes. File each tooth the same number of times and at the same angle.
- Touch up often. A quick touch-up beats a full regrind later. For a proper edge every time, a garden tool sharpener will keep your chain and other bladed tools in top shape.
Battery Care
- Avoid full drains. Stop when the pack sags; swap for a fresh one.
- Store at mid-charge. For long breaks, keep the battery around half charge.
- Keep batteries cool. Don’t leave them in hot cars or direct sunlight.
Storage
- Use a bar scabbard to protect the chain and your hands.
- Store the saw on a dry, dust-free shelf—moisture rusts chains quickly.
For those who own cordless yard equipment, understanding electric lawn mower battery life can help you extend the life of all your battery-powered tools.
Troubleshooting: When Things Go Wrong
Most problems have simple fixes. Here’s what to check first.
| Problem | Likely Cause | Fix |
|---|---|---|
| Chain stalls or smokes | Dull, dry, or over-tight chain | Sharpen, oil, and adjust tension |
| Cuts curve to one side | Uneven tooth height | File the longer side or replace the chain |
| Chain keeps jumping off | Loose tension or dirty bar groove | Re-tension, snug bar nuts, clean groove |
| Battery dies fast | Pack is cold or old | Warm it up or rotate between two packs |
| Heavy vibration | Bent bar or worn sprocket | Inspect and replace damaged parts |
Mistakes to Skip
- Cutting into dirt — Dulls the chain in seconds.
- Forcing the saw — Pushing causes heat and burn marks.
- Using one hand — Even on small cuts, two hands are safer.
These practical checks make learning how to use mini chainsaw tools much smoother.
Accessories That Make Work Faster and Safer
Small add-ons make a big difference in comfort and cut quality.
Worthwhile Upgrades
- Extra battery — Keeps work flowing without rushing or overloading your pack.
- Proper bar oil — Reduces heat and wear. Some bio-oils are yard-safe.
- Filing guide — Keeps angles true for sharper, safer cuts.
- Scabbard and case — Protects the bar and your gear bag.
- Lightweight sawhorse — Clamps irregular limbs for stable cuts.
- Plastic felling wedges — Prevents the kerf from pinching your bar.
Each add-on supports how to use mini chainsaw tools with better control and less fatigue.
Frequently Asked Questions
How Do I Know If the Chain Is Tight Enough?
Lift the chain in the middle of the bar. It should rise a bit and snap back with no sag. If it droops, tighten the tensioner.
What Oil Should I Use on the Chain?
Use dedicated bar and chain oil for the best cling and lubrication. In a pinch, light oil is better than running dry, but switch back as soon as you can.
Can I Cut Wet Wood with a Mini Chainsaw?
Yes, but expect slippery footing and slower chip clearing. Dry and clean the bar and chain afterward to prevent rust.
How Often Should I Sharpen the Chain?
Touch up after every few battery cycles or when chips turn dusty. A quick file keeps cuts straight and cool.
Is One-Hand Use Safe with a Mini Chainsaw?
Use two hands whenever you can. One-hand use increases kickback risk and reduces control.
What Size Branches Can I Cut?
Stay within your bar length and the manufacturer’s limits. For a 4-inch bar, that means branches around 3–4 inches in diameter. Smaller, controlled cuts are safer and cleaner.
How Do I Prevent Kickback?
Avoid the bar tip, keep both hands on the saw, and start cuts with the lower bar. Keeping the chain sharp makes a big difference, too.
Conclusion
You now know how to use mini chainsaw tools with a clear plan: suit up, set up, and cut with steady control. Keep your chain sharp, your work stable, and your pace calm. Small gains in setup and posture pay off with cleaner cuts and far fewer surprises.
Whether you’re pruning backyard trees or prepping firewood for winter, the techniques in this guide will keep you safe and efficient. Practice the steps, refine your stance, and you’ll find that a mini chainsaw quickly becomes one of your favorite yard tools. Ready to put this knowledge to work? Grab your saw, run through the checklist, and make your next cut your best one.