How Deep Should You Dig Garden Soil

How Deep Should You Dig Garden Soil: Best Guide 2026

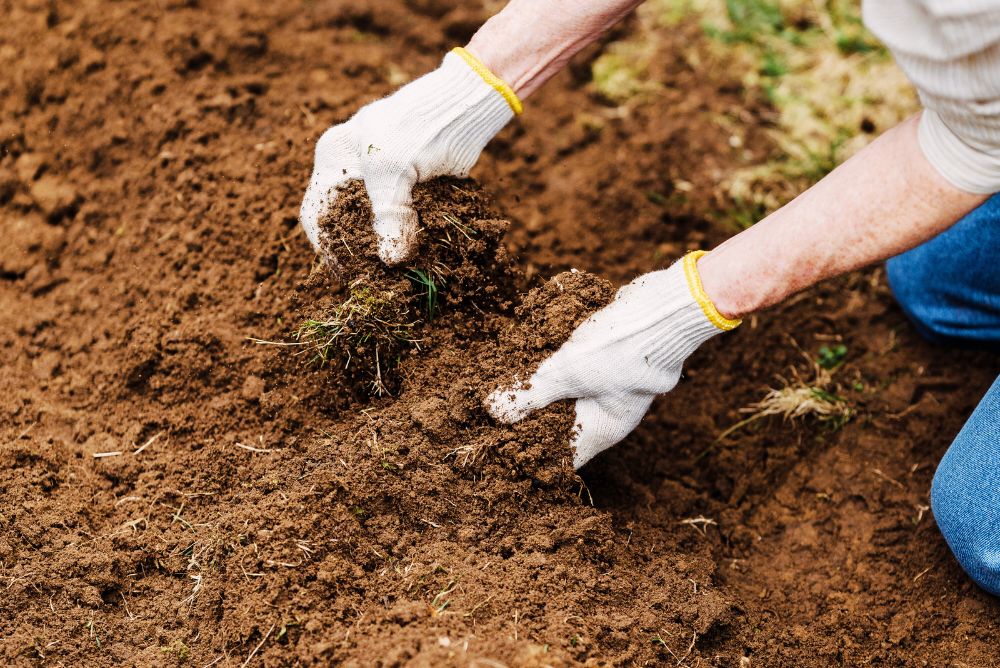
Getting digging depth right is one of the first questions new gardeners ask, and it deserves a better answer than "just dig a hole." Dig too shallow and roots stay cramped, moisture evaporates quickly, and plants struggle to anchor themselves. Dig too deep and you can drag lifeless subsoil to the surface and bury the biology that makes topsoil productive.

The short answer: aim for 8–12 inches (20–30 cm) for most vegetable and flower beds, 12–18 inches (30–45 cm) for deep-rooted crops such as carrots and parsnips, and 4–6 inches (10–15 cm) for lawn renovation. But the right number really depends on your soil type, the crops you grow, and how the land was treated before you took it on. You can also read our guide on how to prepare garden for summer.

This guide walks through exact depths for every common garden scenario, how to test your soil before you break ground, and the tools that make digging easier on both your back and the soil. You will also learn where deeper is not better — and why a no-dig approach often outperforms a full bed renovation.

Why Digging Depth Matters More Than You Think

Soil is not inert dirt. It is a living matrix of mineral particles, air pockets, water, organic matter, and billions of microorganisms. When you dig, you are not simply moving earth; you are reorganising an entire ecosystem. Three things go right when you hit the correct depth:

  • Roots get room to explore. Most vegetable roots feed within the top 12 inches of soil. If that zone is compacted or too thin, plants stay stunted no matter how much fertiliser you add.
  • Water moves the way plants need. Properly loosened soil drains excess moisture while holding on to what roots can use. Shallow beds dry out fast; overly aggressive digging creates channels that drain too quickly.
  • Soil life stays where it belongs. Earthworms, beneficial fungi, and microbes concentrate near the surface where organic matter accumulates. Deep excavation that flips these layers destroys their habitat.

In practice, a common mistake is assuming deeper always means better. Backyards that get double-dug for the sake of it often end up with pale, nutrient-poor subsoil dragged to the surface — a problem that takes seasons of compost to repair. Depth should match the crop's needs, not your enthusiasm. You can also read our guide on best digging tools for compacted soil explained.

Understanding Soil Layers Before You Dig

Before choosing a depth, understand what is under your feet. Soil forms in distinct layers, or horizons:

Layer What it is What it means for digging
Topsoil The dark, crumbly upper layer rich in organic matter and life Where most roots feed; protect and improve it
Subsoil Denser layer with more clay and less biology Avoid bringing it to the surface
Parent material Rock or deep sediment below the subsoil You will rarely reach it, and you usually do not want to

Topsoil depth varies wildly. A well-tended garden can have a foot of rich, dark earth; a new subdivision lot might have barely 2 inches before you hit compacted fill. That is why the same gardener can succeed with 6-inch digging in one yard and fail with 12-inch digging in another — the productive layer is simply deeper in the first plot.

The USDA's soil health principles explain this balance in detail, and they apply just as much to a backyard bed as to a farm field. In short: keep the soil covered, keep it undisturbed where possible, and keep living roots in the ground. You can also read our guide on how to improve garden soil naturally.

Garden soil cross-section showing the topsoil layer for digging

A soil cross-section shows how thin the productive upper layer really is.

The practical takeaway: work within the topsoil layer whenever you can, and build more of it over time rather than digging down into what sits below.

Recommended Depths by Garden Type

Depth is not one-size-fits-all. Different plants send roots to different depths, and different bed styles create their own constraints. Here is the working breakdown for the 2026 season:

Garden Type Ideal Depth Notes
Mixed vegetable bed 8–12 in (20–30 cm) Covers tomatoes, peppers, squash, beans, leafy greens
Root crops 12–18 in (30–45 cm) Carrots, parsnips, daikon need unobstructed depth
Leafy greens and herbs 6–8 in (15–20 cm) Shallow root systems; focus on rich topsoil
Raised beds 10–12 in fill + 4–6 in loosened below Gives roots a path into native ground
Perennial flowers 10–12 in wide and deep per hole Wide holes beat narrow deep ones
Trees and shrubs Loosen 8–12 in over a wide circle; plant at root flare Never bury the trunk flare
Lawn renovation 4–6 in (10–15 cm) enriched topsoil Grass roots stay close to the surface
No-dig beds No turning; add 2 in (5 cm) compost annually Worms and soil life do the mixing

Vegetables: Matching Depth to Crop

Most vegetables grow well in 8–12 inches of loose soil. Tomatoes, peppers, cucumbers, squash, and beans find plenty of room in that range, and going deeper rarely improves yields. The exception is root vegetables. You can also read our guide on digging tools names with pictures.

Carrots, parsnips, beets, and radishes push down hard. Carrots in particular can run 12 inches or more, and when they meet a dense layer they fork, twist, or stop dead. In compacted ground, the right equipment for breaking up hard ground is worth the effort before you plant. For these crops, aim for 12–18 inches of loose, stone-free soil.

If your native ground is only 8 inches deep before you hit clay or rock, grow root crops in a raised bed or deep container instead. You get the depth without the backbreaking excavation. You can also read our guide on how to improve lawn soil health.

Raised Beds: Depth Above and Below

Raised beds give you control over soil quality, but the depth question has two separate parts: how tall should the frame be, and how much should you loosen the ground underneath?

For most vegetables, a total root zone of 10–12 inches works well. That means a frame at least that tall, filled with quality mix. But do not stop there — loosen the native soil 4–6 inches beneath the bed. This creates a continuous path for roots and improves drainage where the bed sits.

On a tight budget, even an 8-inch frame paired with 4 inches of loosened native soil gives roots a full 12 inches of depth. Many gardeners find this combination performs as well as deeper, more expensive beds. A decent spade and fork are enough to start, but the bed-specific tools that save time and strain are worth reviewing before you build.

Lawns: Shallow Is Fine

Lawns are the one place where shallow digging is genuinely correct. Grass roots mostly live in the top 4–6 inches, so there is no benefit to excavating deeper.

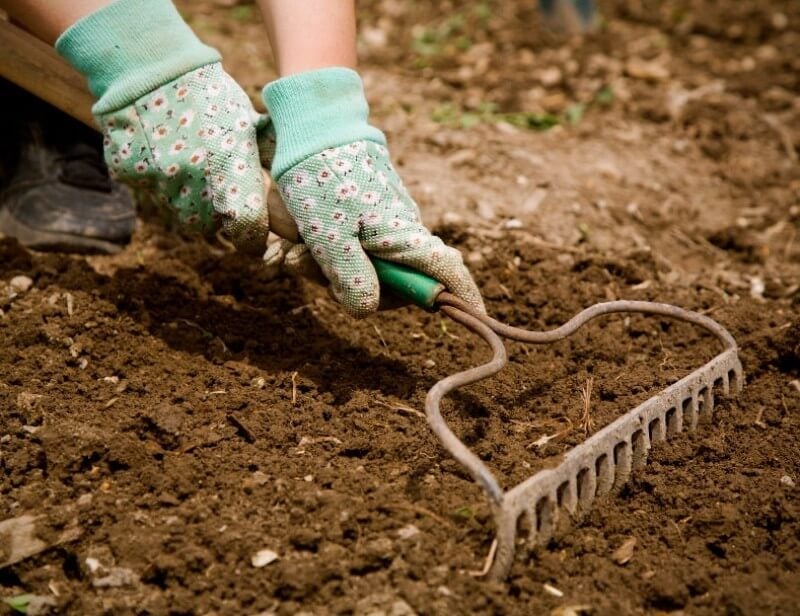
For a new lawn, prepare 4–6 inches of enriched topsoil before seeding or laying sod. Rake it smooth, firm it lightly, and keep the top inch consistently moist during germination. For an existing lawn with compaction problems, core aeration beats tilling every time — it opens the soil without tearing up the turf.

Trees, Shrubs, and Perennials: Dig Wide, Not Deep

This is where most gardeners make their one irreversible mistake. For trees and shrubs, the planting hole should be shallow and wide — roughly 2 to 3 times the width of the root ball, but no deeper than the root ball itself. The root flare, where the trunk widens at the base, must sit at or slightly above the surrounding grade.

Burying the flare sets off a slow chain reaction: girdling roots, trunk decay, and a tree that declines years later for no obvious reason. Perennials follow a similar logic. A hole 10–12 inches wide and deep gives roots room to spread sideways, which is what most herbaceous plants actually do.

How to Test Your Soil Before You Dig

Do not dig blind. A few simple tests take minutes and save hours of wasted effort. They also tell you how deep you can realistically go before you hit a layer that will stop roots.

The Screwdriver Test

Push a long screwdriver or metal rod into moist — not soaking — soil. If it sinks easily to 8 inches, your soil is loose and well-aerated. If it stops at 3–4 inches, you have found a compaction layer that needs attention before any planting.

Repeat the test in several spots around the yard. Compaction is rarely uniform; the strip behind the garage can behave completely differently from the old flower border.

The Jar Test for Soil Texture

Fill a clear jar halfway with a soil sample, add water almost to the top, and shake hard. Let it settle. Sand drops to the bottom in minutes, silt settles over hours, and clay can take a day or two to fully settle.

The layers tell you what you are working with:

  • Sandy soil settles quickly, drains fast, and lets nutrients wash away.
  • Clay soil settles slowly, stays dense, and holds water but drains poorly.
  • Loam settles into even layers — the balance you want.

For a more precise read on texture and nutrient levels, university extension soil testing services will give you exact numbers for a small fee.

The Drainage Test

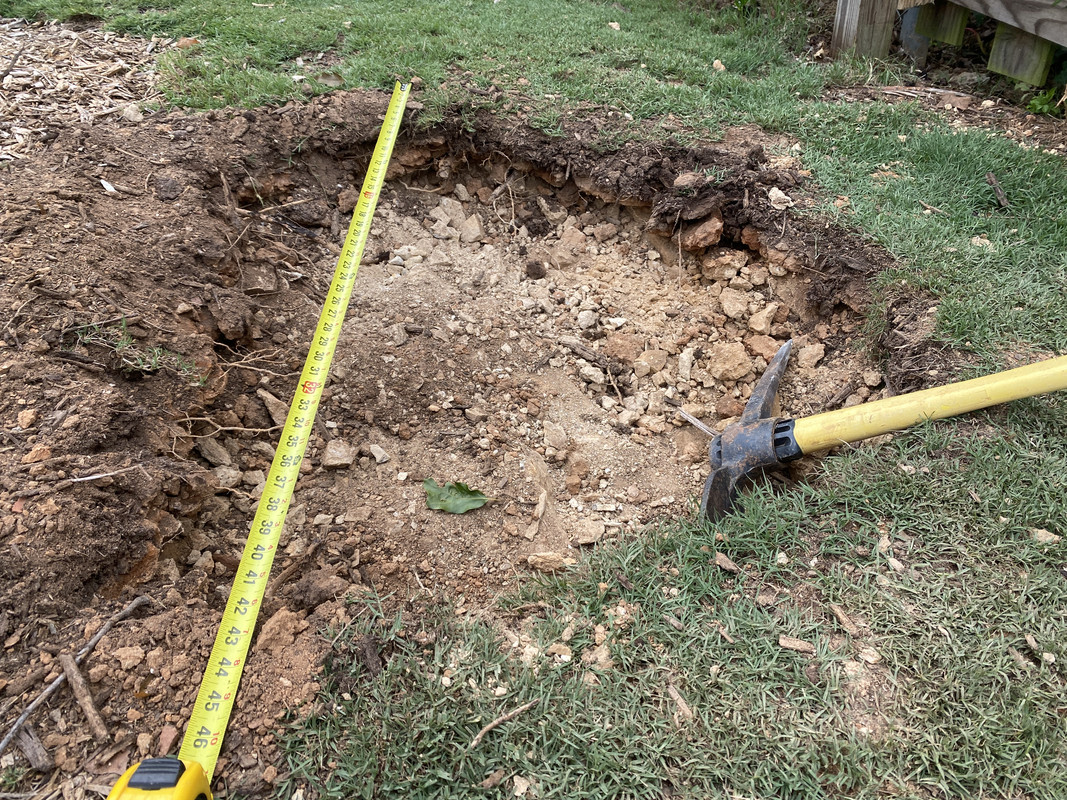
Dig a hole 12 inches deep and 6 inches wide. Fill it with water and let it drain completely. Fill it again and time how long the second filling takes to disappear.

  • 1–4 hours: good drainage — ideal for most gardens.
  • Under 1 hour: sandy soil that loses water too quickly; add compost.
  • Over 4 hours: clay or compaction; improve drainage before planting.

What the Tests Tell You

Once you know texture and drainage, the correct depth becomes clearer. Heavy clay may need loosening to 10–12 inches plus organic matter; free-draining sand just needs compost worked into the top few inches. Soil that drains poorly will not be fixed by digging deeper — it needs organic matter worked into the upper zone where roots actually feed.

Digging Methods: What Each One Actually Does

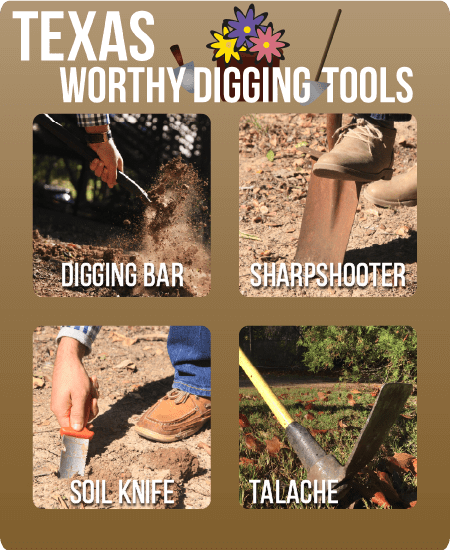
The method you choose determines the depth you actually achieve, so match the technique to the goal. Whatever method you choose, a good all-round spade makes the work noticeably easier on your back.

Single Digging (8–10 inches)

Turn and loosen the top 8–10 inches with a spade or garden fork. This is the standard approach for annual vegetable beds. It is straightforward, effective, and does not disturb the deeper layers where soil structure matters.

Double Digging (16–20 inches total)

This old French intensive technique means removing the topsoil, loosening the subsoil another 8–10 inches below, then replacing the topsoil. The result is genuinely deep, well-aerated ground — but it should be a one-time renovation for compacted or brand-new beds, not an annual ritual.

The process: mark the bed, remove the top 10 inches into a wheelbarrow, loosen the next 10 inches with a fork, then put the topsoil back. Repeat bed by bed. It is hard work, and it transforms heavily compacted sites more effectively than any machine.

Broadforking (10–14 inches)

A broadfork, sometimes called a U-fork, has long tines and twin handles. You step on the crossbar, rock the tool back, and lift the soil to 10–14 inches without flipping the layers. That single motion aerates and loosens while preserving the natural profile: rich topsoil stays on top, worms stay near their food, and fungal networks remain connected.

Broadforking is the best maintenance method for established beds — you get the benefit of deep loosening without the disruption of turning the profile upside down.

Power Tilling (4–6 inches)

Rototillers have a place: breaking new ground and mixing in amendments. But they come with real costs. Tilling wet soil smears the particle structure and can create a hardpan just below the tine depth. It also shreds earthworms and fungal networks that keep your soil healthy.

If you till, follow these rules:

  • Till only when soil is crumbly — never wet or bone dry.
  • Stay in the top 4–6 inches.
  • Keep it to a single pass per bed.
  • Follow up with compost and mulch to rebuild biology.

For ongoing maintenance, a sharp spade or broadfork serves you better than a loud machine.

No-Dig and Sheet Mulching (0 inches)

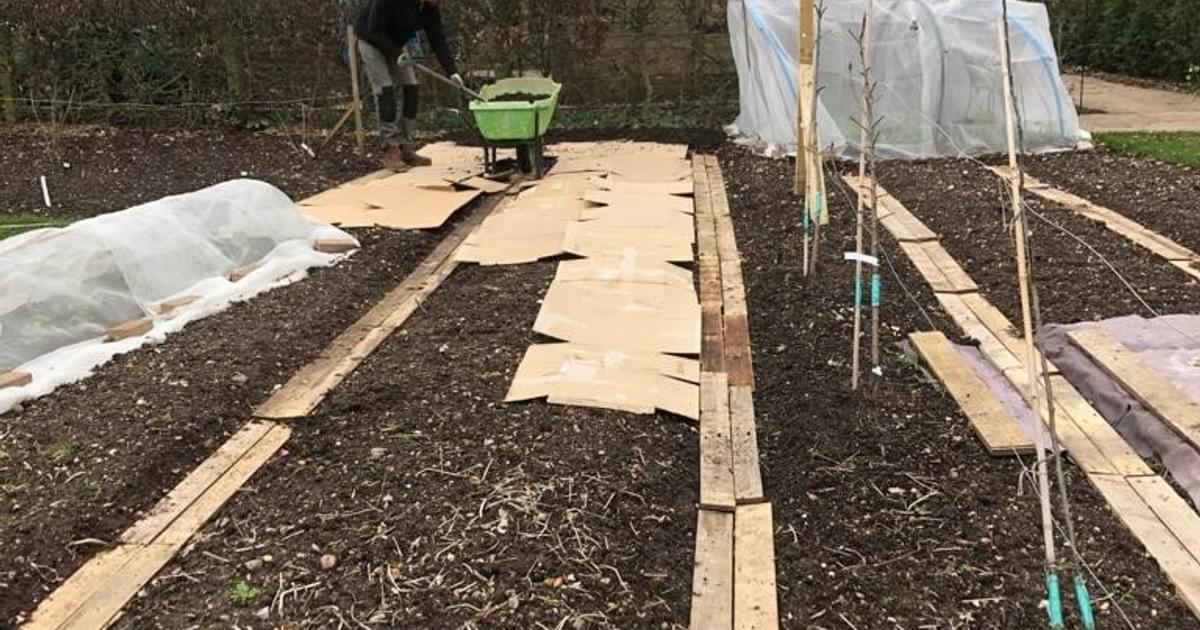
The no-dig method skips excavation entirely. Layer cardboard over grass or weeds, add 4–6 inches of compost and mulch on top, and let soil organisms do the mixing.

This works remarkably well. Undisturbed soil builds better structure over time, and established no-dig beds often match or outperform tilled plots for many crops. Worms pull organic matter down, creating channels for roots and water.

The tradeoff is patience. Sheet mulching takes several months to break down before planting, whereas a tilled bed is ready immediately.

Amendments: How Deep to Work Them In

Depth matters for amendments too. "Just mix it in" is not enough — where you place organic matter determines how well plants can use it.

Compost

Spread 1–2 inches of compost over the surface each season. Mix it lightly into the top 4 inches, or leave it on top for no-dig beds; earthworms will pull it down for you. Avoid burying compost 10 inches deep, where roots cannot reach it early in the season.

Aged Manure

Use 0.5–1 inch of well-aged manure, worked into the top 4 inches. Fresh manure can burn roots and carries pathogen risk, so always choose composted or aged material.

Mulch

After planting, add 2–3 inches of organic mulch — straw, wood chips, or shredded leaves. Keep it pulled back a few inches from stems to prevent rot. Mulch buffers soil temperature, holds moisture, and slowly feeds the food web below. If you have trees on the property, homemade leaf mulch is an easy way to build a steady supply for free.

Lime and Sulfur

Lime raises pH; sulfur lowers it. Both only work when you know your starting point, so test first and follow the label rates for your soil type. Most vegetables prefer a slightly acidic to neutral range around 6.0–7.0, but blueberries, potatoes, and rhododendrons like it more acidic.

These amendments move slowly through soil — lime in particular can take months to fully react — so incorporate them into the top 4–6 inches where roots are feeding rather than scattering them on the surface and hoping. Re-test every year or two, because pH drifts as compost breaks down and nutrients are taken up.

Special Cases: Adjusting Depth for Difficult Ground

Every garden has quirks. Here is how to adapt depth to challenging conditions.

Heavy Clay

Clay holds nutrients beautifully but drains poorly. The key is working it when barely moist — too wet and you smear it into a brick-like layer. Broadfork clay to 10–12 inches, add 2 inches of compost yearly, and avoid deep tilling. Over a few seasons, organic matter turns stiff clay into workable, crumbly soil.

Sandy Soil

Sand drains too fast, washing nutrients past the root zone before plants can use them. Loosen sandy ground to 8–10 inches and mix in 2–3 inches of compost to improve water and nutrient retention. Mulch heavily to slow evaporation and keep the surface from baking.

Because sand breaks down organic matter quickly, plan on more frequent compost additions than clay would need — a yearly top-dressing is usually the right rhythm.

Compacted Urban Lots

Construction equipment leaves new subdivisions with severely compacted ground. If the screwdriver test shows hard resistance at 4 inches, you need a deeper intervention. Double dig once to 16–18 inches in key growing areas, then switch to broadforking and annual compost top-dressing. The one-time deep work breaks the compaction layer; the ongoing surface care keeps it from returning.

Slopes and Wet Spots

On slopes, erosion is the real enemy. Dig shallow and wide, terrace where you can, and keep a thick mulch layer in place. Deep digging on a slope just creates channels that carry topsoil downhill.

In wet spots, raise the grade instead of digging deeper. Build raised beds 8–12 inches high and loosen the native soil 4–6 inches beneath them. That combination gives roots a drainage path without sitting in water.

Common Mistakes That Cost You a Season

After years of working with soil — and making plenty of mistakes myself — a few lessons stand out:

Over-digging every year. Deep cultivation is a one-time renovation, not an annual event. Once structure is established, maintain from the top with compost and mulch.

Digging when soil is too wet. If a squeezed handful forms a ball that will not crumble when poked, it is too wet. Wait a few days. Wet digging smears structure and causes damage that takes years to repair.

Burying tree root flares. Trees are the exception to every depth rule. Dig shallow and wide, keep the flare at grade, and never backfill over the trunk base.

Ignoring bed width. Roots spread sideways as much as down. Most vegetables want a wide bed of 3–4 feet more than a narrow trench. A strong bed starts with a clean edge you can maintain, so the right edging tool makes the whole garden easier to look after.

Bringing subsoil to the surface. Digging deeper than the productive topsoil layer dilutes organic matter and leaves you with pale, stubborn ground. Know where the topsoil ends before you dig past it.

Seasonal Timing: When to Dig

Timing affects digging success as much as depth. Working soil at the wrong moisture level undoes the benefit of the correct depth.

Spring (Before Planting)

Loosen annual beds to 4–6 inches once the soil is workable — crumbly, not muddy. Broadfork deeper if you are following with root crops, and work in compost as part of bed preparation.

Summer (Between Crops)

Keep cultivation light. Between successions, add a thin compost layer and rake smooth. Avoid deep work during hot, dry periods when soil biology is stressed.

Fall (The Best Time for New Beds)

Fall is ideal for establishing new beds. The soil is often drier and more workable, and any disruption has months to settle before spring. This is also the moment for jobs like digging a narrow trench along a new bed, when the ground is softer and the rush of spring is far off. Finish by covering the bed with mulch or a cover crop to protect it through winter.

The Long-Term Rhythm

Established beds need less digging every year. As structure improves, shift from turning to top-dressing. Many growers find their beds need no digging at all after three to five years of good management — the no-dig transition happens naturally.

Frequently Asked Questions

How deep should you dig garden soil for tomatoes? Tomatoes want 10–12 inches of loose soil. Plant them deep — burying part of the stem encourages extra roots along the buried portion, which makes for sturdier, more drought-tolerant plants.

Is deeper always better for vegetable beds? No. Past 12–18 inches you risk mixing poor subsoil into rich topsoil and diluting the organic matter where most roots feed. A 12-inch zone of rich, living soil beats 24 inches of mediocre soil every time.

How deep should you dig garden soil in raised beds? Loosen 4–6 inches below the frame, then fill the bed 10–12 inches deep. The combined depth gives roots room and lets them penetrate native soil below the frame.

Do I need to double dig every year? No. Double dig once for compacted or brand-new beds, then maintain with broadforking and top-dressing. Repeated deep digging harms soil structure and disturbs beneficial organisms.

How deep should you dig garden soil for lawns? Prepare 4–6 inches of enriched topsoil before seeding or sodding. Rake smooth, firm lightly, and keep moisture even during germination. Deeper excavation for lawns is wasted effort.

What if tree roots or utilities are nearby? Call your local utility locator service before any digging. Near trees, dig shallow and wide, apply mulch, and avoid cutting major roots — severing them can destabilise or kill the tree.

Conclusion

The right digging depth balances root needs, soil health, and the reality of your site. Start with 8–12 inches for most beds, extend to 12–18 inches for root crops, and keep lawn prep shallow at 4–6 inches.

Test first with a screwdriver probe and jar test. Choose the lightest method that gets the job done — broadfork where you can, save double digging for one-time renovations, and let no-dig beds do the work for you over time.

This season, pick one bed. Run a quick screwdriver test, set your target depth, and work in a 2-inch layer of compost. Your plants will reward you with deeper roots, better yields, and less supplemental watering — and next year, the digging gets easier.

Similar Posts

Leave a Reply

Your email address will not be published. Required fields are marked *