Garden Tools Digging Fork: Best Picks & Guide 2026
A digging fork is often the second tool a gardener buys—but it should be the first. A shovel slices and scoops; a digging fork opens the soil, loosens compaction, and lifts crops without bruising them. If you have ever fought heavy clay, snapped a potato in half, or struggled to turn a slumping compost pile, the right fork will change how you garden.
This guide covers the main fork types, what to look for before you buy, how to use and sharpen one properly, and the best digging fork picks for 2026. By the end, you will know exactly which fork fits your soil, your body, and your budget. You can also read our guide on how to clean up dog poop in yard.
Why a Digging Fork Is a Must-Have Tool
A digging fork has four sturdy tines that slide between soil clumps rather than slicing through them. That simple difference makes it better for cultivation, root crops, and compost than almost any other hand tool.
The open tines preserve soil structure and keep the soil food web intact. Disturbing soil less aggressively matters more than most gardeners realize; federal soil-health research from the USDA emphasizes minimizing unnecessary disturbance to keep soil aggregates stable and organisms active. You can also read our guide on how to remove rust from garden tools.
A good fork lets you:
- Loosen compacted ground before planting
- Turn compost, manure, or leaves into a uniform mix
- Lift potatoes, carrots, and garlic without spearing them
- Divide perennials with less root damage
- Pry out stubborn taproots and deep weeds
It is quiet, does not need fuel, and works in tight spaces where machinery cannot go.
If you want to rebuild tired ground over time, combining a fork with natural soil-building practices gives better results than tilling alone.
Digging Fork vs. Shovel: Choose the Right Tool
The quick answer: a fork breaks ground, a shovel moves material. Many gardeners reach for a shovel when they should reach for a fork, then wonder why the job takes twice the effort. You can also read our guide on digging tools names with pictures.
| Task | Best tool |
|---|---|
| Loosening a new planting bed | Digging fork |
| Lifting root crops | Digging fork |
| Turning compost | Digging fork |
| Dividing perennials | Digging fork |
| Moving loose soil or mulch | Shovel |
| Digging a clean-edged hole | Shovel |
| Cutting sod or edging a bed | Shovel |
| Trenching for irrigation | Shovel |
In practice, you will often use both in the same session: fork to break the ground, shovel to move what you have loosened. Knowing where each tool fits saves your back. The broader range of digging tools can fill in gaps once you have the basics.
A common mistake is using a shovel to pry compacted soil. Shovels compress the ground around the blade, while a fork’s tines slip between particles and break clods with far less strain.
Anatomy of a Digging Fork
Before buying, it helps to know the parts that determine performance and durability.
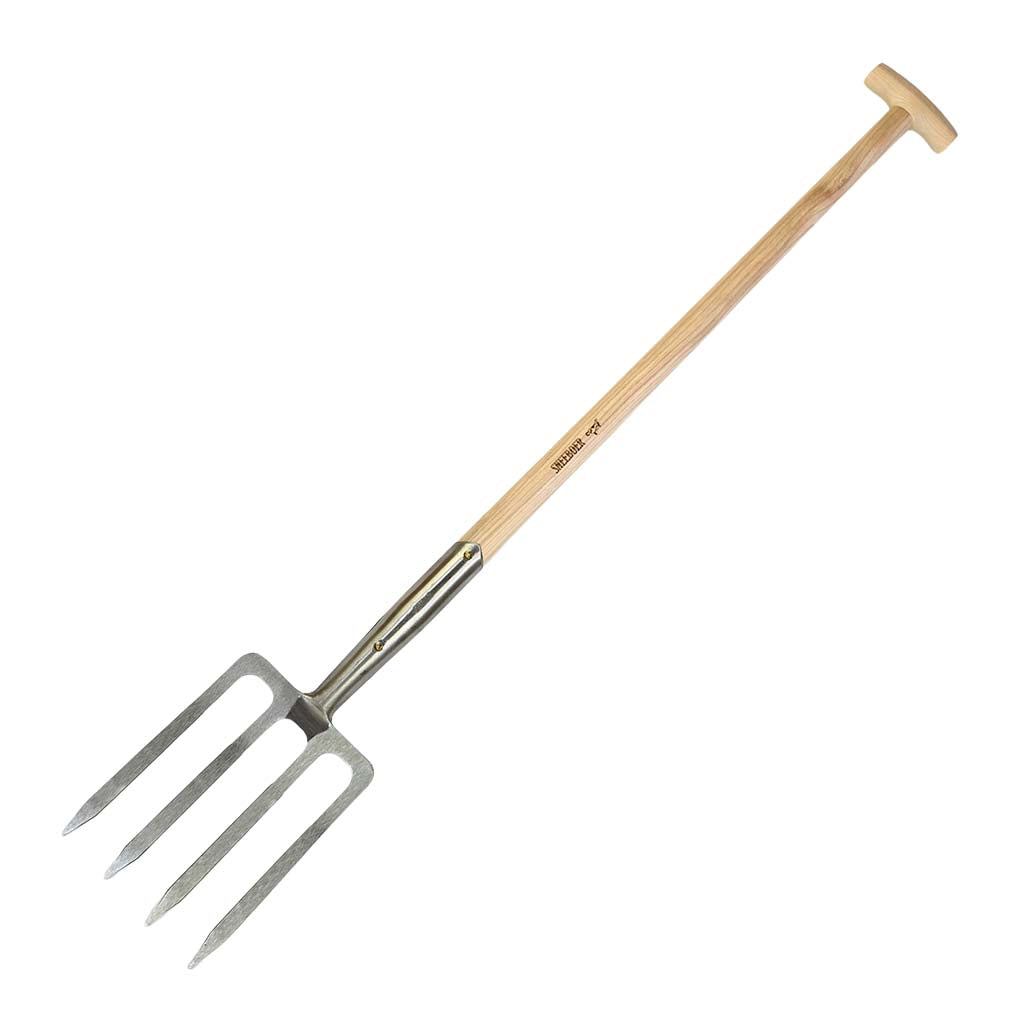
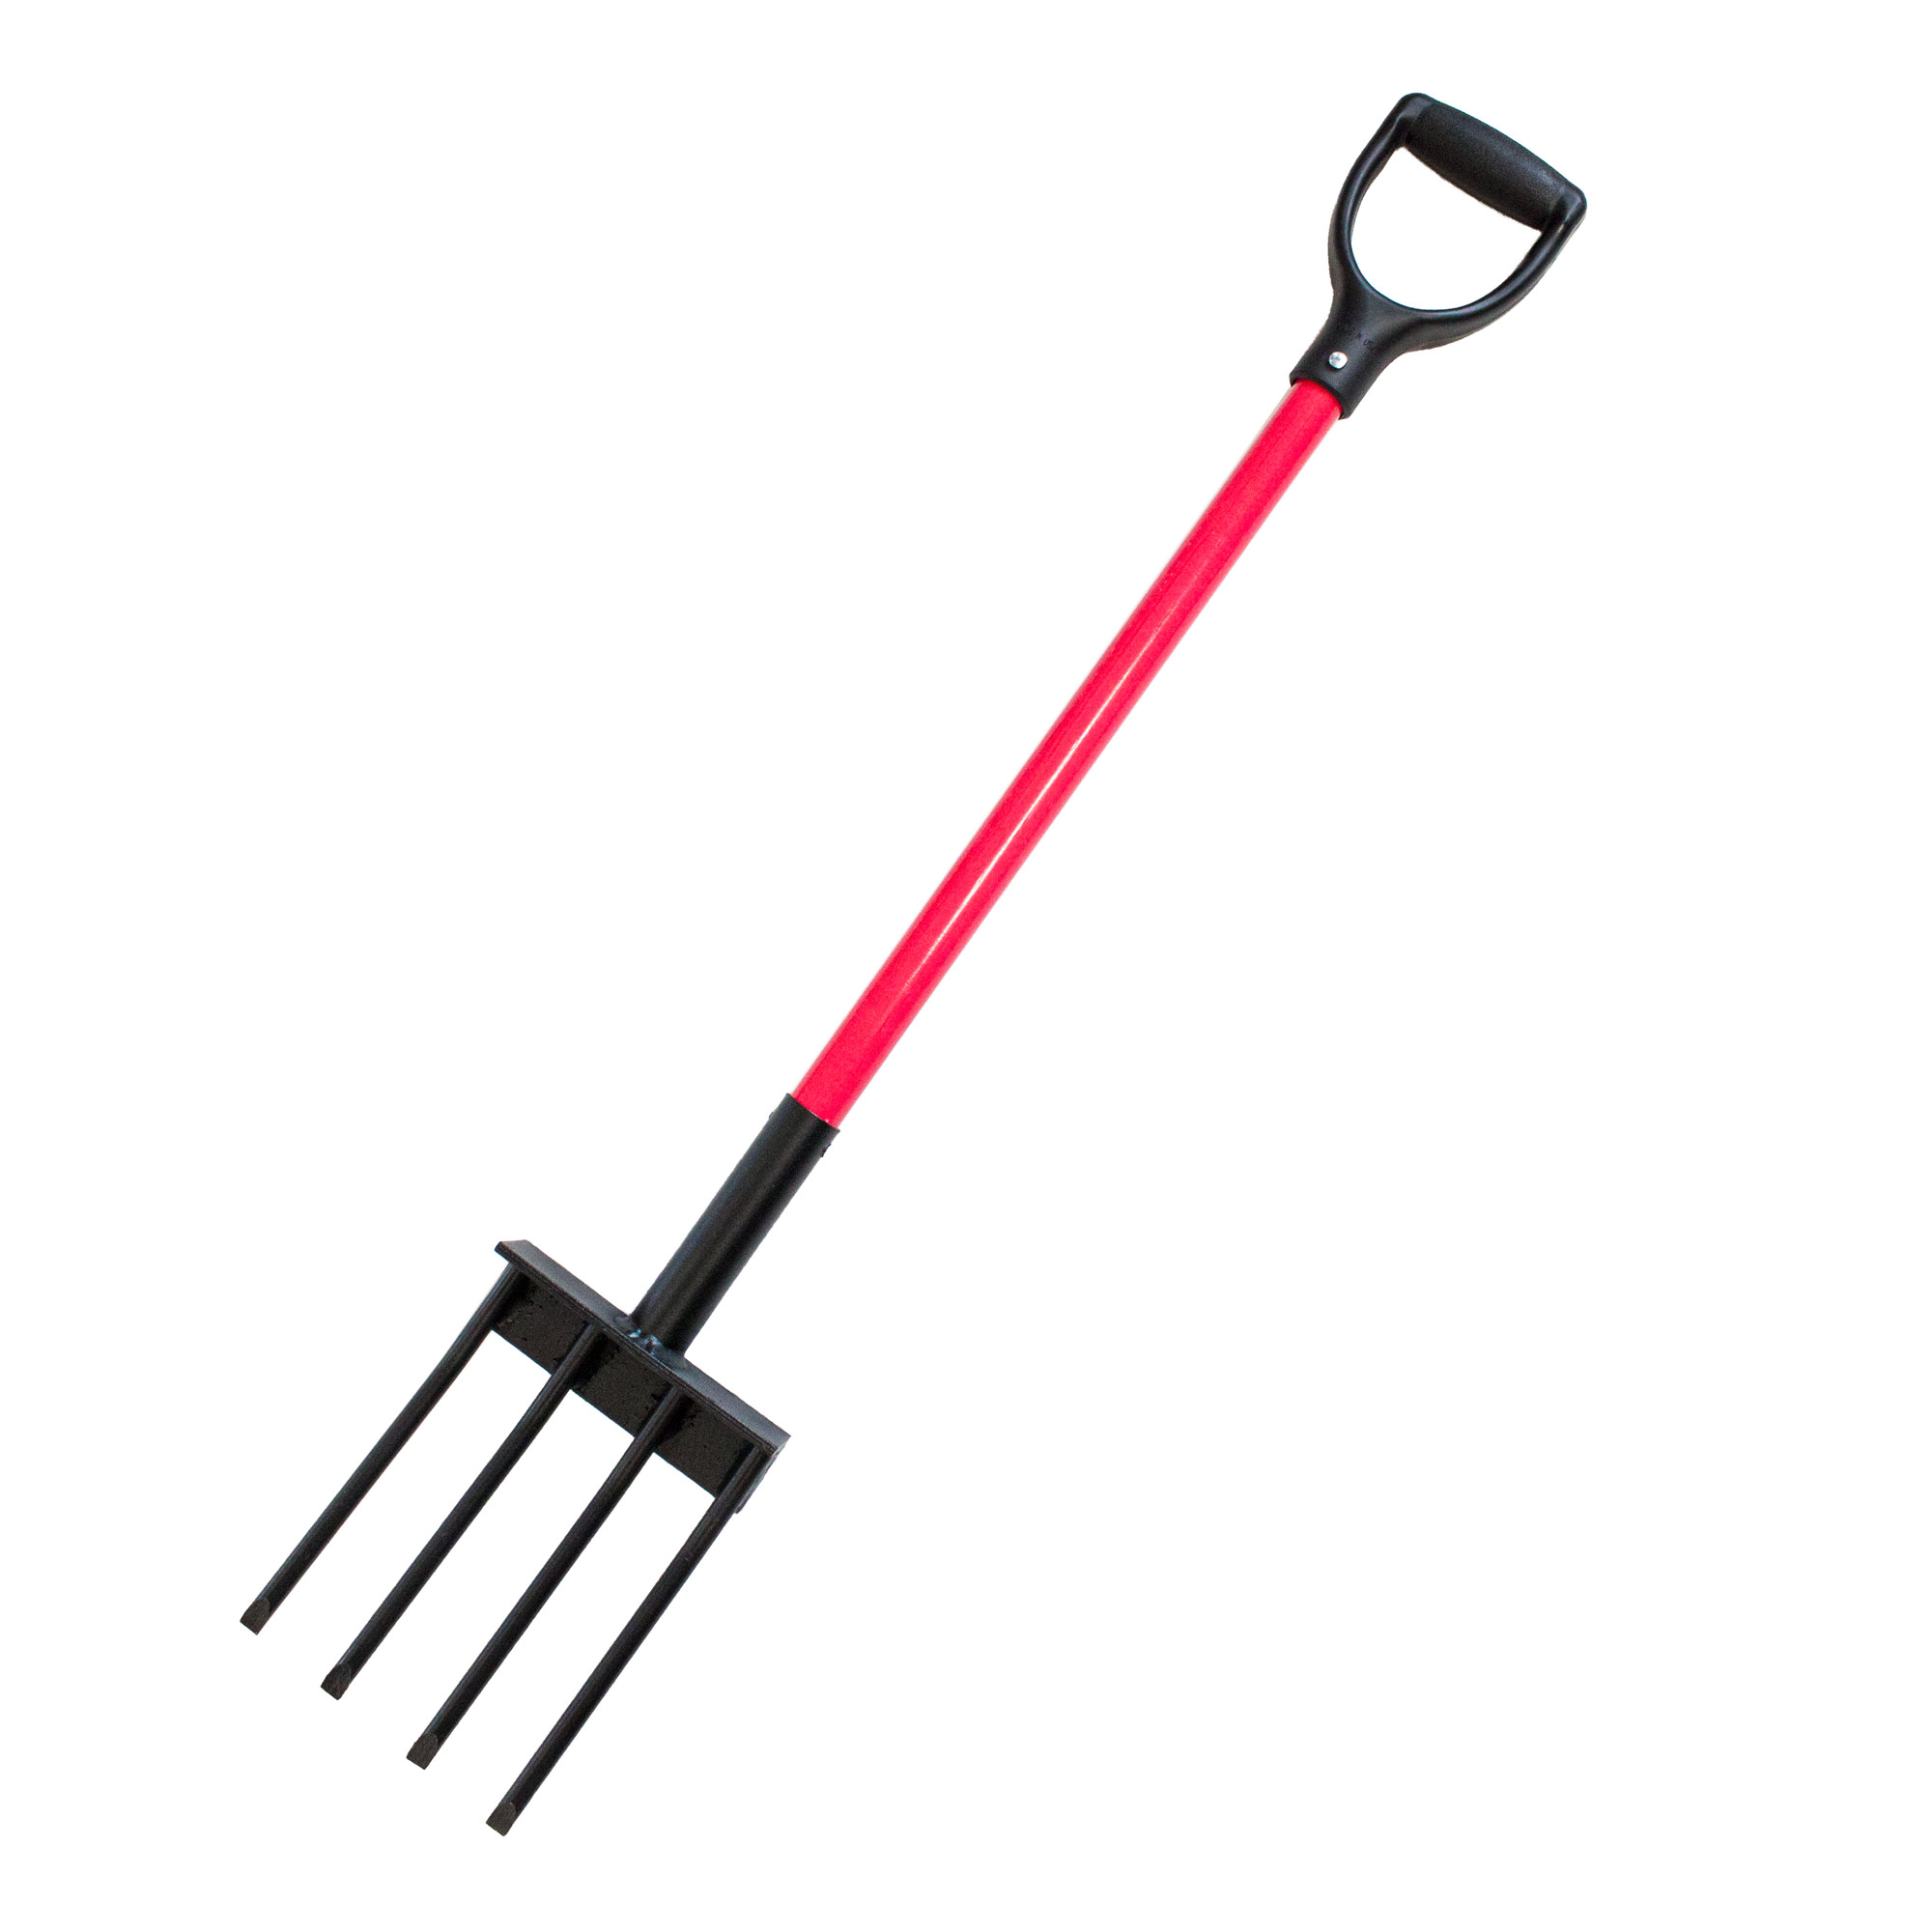
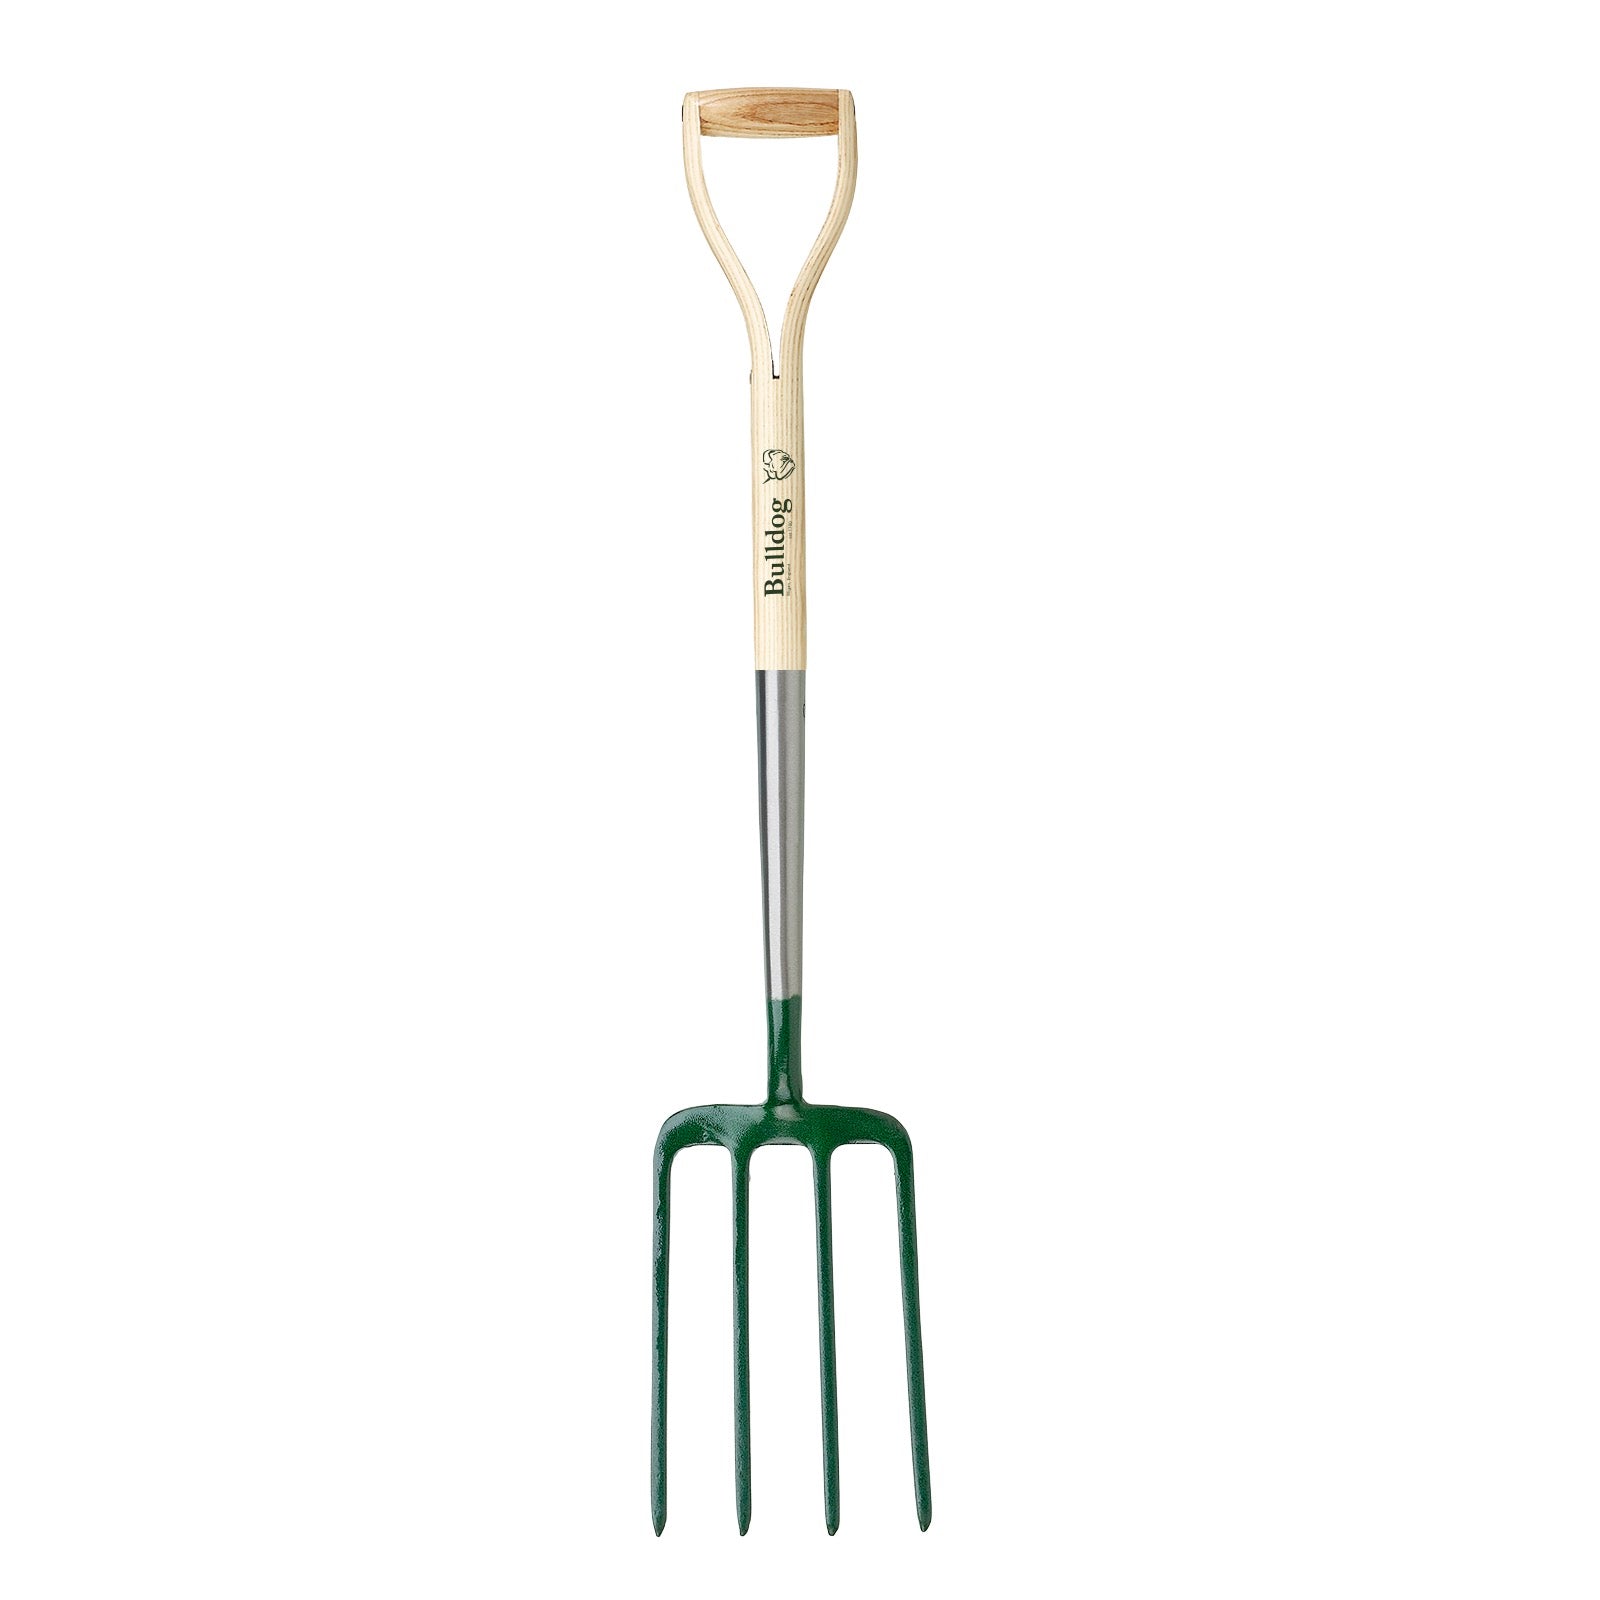
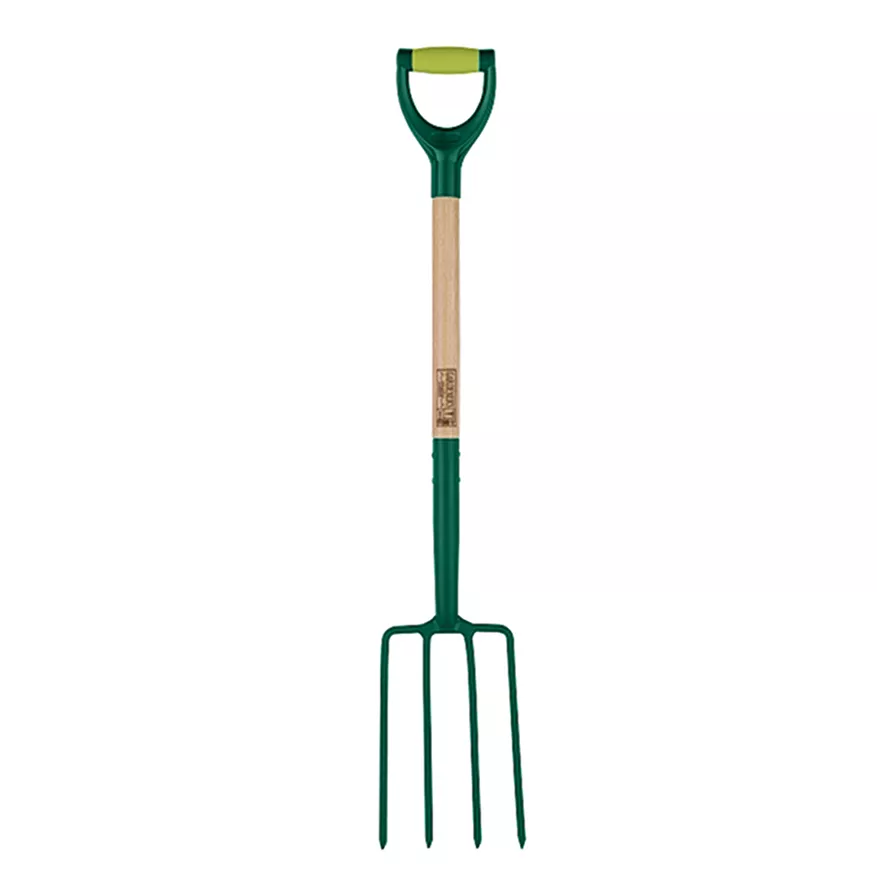
- Head and tines: Usually four, made of forged steel, stainless steel, or carbon steel. Tines are typically 9–12 inches long and can be pointed, tapered, or flat.
- Socket: The collar that connects the head to the shaft. A solid, riveted socket is the strongest design.
- Shaft: Wood (usually ash), fiberglass, or steel. Length affects leverage and comfort.
- Handle grip: T-handles offer two-handed leverage; D-handles give better control and wrist comfort.
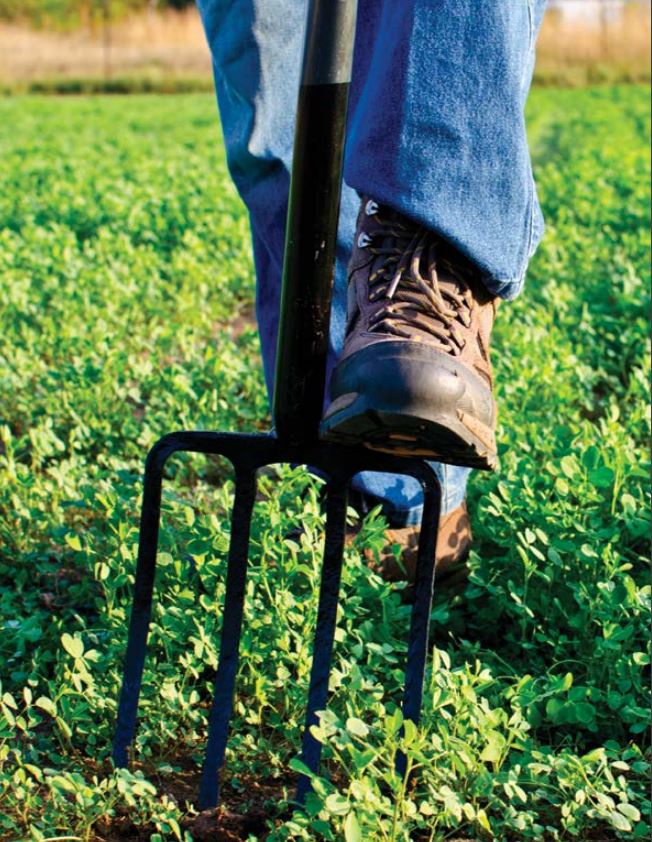
- Step or shoulder: A flat ledge on each side of the head where you press with your boot to drive the tines into hard soil. Wider steps are easier on your feet.
The fork’s job is lifting and loosening, not cutting and scooping. That is why the tines are spaced enough to let soil pass through rather than stick to a solid blade.
Types of Digging Forks
Not every fork does every job. Choosing the right head shape and size makes a bigger difference than any other buying decision.
Standard Digging Fork
The most common design: four thick, slightly curved tines and a head roughly 10–12 inches wide. It handles bed preparation, compost turning, and root crops. If you only want one fork, start here.
Border Fork
A smaller, lighter version with a head around 7 inches wide. It is ideal for raised beds, narrow rows, and working between established plants without disturbing neighboring roots. Pair it with compact weeding tools for tight-space gardening.
Tapered-Tine Fork
The tines narrow toward the tip, so they enter dense clay with less resistance. This design suits new plots, paths, and ground that has not been cultivated in years.
Compost or Manure Fork
Usually five or more thinner tines curved upward slightly. It is designed for turning loose, fibrous material, not for digging hard soil. Use it for compost, hay, and manure.
Broadfork (U-Bar Fork)
A large tool with two long handles and a crossbar you step on to drive five or more tines into the soil. The broadfork loosens deep layers without inverting them. It is a staple for no-dig beds and large areas that would otherwise take hours.
| Type | Typical head width | Best for |
|---|---|---|
| Standard digging fork | 10–12 in | General digging, compost, root crops |
| Border fork | 7 in | Raised beds, small spaces |
| Tapered-tine fork | 10–12 in | Heavy clay, new ground |
| Compost fork | 10–14 in | Turning loose organic material |
| Broadfork | 14–24 in | No-dig bed prep, large areas |
What to Look for When Buying a Digging Fork
A fork should feel like an extension of your arm. Use these criteria to compare models in the store or online.
Tine Material and Shape
- Forged steel is stronger than stamped steel. Look for a head that is one continuous piece of metal.
- Stainless steel resists rust, slides through soil easily, and needs less maintenance.
- Carbon steel holds a sharper edge and shrugs off rocky ground, but rusts quickly if neglected.
- Square or diamond-shaped tines bite into hard ground better than flat tines and are less likely to bend.
Socket and Head-to-Shaft Joint
This is the weakest point on most forks. A solid socket with a visible rivet or bolt is far more durable than a welded collar. If you can check in person, give the head a firm twist: any wobble is a bad sign.
Handle Material
- Ash wood: Classic, shock-absorbing, and comfortable. It needs annual oiling to keep from drying and splitting.
- Fiberglass: Lightweight, tough, and weatherproof, usually with a cushioned grip.
- Steel: Very durable but heavier and more likely to transmit vibration to your hands.
Handle Shape
D-handles give control for detailed work; T-handles give leverage for heavy digging. If you have wrist problems, a padded grip helps. Try both if you can.
Weight and Length
Stand the fork upright beside you. The top of the handle should reach roughly mid-chest. Most shafts range from 40 to 48 inches. Weight is a personal choice, but a manageable range for most adults is 3.5–5 pounds. Choose the lightest fork that still feels solid enough for your soil.
Step Plates
Wider step plates spread the pressure across your boot sole and reduce foot fatigue in hard ground. It is one of the most overlooked comfort features on a fork.
Best Digging Fork Picks for 2026
These picks reflect what most gardeners actually need. Instead of chasing a single “winner,” choose the type that matches your soil, garden style, and body.
Best All-Rounder: Standard Forged-Steel Fork
A 4-tine forged-steel fork with an ash or fiberglass handle does everything well. Look for a solid socket, a D-handle, and a head width around 11 inches. This is the fork to buy if you have in-ground beds and average soil. The typical sweet spot for quality is $35–70.
Best for Raised Beds: Border Fork
A border fork's narrow head fits between plants and keeps soil disturbance low. It is also easier to control when you are working at raised-bed height. If your whole garden is raised beds, a border fork may be the only fork you need.
Best for Tough Clay: Tapered Stainless-Steel Fork
Tapered tines penetrate clay with less effort, and stainless steel releases sticky soil more readily than carbon steel. It costs a little more and saves your back every time you dig. If your soil is heavy, this is the version to prioritize.
Best for No-Dig and Large Beds: Broadfork
A broadfork loosens soil to 10–12 inches without flipping it, which fits no-dig and no-till systems. It covers a large bed far faster than a hand fork and leaves the soil layers intact. Choose one with wide step bars and comfortable grips.
Best Value: Mid-Tier Carbon-Steel Fork
A forged carbon-steel fork in the mid price bracket gives you most of the durability of a professional tool for a fraction of the cost. Carbon steel needs maintenance, but it is tough, affordable, and takes a good edge. With basic care, it will serve a home gardener for many seasons.
Eco-Friendly and Budget Considerations
The most sustainable fork is the one you keep for twenty years. Cheap forks with weak sockets often fail in a few seasons and end up as scrap. Spending a little more on a forged head and a solid joint usually costs less per year than buying repeatedly.
- Entry level ($20–$35): Fine for light work, but the socket is the weak point.
- Mid tier ($35–$70): The best value for most home gardeners.
- Pro tier ($70+): Forged heads, premium handles, and often replaceable parts.
Look for handles from responsibly sourced hardwood, replaceable handles, and brands that sell spare parts. Those features extend the life of the tool and reduce waste.
How to Use a Digging Fork Safely and Effectively
Good technique reduces back strain and keeps the fork from bending. Here is the method that works in most soils.
- Warm up. Loosen your back, hamstrings, and shoulders before heavy digging.
- Position the fork upright in front of you with feet hip-width apart.
- Step onto the shoulder to drive the tines in. Use body weight, not arm strength.
- Rock the handle backward to loosen the soil. Do not jerk or twist hard.
- Lift a moderate forkful and flip or shake it lightly to break up clods.
- Work in rows, moving backward across the bed one fork-width at a time.
For root crops, insert the fork at a slight angle a few inches from the plant, then lever gently upward. This lifts the root system without spearing produce.
Common mistakes:
- Prying sideways against the tines, which bends them at the socket.
- Digging soaked soil, which compacts it into dense, oxygen-poor clumps.
- Taking forkfuls so large that you have to wrestle the tool.
- Using arm strength instead of stepping onto the fork.
Soil moisture matters. Work clay when it is slightly damp but not sticky, and avoid sandy soil when it is soaking wet. If you are unsure, university extension soil guidance explains how to test soil texture and moisture at home.
Ergonomics: Match the Fork to Your Body
A fork that is too long, short, or heavy will punish you by the third row.
- Height: Mid-chest when standing upright with tines on the ground. Shorter gardeners usually prefer a 40-inch shaft; taller gardeners need 46–48 inches.
- Weight: The best fork is the one you will willingly lift. Test the balance before buying.
- Grip: Padded grips and angled handles reduce wrist strain for gardeners with arthritis or joint issues.
- Step plates: Wide steps make a real difference when digging hard ground.
If you are between sizes, choose the shorter, lighter fork. You can always bend your knees a little more, but you cannot make a heavy fork feel lighter.
Stainless Steel vs. Carbon Steel: Which Is Better?
There is no universal winner. The right steel depends on your climate, soil, and willingness to maintain tools.
| Factor | Stainless steel | Carbon steel |
|---|---|---|
| Rust resistance | High | Low unless oiled |
| Soil release | Excellent in sticky soil | Good once a patina forms |
| Edge holding | Good | Better |
| Strength in rocky ground | Good | Very good |
| Maintenance | Low | Regular oiling required |
| Price | Higher | Lower |
For wet climates and low-maintenance digging, stainless steel is the sensible choice. For maximum strength in stony ground, carbon steel has an edge. Many experienced gardeners own both and reach for whichever matches the job.
Maintenance and Care
A quality digging fork should outlive your favorite shovel. Five minutes of care after each use is enough.

Store a wooden-handled fork upright and dry, and the joint stays tight for years.
- Clean it. Scrape off soil and rinse the tines. Dry thoroughly before storing.
- Oil the metal. Wipe the tines and socket with a thin coat of boiled linseed oil, mineral oil, or even cooking oil.
- Check the handle. Tighten any loose rivets and replace split wood before it snaps mid-dig.
- Hang it up. Store off the floor in a dry shed. Leaning a fork against a wall can warp the shaft over time.
For wooden handles, sand rough spots and apply boiled linseed oil once a year. This keeps the wood from drying, cracking, and failing at the worst possible moment.
How to Sharpen Digging Fork Tines
Dull tines crush soil instead of penetrating it, which makes digging harder and increases slipping risk. Sharpening is quick and straightforward.
- Clean the tines and remove rust.
- Clamp the fork securely in a vice.
- Use a flat file at roughly a 45-degree angle to the inside edge of each tine.
- Push the file from base to tip in one direction.
- Finish with a whetstone or fine sandpaper to remove burrs.
A few strokes once or twice a season is enough. Over-sharpening weakens the tines, so only work when you notice the fork resisting penetration.
Best Practices for Specific Garden Tasks
Preparing a New Bed
Mark out the area and loosen the soil to the depth of the tines, working across the bed in a grid. Remove perennial weed roots as you go. If the ground is heavily compacted, start with a broadfork to break up deeper layers without inverting the profile. The same technique works when preparing asparagus beds.
Turning Compost
Work from the outside of the pile inward. Insert the fork at the edge, lift, and turn the material so air reaches the center. The open tines aerate better than a shovel, and the pile heats up faster as a result.
Harvesting Root Vegetables
Insert the fork at least 6 inches from the plant crown, angle it toward the center, then lever gently. This loosens soil around the root system without spearing the crop. You will harvest noticeably more intact potatoes and carrots this way.
Dividing Perennials
Lift the whole clump by inserting the fork around the perimeter, then use two forks back-to-back in the center to split the root ball. This is far gentler on roots than chopping with a spade.
Repairing Lawn Compaction
For a small patch of compacted lawn, push the fork tines into the turf to full depth and rock the handle gently. This relieves compaction and lets air and water reach the roots. It also supports lawn soil biology without heavy machinery.
Common Mistakes to Avoid
- Treating the fork like a crowbar. Prying out oversized clods bends tines and strains your back.
- Digging at the wrong time. Wet soil compacts; bone-dry soil is brutally hard. Work in the moisture window.
- Choosing too heavy a fork. A professional-grade monster that stays in the shed is the wrong tool for you.
- Ignoring the socket. The joint is the first thing to fail. Inspect it before you buy and after heavy use.
Frequently Asked Questions
What size digging fork should I buy?
Choose a fork that reaches mid-chest when standing upright with the tines on the ground. Head width should match your garden: around 7 inches for raised beds, 10–12 inches for general in-ground work.
Is stainless steel better than carbon steel?
For low-maintenance, rust-resistant performance in most gardens, stainless steel is better. For maximum toughness in rocky or heavy clay soil, carbon steel wins. If you garden in a wet climate, stainless steel is usually the smarter investment.
D-handle or T-handle: which is best?
D-handles give better control and are generally more comfortable for most people. T-handles give more leverage for two-handed work and suit taller gardeners who want extra reach. Try both if you can.
Can a digging fork replace a shovel?
No. A fork loosens and lifts, while a shovel scoops and moves. For soil cultivation, bed preparation, and harvesting root crops, the fork is better. You still need a shovel for moving material and digging clean-edged holes.
How often should I sharpen the tines?
Only when you notice increased resistance, usually once or twice a season. Clean the tines, file the inside edge, and remove burrs with a whetstone.
Conclusion
The digging fork is the quiet workhorse of the garden. It preserves soil structure, makes heavy soil manageable, and lifts crops cleanly without damaging them. The right fork, used properly, becomes one of those tools you reach for every single session.
Choose a fork that fits your body, your soil, and the kind of gardening you actually do. Prioritize the tines, socket, and handle comfort. Spend a few minutes cleaning and oiling it after use, and it will serve you for fifteen years or more.
Start with one bed. Loosen it, turn it, lift a few carrots, and feel the difference for yourself. Your back, your soil, and your harvest will all be better for it.