

How To Prepare Soil For Planting Vegetables: Pro Tips 2026
Great vegetables start below the surface. You can buy the best seeds, water on a perfect schedule, and still end up with disappointing harvests if the soil underneath is compacted, imbalanced, or starved of organic matter. The good news? Fixing your soil is straightforward, and the results show up fast — often within a single growing season.
This guide walks through exactly how to prepare soil for planting vegetables, from reading your soil type to adjusting pH to building long-term fertility. No fluff, no guesswork — just practical steps you can apply this weekend. For more on this, see our guide on how to improve lawn soil health.

Testing and amending soil before the first planting gives roots the best possible start.
Image source: wikihow.com
Why Soil Preparation Determines Your Harvest
Healthy soil is a living system, not just dirt. It holds air, water, and nutrients while hosting billions of microbes, fungi, and earthworms that make those nutrients available to plant roots. When soil is compacted or depleted, roots struggle, water pools or runs off, and plants become vulnerable to pests and disease.
Four factors matter most:
- Texture — the ratio of sand, silt, and clay particles determines drainage and nutrient retention
- Structure — how those particles clump together into crumbs that allow air and water movement
- pH — most vegetables thrive between 6.0 and 7.0, where nutrients are most available
- Organic matter — the decomposed plant and animal material that feeds soil life and holds moisture
Before doing anything else, learn to read your soil by touch. Grab a handful of slightly damp soil and squeeze it. If it forms a slick ribbon that holds together, you have clay-heavy soil. If it crumbles and falls through your fingers immediately, it’s sandy. The goal is loose crumbs that hold their shape when squeezed but break apart with a light pinch. For more on this, see our guide on how to improve garden soil naturally.
A quick home test or a laboratory soil test tells you the pH and nutrient levels you’re working with. This single step removes the guesswork and prevents common mistakes like adding lime when you don’t need it or over-fertilizing with phosphorus.
Tools and Supplies: What You Actually Need
You don’t need a shed full of expensive equipment. These basics cover almost every soil preparation scenario:
- Garden fork or broadfork — to loosen soil without destroying its structure
- Steel rake — to level beds and break up surface clods
- Soil test kit or lab test — to learn your starting pH and nutrient levels
- Compost — well-aged, dark, and crumbly; the single most important amendment
- Aged manure or worm castings — for extra nitrogen and microbial life
- Mulch — straw, shredded leaves, or wood chips for paths and bed tops
- Elemental sulfur or lime — only if your soil test shows pH needs adjusting
- Organic fertilizer — balanced NPK to match your specific crop plan
- Wheelbarrow, buckets, and a tarp — for mixing, moving, and covering piles

A garden fork and rake are the two most useful tools for breaking up compacted beds.
Image source: youtube.com
If you’re working with stubborn clay or need to dig planting holes in tough ground, having the right equipment matters more than you’d think. A sturdy digging tool makes the job faster and preserves your back — and good tools last for decades if you maintain them. For more on this, see our guide on how to fix poor garden soil.
Step-by-Step: How To Prepare Soil For Planting Vegetables
Follow this sequence for new beds or when refreshing existing ones. You can scale each step to any garden size.
1. Choose the Right Location
Pick a spot that gets six to eight hours of direct sun daily. Most fruiting vegetables — tomatoes, peppers, squash — need full sun. Leafy greens tolerate a bit more shade but still prefer at least four to six hours.
Check drainage after a heavy rain. Water should soak into the soil within 24 hours. If puddles linger for days, choose a different spot or plan for raised beds.
2. Clear Weeds and Debris
Pull weeds by hand or slice them off at the base with a hoe. Shake soil from the roots back into the bed. Remove rocks, old roots, and trash.
For tough perennial weeds like bindweed or quack grass, solarization works well in warm months. Cover the area with clear plastic for four to six weeks during the hottest part of summer. The heat kills weed seeds and rhizomes near the surface.
If you’re dealing with a large area, a sharp hoe makes quick work of weed clearing.
3. Test Your Soil
Use a home testing kit for a quick pH reading, or send a sample to your local university extension service for a full nutrient analysis. A lab test costs a bit more but gives you exact recommendations for lime, sulfur, and fertilizer amounts.
Most vegetables prefer a pH between 6.0 and 7.0. If your test shows something outside that range, follow the guidance in the fertility section below.
4. Add Organic Matter
Spread one to two inches of finished compost over the entire bed. For severely depleted or sandy soil, go up to three inches in the first year. On a 100-square-foot bed, that’s roughly six to eighteen cubic feet of compost — about half a cubic yard for the deeper application.
Compost improves drainage in clay, increases water retention in sand, and feeds the microbial life that makes nutrients available to roots.
5. Adjust pH Based on Test Results
If your soil test says pH is too low (acidic), apply the recommended amount of lime. Calcitic lime raises pH and adds calcium; dolomitic lime also adds magnesium. Spread it evenly and work it into the top few inches.
If pH is too high (alkaline), use elemental sulfur in small, split doses. Sulfur takes time to react, so apply it several months before planting if possible.
Never add lime or sulfur without a soil test. Applying either blindly can cause more problems than it solves — over-limed soil locks up nutrients and stunts growth.
6. Add Fertilizers Based on Need
Only add fertilizers if your soil test indicates a deficiency. Too many gardeners fertilize by habit, which wastes money and can harm soil biology.
- Low nitrogen: Add feather meal, alfalfa meal, or a balanced organic fertilizer
- Low phosphorus: Use bone meal or rock phosphate
- Low potassium: Apply sulfate of potash, kelp meal, or greensand
Blend rates according to the label instructions and your soil test recommendations. When in doubt, start with less — you can always add more later.
7. Loosen, Don’t Pulverize
Use a garden fork to loosen the soil six to ten inches deep. Push the fork in, lean back slightly to crack the soil, and lift. The goal is to open pores and create space for roots and water — not to flip layers or grind soil into dust.
Over-tilling destroys soil structure and kills beneficial organisms. In practice, I’ve seen rototilled beds turn into hard, crusted pans within a few seasons. A fork does the job without the collateral damage.
8. Mix and Level
Rake the bed to blend compost and amendments into the top four to six inches of soil. Break up large clods and create a smooth, even surface.
For most vegetables, a flat bed works well. In areas with heavy rainfall or poor drainage, raise the bed by pulling soil from the paths into a low mound.
9. Water to Settle
Soak the bed thoroughly after preparation. This settles air pockets, wakes up soil microbes, and gives you a clear picture of how water behaves in the space. If the surface crusts as it dries, add a thin layer of compost or leaf mold.
10. Rest Before Planting
If you used strong amendments like fresh manure or concentrated fertilizers, wait one to two weeks before planting. This allows salts to dissipate and soil biology to stabilize. For beds amended with compost alone, you can plant immediately.

A properly prepared bed has dark, crumbly soil with no standing water or crusted surface.
Image source: gardeningchannel.com
Tailor Soil Prep To Your Soil Type
Not all soils need the same treatment. Here’s how to adapt the basic steps to your specific conditions.
Clay Soils
Clay is nutrient-rich but drains poorly and compacts easily. Your strategy:
- Add two to three inches of compost every season
- Never work clay when wet — it smears and forms brick-like clods
- Use a fork, not a rototiller, to create cracks rather than glue
- Consider raised beds for faster drainage and earlier spring planting
Sandy Soils
Sand drains quickly but holds little water or nutrients. Your strategy:
- Add two to three inches of compost to increase water and nutrient retention
- Mulch heavily to reduce evaporation and keep roots cool
- Use slow-release organic fertilizers, which leach less in sandy conditions
Silt and Loam Soils
Loam is the ideal garden soil — a balanced mix of sand, silt, and clay with good structure. Your strategy:
- Maintain with one to two inches of compost annually
- Keep beds covered with mulch or cover crops to protect soil life
Containers and Raised Beds
Container soil is a different beast. A proven mix by volume:
- 40% quality compost
- 40% topsoil (not garden soil, which compacts in containers)
- 20% coarse material like perlite or pine bark for drainage
Feed containers with a gentle, complete fertilizer and water more frequently than in-ground beds. Container soil dries out faster and nutrients wash through more quickly.
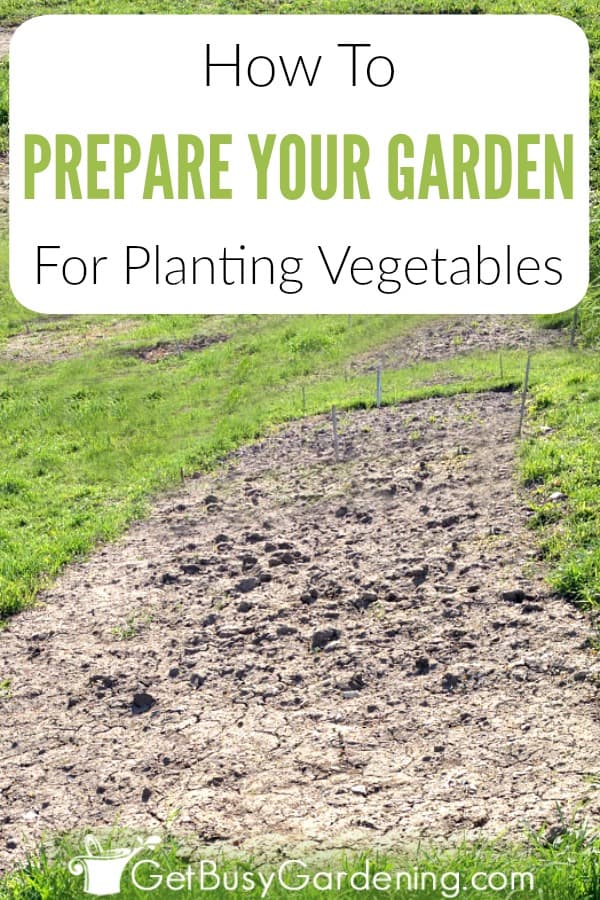
Different soil types need different amendments, but organic matter is the universal foundation.
Image source: getbusygardening.com
A Seasonal Plan for Continuous Soil Improvement
Soil preparation isn’t a one-time event. Spreading the work across the year produces better results with less effort.
Fall
Clear spent crops and add one to two inches of compost. Plant a cover crop like winter rye or crimson clover to protect soil over winter and add organic matter when it’s turned under in spring. Alternatively, sheet-mulch with cardboard and leaves to suppress weeds.
Winter
Let freezing and thawing cycles break up clods naturally. Keep beds covered to prevent erosion and compaction from rain. Avoid walking on wet soil — foot traffic is one of the biggest hidden causes of compacted garden beds.
Early Spring
Chop and drop cover crops before they set seed. Fork to loosen, then rake smooth. Retest soil if it’s been two or more years since your last analysis. Finish prep about two weeks before planting cool-season crops.
Late Spring Through Summer
Top-dress around heavy feeders like tomatoes and corn with a thin layer of compost mid-season. Mulch beds to hold moisture and suppress weeds. If plants look tired, add a light side-dressing of organic fertilizer and water it in.
This cycle keeps soil biology active year-round, which means healthier plants with less synthetic input.

A finished bed in early spring, ready for planting after a winter of cover cropping.
Image source: portlandediblegardens.com
Organic Matter: What to Use, How Much, and What to Avoid
Compost is the heart of soil preparation, but not all organic matter is equal. Here’s what works and what doesn’t.
Reliable Amendments
- Finished plant-based compost — dark, crumbly, with an earthy smell
- Leaf mold — slow to produce but superb for soil structure and water retention
- Aged manure — only if well-composted and weed-free; use modest amounts
- Worm castings — potent in small doses, excellent for seedlings and transplants
- Biochar — add five to ten percent by volume, pre-charged with compost or liquid fertilizer
Application Rates
- New beds: Two to three inches spread across the surface
- Established beds: One inch per season is sufficient in most cases
- Containers: Refresh the top few inches with fresh compost each spring
What to Avoid
- Fresh manure applied near planting time — it can burn roots and introduce pathogens
- Salty composts made from certain food wastes — if leaf tips brown, reduce the rate and water deeply
- Wood chips in the root zone — they tie up nitrogen while decomposing; keep them on paths or as surface mulch only
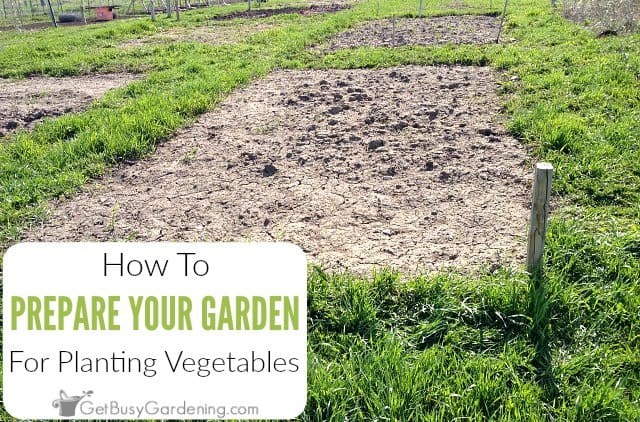
Well-aged compost should be dark, crumbly, and smell earthy — never sour or ammonia-like.
Image source: getbusygardening.com
Fertility and pH Made Simple
Vegetables need three primary nutrients in balance: nitrogen, phosphorus, and potassium — plus trace minerals. Balance matters more than sheer quantity.
Nitrogen (N)
Nitrogen fuels leafy growth. Use feather meal, alfalfa meal, or a balanced organic blend. Apply in small, steady doses rather than one big slug. Too much nitrogen produces lush leaves but weak roots, poor flavor, and increased pest pressure.
Phosphorus (P)
Phosphorus supports root development and flowering. Only add it if your soil test shows low levels. Excess phosphorus can interfere with other nutrient uptake, so don’t add bone meal out of habit.
Potassium (K)
Potassium improves fruit set, disease tolerance, and winter hardiness. Use sulfate of potash, kelp meal, or greensand if test results indicate a deficiency.
Micronutrients
Compost and kelp meal supply most trace minerals. If your soil test flags a specific gap, use a targeted product rather than a broad-spectrum mix.
pH Adjustments
- To raise pH (acidic soil): Use calcitic lime for calcium, or dolomitic lime if you also need magnesium
- To lower pH (alkaline soil): Use elemental sulfur in small, split applications
Always change pH gradually — a full point shift takes months. Retest after each adjustment rather than applying more.
For more detailed guidance on building fertility naturally through compost, cover crops, and organic amendments, this practical breakdown covers the long-term approach.
Soil Life: The Hidden Engine of Fertility
Beneath every healthy vegetable bed is a web of bacteria, fungi, nematodes, and earthworms working to break down organic matter and cycle nutrients. Your job is to feed and protect that life.
How to Support Soil Biology
- Keep soil covered — mulch or living roots protect microbes from heat and drying
- Limit tillage — disturb only as deep as needed, and only when necessary
- Avoid harsh chemicals — strong synthetic fertilizers and pesticides harm beneficial organisms
- Add diverse inputs — different composts, leaf mold, and cover crops build a varied microbe community
- Water deeply but less often — this pulls air into the soil between watering cycles
In practice, earthworm populations multiply dramatically within one season of stopping rototilling and adding leaf mold. Those worms become your tillers, aerating the soil and leaving nutrient-rich castings behind.
Watering and Mulching After Planting
Good soil preparation sets the stage, but how you water and mulch afterward determines whether the benefits stick.
Watering
Water slowly and deeply to reach six to eight inches down. Shallow, frequent watering creates shallow roots that suffer in dry spells. In most soils, one deep watering per week beats several light sprinklings.
Mulching
Apply two to three inches of straw, shredded leaves, or fine bark on the bed surface. Keep a two-inch gap around plant stems to prevent rot. Mulch suppresses weeds, moderates soil temperature, and dramatically reduces evaporation.
During hot spells, increase mulch depth and water in the morning to give plants a full day of moisture before evening cooling.
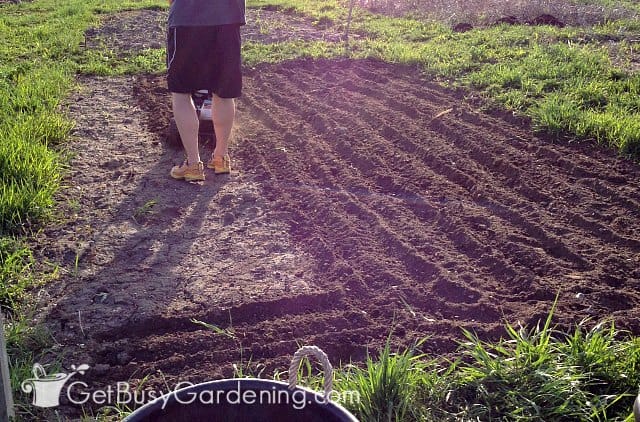
A straw mulch keeps moisture in, weeds down, and soil life undisturbed.
Image source: getbusygardening.com
Troubleshooting Common Soil Problems
Even with careful preparation, problems arise. Here’s how to diagnose and fix the most common issues.
Soil Crusts After Rain
Crusting happens when bare soil dries after heavy rain. Dust the surface with fine compost, add mulch, and water with a soft spray to break the crust without compacting the soil.
Standing Water After Rainfall
Poor drainage causes root rot and stunted growth. Fork channels for surface drainage, add more compost to improve infiltration, and consider moving plants to raised rows or beds.
Yellow Leaves and Slow Growth
This usually signals low nitrogen or cold soil. Side-dress with a gentle nitrogen source like compost or alfalfa meal. If soil is still cold, wait for warmer temperatures before expecting vigorous growth.
Blossom End Rot on Tomatoes
This dark, sunken spot on fruit bottoms comes from uneven moisture and calcium uptake. Keep soil consistently moist, avoid excessive nitrogen, and check that pH is near 6.5.
Poor Seed Germination
If seeds don’t sprout, soil may be too cold, too wet, or too crusty. Wait for warmer temperatures, prepare a fine seedbed with good seed-to-soil contact, and keep the surface moist until germination.
For gardens that double as gathering spaces for pets, dealing with animal waste contamination before planting is essential for food safety.
Frequently Asked Questions
How far in advance should I prepare the soil?
Two to four weeks before planting is ideal for most beds. This gives soil biology time to settle and allows pH or fertilizer amendments to start working.
Can I prepare soil when it’s wet?
Avoid it. Working wet soil creates compaction and smeared layers that restrict root growth. Wait until soil crumbles when squeezed rather than forming a slick ball.
Do I need to till every season?
No. A light fork-loosening and a fresh layer of compost each season is sufficient. Save deep tilling for new, heavily compacted beds only.
What pH is best for vegetables?
Most vegetables thrive between 6.0 and 7.0. Blueberries and some herbs prefer more acidic soil, while brassicas tolerate slightly higher pH.
Is fresh manure safe to use?
Not right before planting. Use only well-aged manure and apply it months before harvest, especially for root and leafy crops that come into direct contact with soil.
How much compost is too much?
More isn’t always better. For established beds, one inch per season is plenty. Excess compost can raise salt levels and create nutrient imbalances.
Should I add sand to clay soil?
No. Adding sand to clay creates a concrete-like hardpan. Use compost and gentle loosening instead — organic matter is the only amendment that reliably improves clay structure.
Conclusion
Soil preparation is the highest-leverage task in vegetable gardening. Test, amend with compost, balance pH, and loosen gently — then keep the soil covered and fed throughout the season. Do this consistently, and your beds will improve every single year.
Start small this week. Pick one bed, run a soil test, and follow the steps above. Track what you add and how your plants respond. Within one season, you’ll see the difference in both the health of your soil and the size of your harvest.
Ready to get your hands dirty? Your vegetables will thank you.


