Use a hose to flush coolant until clear, then refill and bleed.
If you want to learn how to flush a radiator with a garden hose the right way, you’re in the perfect place. I’ve done this job in driveways, shops, and on the side of the road. In this guide, I’ll show you a safe, simple, and thorough process. You’ll see pro tips, real mistakes to avoid, and clear steps that work on most cars and trucks.

Why and when a radiator flush matters
Old coolant loses corrosion protection and heat transfer power. Rust, scale, and silicate gel can clog passages. That raises engine temps and strains the water pump and heater core.
A flush clears debris and restores flow. It also helps prevent overheating and head gasket stress. If you want to know how to flush a radiator with a garden hose, it starts with knowing why you are doing it.
Common signs it is time:
- Temperature gauge runs hot or creeps under load
- Brown or cloudy coolant in the reservoir
- Sludge in the radiator neck
- Weak cabin heat or fluctuating heat

Tools and materials you need
You can do this with basic tools. Gather everything first to keep it clean and safe.
- Garden hose with spray nozzle for controlled flow
- Pliers or nut driver for hose clamps
- Drain pan, 2–3 gallons or larger, for old coolant
- Funnel and measuring jug to refill neatly
- New coolant, premix or full-strength with distilled water
- Radiator flush chemical if the system is very dirty
- Gloves and safety glasses for protection
- Rags or paper towels for spills
- New radiator cap or hose clamps if yours look worn
Tip: If you plan how to flush a radiator with a garden hose, check the hose length and a nearby spigot before you start.
Safety and preparation
Coolant is toxic to people and pets. Prepare your space and protect yourself.
- Work on a cold engine only. Let it cool at least 2–3 hours.
- Park on level ground, set the brake, and chock a wheel.
- Open the hood and find the radiator cap, overflow tank, and drain petcock.
- Identify heater hoses and the thermostat location on your engine.
- Keep pets away and lay absorbent pads if working on a driveway.
If you’re learning how to flush a radiator with a garden hose for the first time, do not rush the cool-down. Pressure plus heat can cause burns.

Step-by-step: how to flush a radiator with a garden hose
Follow these steps in order. Take your time and keep the area tidy.
- Verify the engine is cold. Put on gloves and glasses.
- Remove the radiator cap slowly. If you hear hissing, wait longer.
- Place a drain pan under the radiator. Open the petcock or loosen the lower hose to drain old coolant.
- Close the petcock. Fill the radiator with clean water. Reinstall the cap loosely.
- Start the engine and set the heater to max heat, fan on low. Run 5–10 minutes to circulate. Shut off and let cool.
- Drain again. Catch all the fluid in the pan.
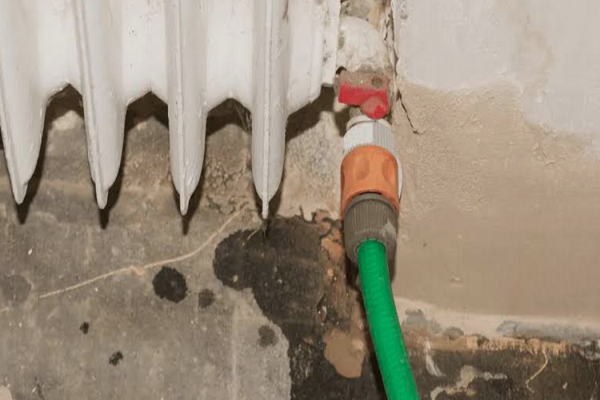
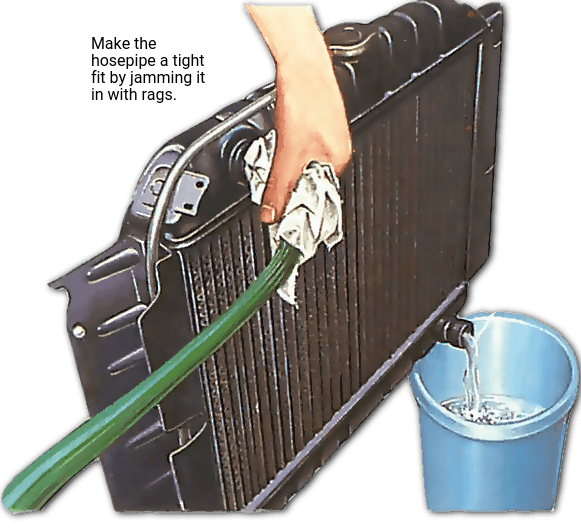
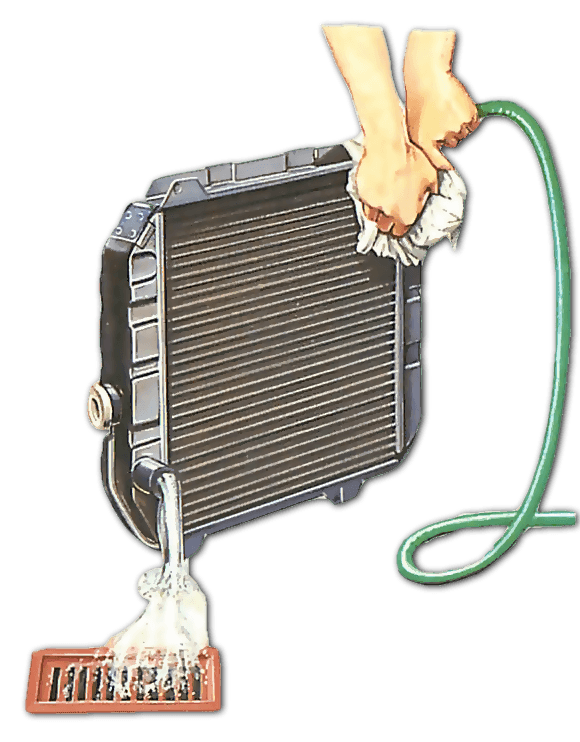
- Connect the garden hose to the radiator fill neck. Remove the cap fully. Use gentle flow at first.
- Flush until clear water exits the drain. Do not blast high pressure; you want steady flow, not force.
- For deeper cleaning, close the drain, add water and a flush chemical per label, run the engine with heat on, cool down, then drain and rinse again.
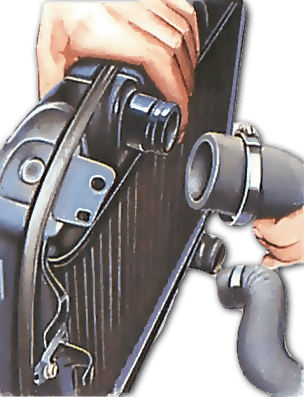
- Optional but effective: Back-flush the heater core. Disconnect the heater inlet hose, aim the hose into the outlet side, and run gentle water until clear. Reconnect and secure clamps.
- Close all drains and reconnect any hoses. Check clamps for snug fit. Do not over-tighten.
- Proceed to refill with the correct coolant mix.
Pro tip from the bay: I learned the hard way that blasting water at full pressure can shift debris and cause a small leak to become a big leak. Keep flow moderate. That keeps control and prevents splash-back while you master how to flush a radiator with a garden hose.
Bleeding air and refilling coolant correctly
Air pockets cause hot spots and poor heat. Refill with care.
- Check your owner’s manual for coolant type and mix. Many modern cars use specific OAT or HOAT formulas.
- If using concentrate, mix with distilled water per spec. Do not guess.
- Fill the radiator to the neck. Fill the overflow tank to the mark.
- If your car has a bleed screw, open it while filling until coolant flows with no bubbles, then close it.
Start the engine with the heater on high. Let it reach operating temp. Watch the coolant level and add as it drops. Squeeze the upper radiator hose to purge air. Once stable and warm, install the cap. Confirm heat works in the cabin. This is a key step in how to flush a radiator with a garden hose and get full performance back.

Troubleshooting after a flush
Most jobs go smooth. If not, use these checks.
- Still overheating: Make sure the thermostat opens. Check for a sticking fan or low coolant level.
- No cabin heat: Air is likely trapped. Bleed the system again with the heater on.
- Leaks: Inspect hose ends, petcock, and the water pump weep hole.
- Dirty coolant again: There may be heavy rust. Repeat a chemical flush or plan a professional power flush.
If you followed how to flush a radiator with a garden hose and problems remain, a clogged radiator core or failing head gasket could be the cause.
Common mistakes to avoid
Even skilled techs can slip. Avoid these pitfalls.
- Opening a hot system and getting burned
- Using tap water in hard-water regions for the final fill instead of distilled
- Mixing coolant types, which can form gel
- Over-tightening clamps and cracking plastic necks
- Skipping heater core back-flush on sludge-heavy systems
These mistakes can undo the gains from how to flush a radiator with a garden hose and cost more later.
How often to flush, and signs it is time
Most vehicles call for a coolant service every 2–5 years, or 30,000–100,000 miles. Always check your owner’s manual.
Watch for:
- Rust color or grit in coolant
- Sweet smell under the hood after drives
- Rising temps in traffic
- Rapid coolant discoloration after a recent change
If these show up, schedule how to flush a radiator with a garden hose sooner rather than later.

Eco-friendly disposal and legal tips
Do not pour coolant down a drain or onto soil. Ethylene glycol tastes sweet to animals and is dangerous.
- Store used coolant in sealed containers
- Take it to a recycling center or auto parts store that accepts it
- Wipe spills with absorbent pads and dispose of them properly
Local rules vary. Check city or county guidelines. Being careful with disposal is part of doing how to flush a radiator with a garden hose the right way.
Cost, time, and skill level
This job takes about 60–120 minutes if parts cooperate. Add time for cool-down.
Typical costs:
- Coolant: 2–3 gallons premix or 1–2 gallons concentrate
- New cap or clamps if needed
- Flush chemical for heavy rust
Skill level is beginner to intermediate. If you can change oil, you can learn how to flush a radiator with a garden hose with patience and care.
Frequently Asked Questions: how to flush a radiator with a garden hose
Can I flush without removing the thermostat?
Yes, in most cases. If flow is poor or the engine runs hot, removing the thermostat can help during the flush, but reinstall it before final refill.
Is a garden hose safe for modern aluminum radiators?
Yes, if you use gentle flow. Avoid high pressure nozzles that can damage fins or seals during how to flush a radiator with a garden hose.
What coolant should I use after the flush?
Use the exact type in your owner’s manual. Mixing types can form sludge, so match the chemistry after how to flush a radiator with a garden hose.
Do I need a chemical flush?
Not always. For heavy rust or oil contamination, a chemical flush can help, followed by thorough rinsing when you do how to flush a radiator with a garden hose.
How do I know all the air is out?
Heater should blow hot at idle and the temp gauge should be stable. Squeezing the upper hose and using bleed screws helps while you complete how to flush a radiator with a garden hose.
Conclusion
You now have a clear, safe process to restore cooling system health. With basic tools, patience, and attention to detail, you can improve heat transfer, protect the engine, and avoid costly repairs. Put this guide to work, and schedule your next service before problems start.
If this helped, try it on your vehicle this weekend, share your results, and subscribe for more simple, proven DIY guides.


