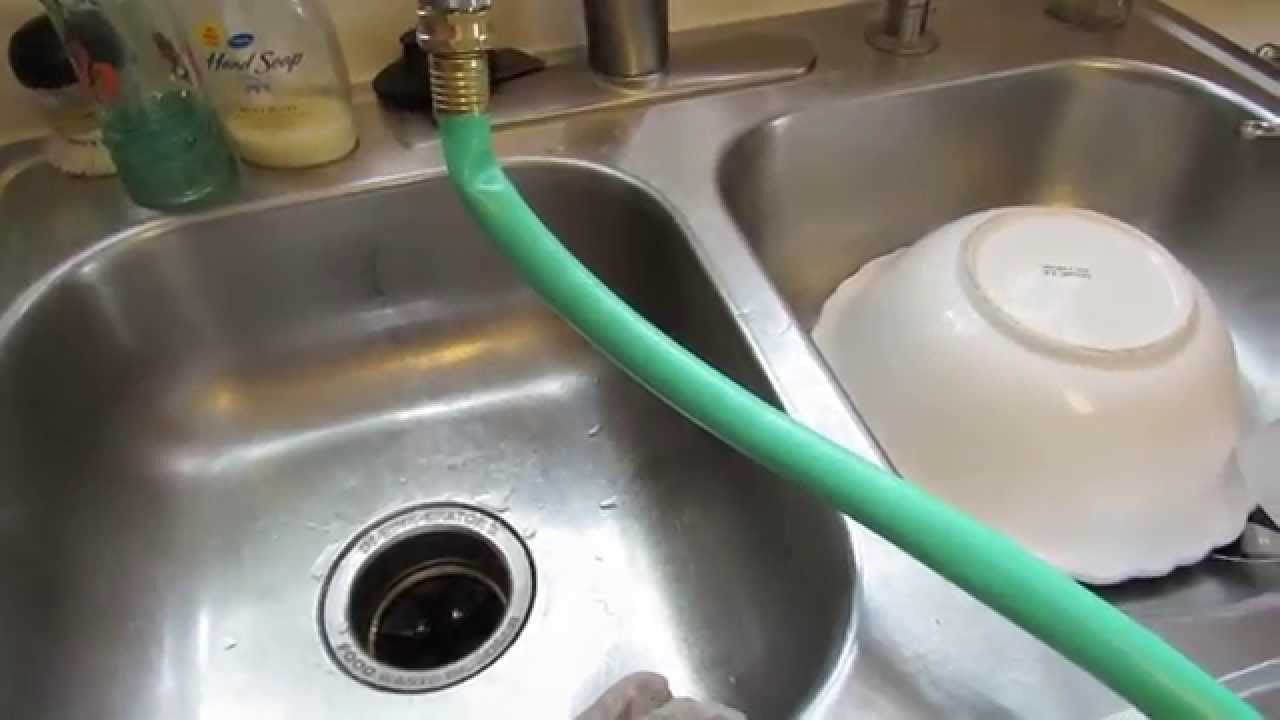
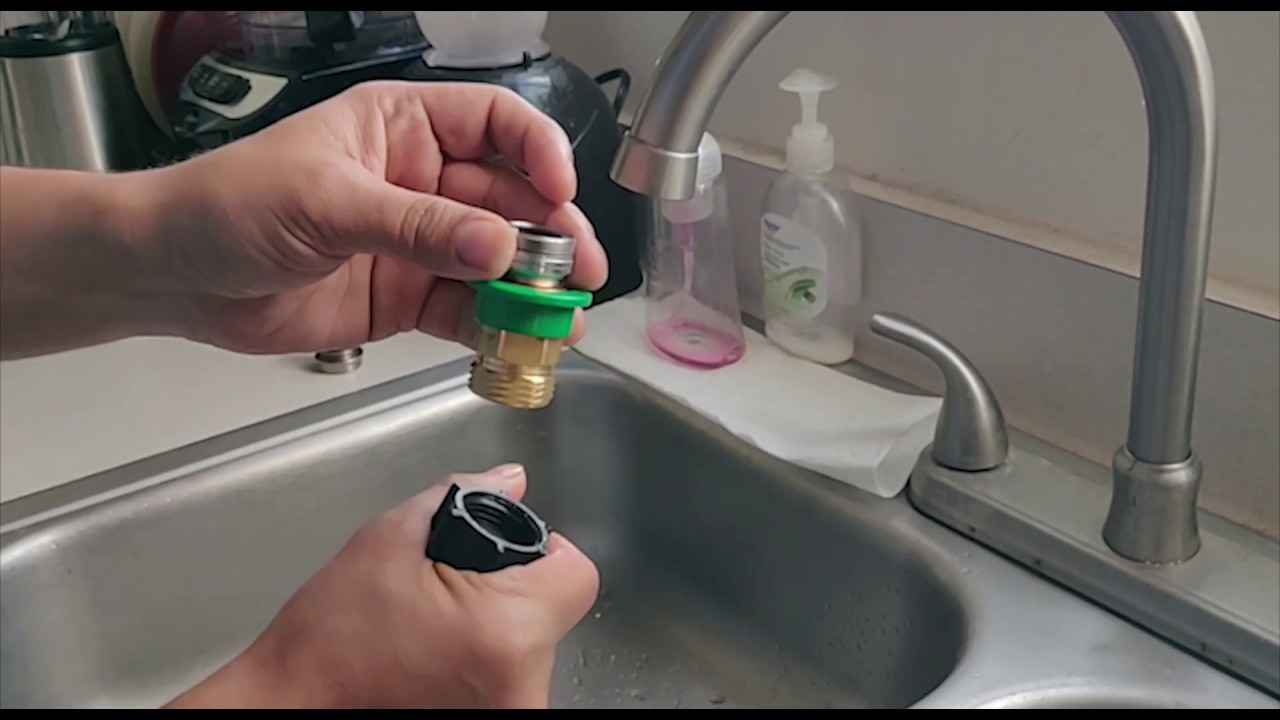
Attach an aerator adapter to your faucet, then screw on a garden hose.
If you want a fast, clean way to run water outside, you can do it. In this guide, I show how to connect a garden hose to the kitchen sink with simple parts and clear steps. I’ve done this many times for clients and in my own home. Follow along, and you will get a secure fit, no leaks, and steady flow.

Tools and Parts You’ll Need
Gather your parts before you start. This will save time and mess.
- Faucet aerator adapter that converts your faucet to 3/4-inch GHT garden hose thread
- Common sizes: 15/16-27 male, 55/64-27 female, M22x1, or M24x1 faucet threads
- Rubber washers for the adapter and the hose
- Optional vacuum breaker or backflow preventer rated for hose use
- Optional quick-connect set for fast on/off
- Adjustable wrench or pliers with smooth jaws, coin for aerators, PTFE tape, towel, and a small bucket
When people ask how to connect a garden hose to the kitchen sink, this list is where I begin. A good adapter with the right washer is the secret to no leaks. Keep a spare washer in a drawer. It pays off.
Find Your Faucet Type and Thread Size
Most kitchen faucets have an aerator at the spout tip. You must remove that aerator to attach an adapter.
- Unscrew the aerator by hand, a coin, or a wrench. Wrap the jaws with tape to avoid scratches.
- Check thread type. If threads are on the outside of the spout, you have male threads. If inside, you have female threads.
- Measure size or read the aerator stamp. Common US sizes are 15/16-27 male and 55/64-27 female. Some modern faucets use M22x1 or M24x1 metric threads.
- Match your adapter to the faucet, then to 3/4-inch GHT on the hose side.
Pull-down sprayer faucets are different. For those, you often need an under-sink diverter kit. In my work, I see many 55/64-27 female spouts. I use a male-to-GHT adapter and get a tight fit every time.

Step-by-Step: How to Connect a Garden Hose to the Kitchen Sink
Use this method when you need a hose on demand. It is simple and clean.
- Clear the sink and place a towel down. Put a bucket under the spout to catch drips.
- Turn off the faucet. If the faucet is hot from use, let it cool.
- Remove the aerator. Keep the parts in a small bag so you do not lose them.
- Confirm the thread size and type. Choose the adapter that matches your faucet.
- Seat a fresh rubber washer in the adapter. This is key to a leak-free seal.
- Hand-tighten the adapter to the spout. Snug it with a wrench a quarter turn if needed. Do not over-tighten.
- If using a vacuum breaker, screw it onto the adapter now. Keep the washer in place.
- Attach the garden hose to the GHT side. Hand-tighten until the washer seats.
- Turn on the cold water slowly. Let the hose fill and purge air.
- Check for leaks. If it drips, tighten by small turns. Replace any worn washer.
- If you will do this often, add a quick-connect set for easy on/off.
If you ask how to connect a garden hose to the kitchen sink with no mess, the washer and gentle torque are the answer. Cross-threading is the main risk. If you feel grit or binding, back off and start again.

How to Ensure No Leaks and Good Flow
A dry connection needs flat faces and good washers. Most leaks happen at the washer or from cross-threads.
- Use fresh washers. Garden hose threads seal on the washer, not the threads.
- Flush debris. Run water for a few seconds before you attach the hose.
- Watch flow rate. Many faucets are 1.5–2.2 GPM. Long hoses drop flow more.
- Keep hose runs short and straight. Kinks and tight loops reduce pressure.
- Open the valve slowly to avoid water hammer. This will help protect the faucet.
People search how to connect a garden hose to the kitchen sink for laundry, plants, and cleaning. Good flow makes all those jobs easier. A clean aerator and a smooth adapter will help.

Safety, Backflow, and Hygiene Tips
A hose can siphon dirty water back into your home. Use a vacuum breaker to stop that risk. Many codes call for this device.
Do not drink from a hose unless it is rated for potable water. Garden hoses can leach chemicals. Use cold water unless your hose and adapter are hot-water rated.
Support the hose. Heavy hoses can stress the spout. Keep the sink clear so the hose does not pull on the faucet. This matters if you do this often.
When you first learn how to connect a garden hose to the kitchen sink, safety is easy to miss. Build the habit now. It will save you later.

Common Mistakes and How to Avoid Them
- Forgetting the washer. This causes 90% of leaks. Always check the washer is seated.
- Over-tightening. This can crack the adapter or chew the threads. Stop once the drip stops.
- Cross-threading. Start by hand and feel for smooth turns.
- Using hot water on a standard hose. The hose can soften and leak. Use cold unless the hose is hot-rated.
- Ignoring backflow. A simple vacuum breaker adds peace of mind.
I learned these the hard way on a rental clean-out job. I rushed, skipped the washer, and soaked the cabinet. Now I slow down and follow these steps every time I show how to connect a garden hose to the kitchen sink.
Alternatives if Your Faucet Won’t Fit
Some faucets will not take a tip adapter. Pull-down sprayers and some designer spouts are hard cases.
- Under-sink diverter tee. Add a 3/8-inch compression tee and a small valve, then a hose-to-GHT adapter. This is neat and strong.
- Portable appliance adapter. Some countertop dishwasher kits include a faucet-to-GHT adapter that may fit your spout.
- Utility sink or laundry faucet. These accept hose threads natively. It is the best long-term fix.
- Outdoor sillcock upgrade. A frost-free hose bib is ideal for yard work.
If you still need guidance on how to connect a garden hose to the kitchen sink in these cases, a diverter kit under the sink is my go-to. It keeps the faucet free and protects the spout.

Maintenance and Care for Your Setup
Keep the parts clean and dry. This helps them last.
- Rinse and dry the adapter after each use. Store it in a small bag with spare washers.
- Replace washers when they flatten or crack. They are cheap and vital.
- Wipe threads with a soft brush. Grit can cause leaks and damage.
- In winter, drain the hose. Water left inside can freeze and split the hose.
If you repeat how to connect a garden hose to the kitchen sink each week, a quick-connect set and fresh washers will save time. It keeps the job simple.

Time, Cost, and When to Call a Pro
Most jobs take 10–20 minutes. Clean-up adds five more. Plan for one store trip if you are unsure of thread size.
- Adapter cost: about $10–$30, more for specialty parts
- Vacuum breaker: about $10–$20
- Quick-connect pair: about $10–$15
Call a pro if the aerator is seized, the spout is damaged, or you have a pull-down sprayer and want a clean under-sink diverter. If you want a permanent fix beyond how to connect a garden hose to the kitchen sink, a utility sink or outdoor hose bib is best.
Frequently Asked Questions of how to connect a garden hose to the kitchen sink
Can I attach a hose to any kitchen faucet?
Many faucets can, but not all. Pull-down sprayer models often need an under-sink diverter instead of a tip adapter.
What adapter size do I need for my faucet?
Most US faucets use 15/16-27 male or 55/64-27 female threads. Some use M22x1 or M24x1; check your aerator or bring it to the store.
Do I need PTFE (Teflon) tape on hose threads?
Hose threads seal with a rubber washer, not tape. Use tape only on tapered pipe threads if your diverter or tee calls for it.
Is hot water safe to run through the hose?
Use cold water unless your hose and adapter are hot-water rated. Hot water can soften standard hoses and cause leaks.
How do I stop leaks at the adapter?
Replace the washer and tighten by hand, then a small wrench turn. If it still leaks, check for cross-threads or damaged threads.
Will this damage my faucet?
Not if you support the hose and avoid over-tightening. Heavy, constant side load can stress a spout, so use a diverter for frequent use.
What if my faucet has a pull-down sprayer?
Use an under-sink diverter tee and a valve that leads to GHT. It is secure, clean, and avoids strain on the spray head.
Conclusion
You can set up a hose at your sink with a simple adapter, good washers, and careful steps. Now you know how to connect a garden hose to the kitchen sink with safe flow and no leaks. Use a vacuum breaker, support the hose, and keep spare washers on hand.
Try the steps today and see how fast the job goes. If this helped, share it, subscribe for more home tips, or leave a comment with your faucet model and questions.