
Digging Garden Tools: Top Picks & Buying Guide 2026
Digging is the most physically demanding job in any garden. Whether you're breaking new ground, planting a tree, or edging a border, the right tool means the difference between a pleasant afternoon and a sore back. The wrong one? It can turn a simple task into a battle with the soil.
After years working in clay, loam, and stony ground, I've learned that brand names matter less than build quality, handle length, and how a tool balances in your hands. This guide covers the essential types, what to look for, how to dig smarter, and how to keep your tools working for years—all with the 2026 season in mind. For more on this, see our guide on digging tools for raised garden beds guide.
Why Your Digging Tools Matter More Than You Think
Your hands and back do the work, but the tool multiplies that effort. A sharp, well-balanced spade cuts through turf like butter. A dull, poorly-designed one bounces off hard ground and jars your wrists. Over a season, that difference adds up to hours of labour and unnecessary strain.
Good digging tools are a long-term investment. Unlike power equipment, hand tools don't have motors or batteries to worry about. Properly maintained, a quality spade or fork can serve for decades. If you're also maintaining powered equipment like a lawnmower, you'll appreciate the simplicity of a well-made hand tool. For more on this, see our guide on garden tools digging fork.
The Complete Guide to Digging Tool Types
Every digging tool has a specific job. Using a shovel to edge a border or a spade to move mulch is like using a screwdriver as a chisel—it works, but poorly. Here's what each tool does best.
Spade
Best for: Edging beds, cutting sod, digging square planting holes, and transplanting.
The spade has a flat, straight blade. This design makes it a precision tool rather than a bulk-moving one. You can stand on the treads, drive it straight down, and make a clean vertical cut. That's essential for crisp lawn edges and neat trenches.
A common mistake is using a spade to dig large planting holes or move soil. It works, but it's slow. Reserve the spade for jobs that need a straight edge.
Shovel
Best for: Moving loose soil, compost, mulch, and gravel; digging round holes for plants.
The shovel's curved blade is essentially a scoop. It lifts and carries material efficiently. You'll want a round-point shovel for general digging and a square-point version for moving loose material across flat surfaces.
Quick tip: When digging in hard soil, let the shovel's weight do the work. Push the blade into the ground using your foot, then pull back on the handle to lever the soil loose.
Garden Fork
Best for: Loosening compacted soil, breaking up clods, and lifting root vegetables like potatoes.
The fork has four flat or slightly curved tines. It's gentler than a spade because the tines slip between soil particles rather than slicing through them. This makes it invaluable in clay soil, where a spade can quickly become stuck.
A garden fork is also your best friend when soil needs aeration. Rock the fork back and forth to loosen the ground without inverting the soil layers—a key technique for preserving soil life.
Trowel
Best for: Planting seedlings, transplanting small plants, weeding, and working in containers.
The trowel is your precision hand tool. Look for one with a comfortable handle and a blade that doesn't flex under pressure. Sturdy construction matters here—cheap trowels bend and break at the handle joint more often than you'd think.
For proper technique, avoid gripping the trowel like a dagger. Instead, hold it with your palm over the top of the handle and your index finger pointing down the blade. This gives you more control and reduces wrist strain. A secure grip is a small thing that pays off over a long planting session.
Mattock or Pick
Best for: Breaking up hardpan, cutting through roots, and working in stony ground.
When a shovel bounces off the ground, it's time for a mattock. This heavy tool has a head with an axe-like blade on one side and a pick or chisel on the other. You swing it rather than push it, letting the weight of the head do the work.
A mattock is an aggressive tool. Use it to break up the soil first, then switch back to a shovel to remove the loosened material. Trying to dig a whole bed with a mattock will exhaust you quickly.
Post Hole Digger
Best for: Digging narrow, deep holes for fence posts, poles, and stakes.
Post hole diggers come in two main types: the classic clamshell design and the newer auger style. The clamshell requires you to jab, twist, and pull. An auger, which attaches to a power drill, does the hard work for you—but only works well in soil that's free of major rocks and roots.
Bulb Planter and Soil Auger
Best for: Planting bulbs and small transplants quickly and uniformly.
Bulb planters are essentially elongated trowels or hollow cylinders that extract a plug of soil. A soil auger attachment for a drill is faster and makes a clean, uniform hole. If you're planting dozens of bulbs every autumn, an auger is worth the investment. Check depth markings on the tool to ensure consistent planting depth.
Trenching Shovel
Best for: Digging narrow trenches for irrigation lines, electrical cables, and drainage.
The trenching shovel has a long, narrow blade—sometimes called a "trench spade" or "Irish spade." It allows you to cut a clean-sided trench of precise width. Work in stages, removing soil in thin layers, to keep the walls tidy.
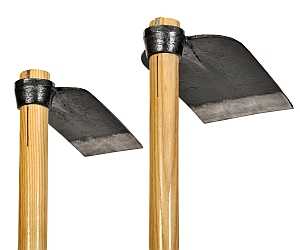
Grub Hoe
Best for: Breaking up hard ground, weeding large areas, and shaping planting rows.
A grub hoe has a wide, flat blade set at a right angle to the handle. You swing it in a chopping motion to slice just below the soil surface, cutting weeds at the root. It's an efficient tool for clearing new beds or maintaining paths.
Bulb Planter or Auger
Best for: Planting bulbs and small transplants.
Bulb planters are essentially long trowels with depth marks, while augers attach to a power drill for faster work. Both create uniform holes without the back strain of repeated bending. For mass plantings, an auger with a powered drill is a game-changer.
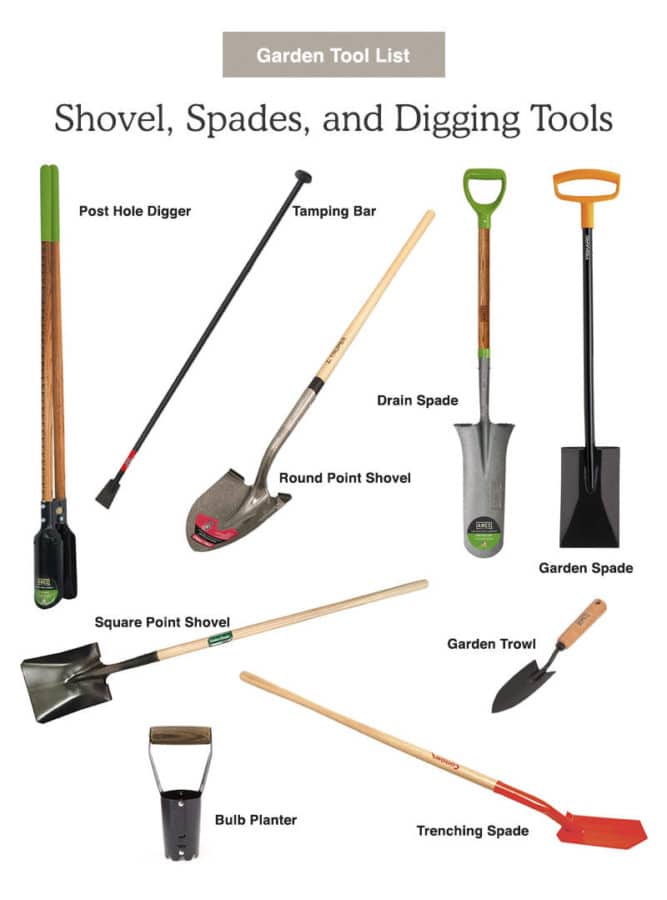
A visual inventory of common digging tools, showing the range of blade shapes and handle lengths available.
Source: propheticimagination.org
How to Choose the Right Digging Tools: A Practical Buying Guide
With so many tools on the market, how do you separate quality from gimmickry? Focus on the following physical characteristics—they're what matter in real use.
Build Quality First
Look for forged steel heads. Forged steel is heated and shaped in one piece, which aligns the metal's grain and makes it much stronger than stamped steel. Cheaper tools are often stamped from sheet metal and can bend or crack under heavy use in dense soil. This is the single most important quality marker to check.
Check the blade thickness. A good digging blade is at least 2-3mm thick at the cutting edge. Thinner blades are lighter but more prone to bending. In hard, stony soil, you want the strength of a thicker blade.
Handle Materials and Construction
Wood handles (ash or hickory) are classic for a reason. They absorb shock well and feel warm in the hand. Ash is lighter and more flexible; hickory is heavier and denser. Both will last for years if you oil them once or twice a season with linseed oil.
Fiberglass handles are the modern alternative. They're virtually weatherproof, won't splinter, and are extremely strong. They do transmit more vibration to your hands than wood, which is noticeable in prolonged digging sessions. They're an excellent choice if you leave tools outside or store them in a damp shed.
Steel handles are the toughest but least comfortable. They're heavy and transmit cold and vibration efficiently. They're best reserved for tools that see heavy commercial use, not the home garden.
Handle Length
The golden rule: stand tall with the tool in front of you. Your hands should grip the handle with your elbows slightly bent, and you should be able to place the blade flat on the ground without stooping. If you're bending, the handle is too short.
Longer handles give more leverage. If you have back problems, opt for a longer handle—the extra leverage means you can let the tool's weight do more of the work.
Socket and Ferrule
The socket is where the blade attaches to the handle. Look for a deep socket (meaning the handle goes well into it) that is riveted or bolted. A fully-gripped socket goes all the way through the head and is secured with a rivet—this is the strongest construction and worth paying extra for. Wobbly or shallow sockets are a sign of a tool that will fail.
Weight and Balance
Heavier heads bite deeper but tire you faster. The right tool should feel neutral when you hold it at the grip—neither head-heavy nor handle-heavy. If you can, lift the tool before buying. Feel how it balances at the end of the handle, then test the motion of a digging stroke. A well-balanced tool will move smoothly through the air.
Foot Treads
Wide foot treads protect your boots and spread the force of your weight across the blade. Look for treads that are deep enough to grip your boot sole. On spades and shovels, this is a critical comfort feature.

A grub hoe's wide, sharp blade makes short work of weeding newly cleared beds.
Source: easydigging.com
Digging Techniques for Different Soils: Work Smarter
Tools are only half the equation. The correct technique is what separates effortless digging from exhausting work.
Soil Moisture is Everything
Dig when the soil is moist but not wet—it should feel like a wrung-out sponge. Wet soil clings and clumps. Dry soil is rock-hard and resists your blade.
Test: Squeeze a handful of soil. If it forms a ball that holds its shape but crumbles easily when you poke it, it's perfect. If it forms a sticky, shiny mass, it's too wet. If it won't hold together at all, it's too dry.
Master The Basic Digging Stance
- Stand with your feet shoulder-width apart and knees slightly bent.
- Position the tool vertically, blade flat on the soil.
- Push the blade into the ground using your foot, not your arms.
- Pull back on the handle to lever the soil loose, keeping your back straight.
- Turn your whole body to deposit the soil—don't twist at the waist.
Digging in Recovery
Wet, compacted soil in spring needs a different approach. Use a garden fork to loosen the top few inches first. This reduces the physical effort required by your spade or shovel and protects your spine from jarring impacts.
Double Digging for New Beds
- Mark out the bed. Use string lines for straight edges.
- Remove the top layer of soil with a spade, setting it aside.
- Loosen the second layer with a garden fork, working compost through it.
- Replace the top layer and level the bed.
This technique aerates deep soil and boosts root depth, but it's labour-intensive. If the soil is in decent health, skip the double digging—it disturbs soil structure and the beneficial organisms within it. Instead, loosen the top few inches with a fork and add organic matter on top.
Slicing Sod Cleanly
Score the shape you need with a sharp spade, cutting through the roots cleanly. Then, work the spade underneath the sod at a shallow angle, lifting thin sheets of turf. Stack them upside down in a corner to compost.
Managing Roots and Rocks
Don't try to cut through thick roots with a shovel—you'll dull the blade and strain your back. Switch to a mattock or a fork. Loosen the root first, then lift it out with a shovel or your hands.
Trenching for Irrigation
Run a string line to mark the trench edge. Use a trenching shovel and work in thin layers, keeping the spoil on one side for easy backfilling. This keeps the trench width precise and tidy.
Working in Cold or Heat
In cold weather, let the morning sun soften the top inch of frozen soil before digging. In summer heat, work early in the day and take regular breaks. Digging is repetitive, high-effort work—it's not the time to push yourself.
Let the Tool Do the Work
The most common beginner mistake is trying to force the tool into the ground with arm strength alone. Let gravity and the weight of the tool do the initial work. Your foot provides the driving force; your arms manage direction and leverage.
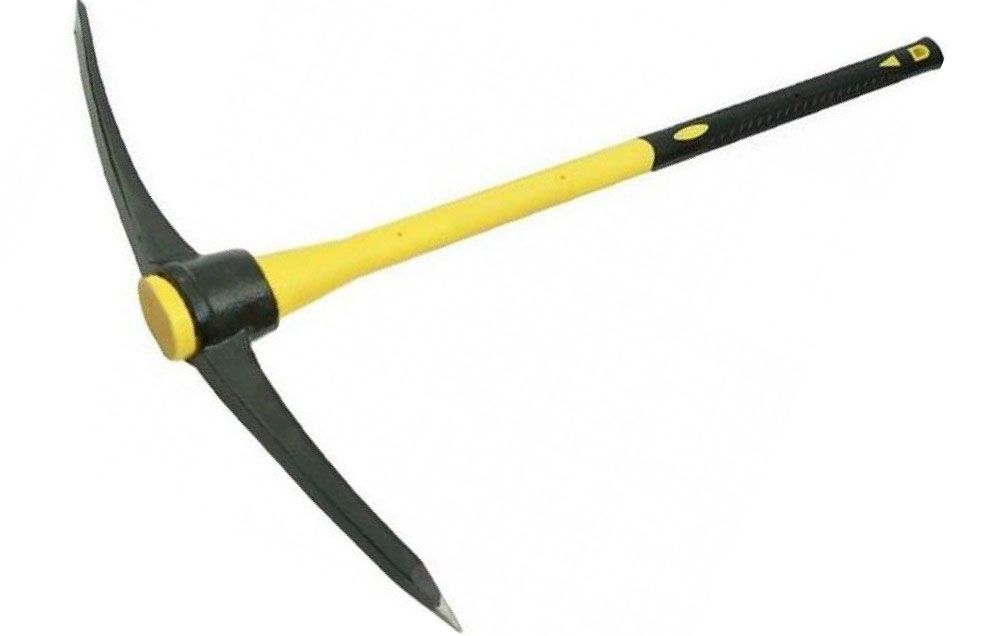
Heavy tools like the pickaxe are essential for breaking up compacted or stony ground.
Source: gilgharda.com
Tool-Specific Best Practices
Spade
Use one foot to drive the blade, then lever with straight arms. Keep the blade sharp—a sharp spade slices roots cleanly, reducing the effort needed dramatically.
Shovel
- Round-point: Use for breaking ground and general digging.
- Square-point: Use for scooping and moving loose material on flat surfaces.
Load only what you can lift without twisting. Move your feet to face the direction of the throw—never throw soil over your shoulder, as this torques your spine.
Garden Fork
Rock the fork back and forth to loosen soil—don't try to pry up big clods. In clay soil, open the tines slightly as you lift to let soil fall through.
Trowel
Use the depth marks on the blade for consistent planting. For stubborn soil, use a rocking motion to widen the hole rather than forcing the blade deeper.
Mattock
Let the tool's weight do the work. Swing from your shoulders with short, controlled arcs. Keep your hands spread apart on the handle for balance and control. Never swing when someone is standing nearby.
Post Hole Digger
Twist the tool as you push down to bore into the soil, then close the jaws to grip the soil and lift. Work in stages to keep the hole walls clean and prevent collapse. If the soil is hard and dry, water it lightly the day before.
Bulb Planter or Auger
Check the depth marking for each bulb type. For a drill auger, use low speed and keep the drill perpendicular to the ground. Work in rocks-free soil to protect the drill and the bit.
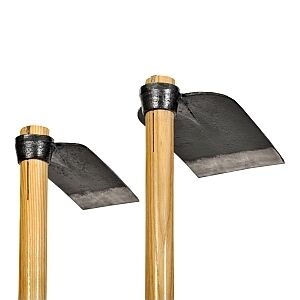
Grub hoes are ideal for breaking up the top layer of soil and shaping planting rows.
Source: easydigging.com
Care, Maintenance, and Sharpening
Well-maintained tools dig faster, last longer, and are safer to use. A few minutes of care after each session pays back for years.
Cleaning
Knock off soil with a wire brush or scraper after every use. Rinse with water Only if needed—excess moisture can promote rust. Dry thoroughly before storage.
Sharpening
A sharp spade or trowel slides into soil with considerably less effort than a dull one. Use a flat file or sharpening stone to work the bevel edge, pushing in one direction along the blade. A few strokes every couple of weeks during the digging season is enough.
Important: Aim for a sharp but not razor edge. A fine edge will chip in hard or stony soil. A slightly blunter edge is more durable. Imagine sharpening a pencil to a usable tip, not a surgical scalpel.
Rust Control
Wipe metal parts with a light coat of linseed oil or machine oil after cleaning. A simple and effective technique is to fill a bucket with sand mixed with old engine oil. Plunge the blade in a few times to clean and coat it in one motion.
Handle Care
Sand down any rough spots on wooden handles. Treat with boiled linseed oil on a dry day and allow to soak in. This prevents the wood from drying out and cracking. Inspect handles regularly for cracks or splinters—a broken handle mid-swing is dangerous.
Storage
Hang tools off the ground to prevent moisture wicking up the handles. Store in a shed, garage, or covered area away from direct sun and rain. A simple wall rack costs little and protects your investment.
Safety Basics
- Wear sturdy boots with enclosed toes.
- Wear gloves for grip and protection from blisters.
- Consider safety glasses when digging near roots or stony ground.
- Step on the treads, never on the blade edge.
- Always lift with your legs, keeping your back straight.
Research on gardening ergonomics consistently shows that tool design and maintenance directly influence injury rates and working efficiency. Keep your tools in good condition and pay attention to body positioning.

A clean, oiled blade is the mark of a properly maintained tool.
Source: ebay.com
Budget vs. Premium: A Smart Buying Order
You don't need a $500 wall of tools to start gardening. Build a working core set first, then add tools based on the specific jobs that actually arise in your garden.
Your Starter Kit
| Tool | Why It Comes First |
|---|---|
| Spade | Edging, sod cutting, clean planting holes |
| Round-point shovel | General digging and moving soil |
| Garden fork | Loosening soil, aeration, lifting roots |
| Trowel | Small planting holes and container work |
This four-tool kit covers 80% of home garden digging jobs and is inexpensive to assemble.
Second-Tier Additions
- Mattock: For hardpan, rock, and roots.
- Trenching shovel: For any irrigation or drainage work.
- Post hole digger: If you're installing fencing.
Nice-to-Have Upgrades
- Bulb planter or auger: For mass bulb planting.
- Long-handled trowel: For standing-height planting in beds.
- Ergonomic "easy-dig" tools: With angled handles that reduce back strain. They're a genuine improvement if you have joint or back issues.
When to Spend for Premium
Invest in high-quality forged steel when:
- You dig on a weekly basis.
- You have heavy, clay, or rocky soil.
- You plan to use the tool for a decade or more.
For light, occasional use in good soil, a mid-range tool from major brands will suffice. Always check the warranty and whether replacement handles are available separately. A tool with a solid warranty is an investment, not just a purchase.

A comprehensive digging tool collection, including both essential and specialty pieces.
Source: amazon.ae
Sustainable and Ergonomic Choices
Good tools benefit you and the planet.
Materials with a Conscience
- Forged steel: Lasts for decades, reducing waste.
- FSC-certified wood handles: Sourced from responsibly managed forests.
- Recycled materials: Some manufacturers now use recycled steel and plastics in tool components.
Ergonomic Innovations
- D-handles and padded grips: Reduce wrist strain and improve grip.
- Angled tool heads: Improve wrist alignment and reduce back strain.
- Longer handles: Prevent stooping and reduce the force needed for leverage.
A well-designed tool can reduce joint strain. If you have arthritis or reduced grip strength, tools with ergonomic handles are a genuine, life-changing upgrade.
Work Smarter for Your Soil's Sake
- Plan tasks to minimize trips and digging time.
- Mulch and compost are the best soil-improvement tools you'll ever own. Healthy, well-structured soil requires far less effort to dig.
- Consider no-dig gardening for some beds. A fork to aerate and a layer of compost on top builds healthy soil without deep cultivation, preserving the soil food web and dramatically reducing the labour involved.
If you're working to improve deep soil health, you may also want to address your lawn's overall condition. A healthy soil foundation benefits everything growing in it.
Real-World Lessons and Field Tips
Every gardener has learned a few things the hard way. Here are the tips that have saved me time, effort, and money.
- If the shovel stops, switch tools. Don't force it. A fork to loosen or a mattock to break up usually works faster than brute force.
- Keep a small file in the shed. A two-minute touch-up turns a dull spade back into a cutter. This constant, small maintenance is more effective than occasional major sharpening.
- Mark depths on handles with tape. Use different coloured tape for different depths. This speeds up uniform planting and eliminates guesswork.
- Water stubborn clay the night before. In the morning, digging feels two grades easier. This simple trick is far more effective than trying to force a dry clay pan.
- Rotate tasks. Dig for ten minutes, then haul or weed for ten. This lets your muscles recover and keeps you productive longer, and it's far easier on your joints.
These habits make your tools work with you, not against you.
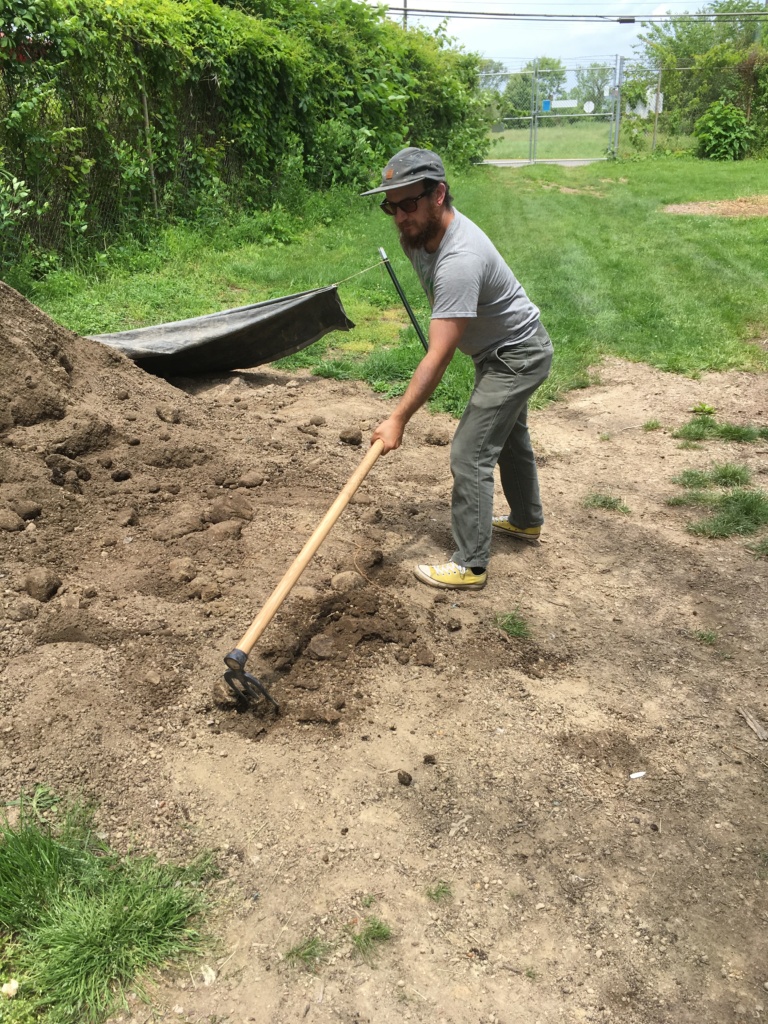
An easy-dig tool with an angled handle demonstrating ergonomic garden design.
Source: growpittsburgh.org
Frequently Asked Questions
What is the difference between a spade and a shovel?
A spade has a flat, straight blade designed for cutting and edging. A shovel has a curved blade designed for scooping and moving material. Many people use them interchangeably, but you'll get much better results using the right tool for each job.
Which digging garden tools should a beginner buy first?
Start with a spade, a round-point shovel, a garden fork, and a trowel. These four tools cover the vast majority of home garden digging jobs without breaking the bank.
How do I sharpen digging garden tools safely?
Secure the tool in a bench vice, then use a flat file to push the bevel in one direction. Always file away from your body. Aim for a smooth, sharp edge—not razor sharp, as that will chip in stony soil.
What length handle is best for me?
Choose a handle length that allows you to stand tall with a slight bend in your elbows. If you're bending over significantly to grip, the handle is too short. Taller users generally benefit from longer handles for added leverage.
How do I dig in hard clay without burning out?
Work when the soil is slightly moist, and use a garden fork or mattock to break up the ground first. Then use a shovel to scoop out the loosened material. Watering hard clay the night before also makes digging significantly easier.
Are fiberglass handles better than wood?
Fiberglass is more weather-resistant and durable, while wood absorbs shock better and is easier to repair or replace. There's no universal winner—it depends on your climate and preferences. If there's a chance your tools will stay outside, choose fiberglass.
Can I use a drill auger for planting?
Yes. A soil auger attached to a cordless drill makes fast, uniform holes for bulbs and small plants. Use a low speed setting, and be mindful of rocks, which can damage both the bit and the drill. This requires a battery-powered drill in good working order. If you're wondering about battery life on your equipment, modern tools have come a long way in recent years.
What is the best way to store digging tools?
Hang them off the floor in a dry, covered area. This prevents moisture from collecting on the metal and protects the handles from cracking. Before storing, clean and dry the tools, and give wooden handles a coat of linseed oil a few times a season.
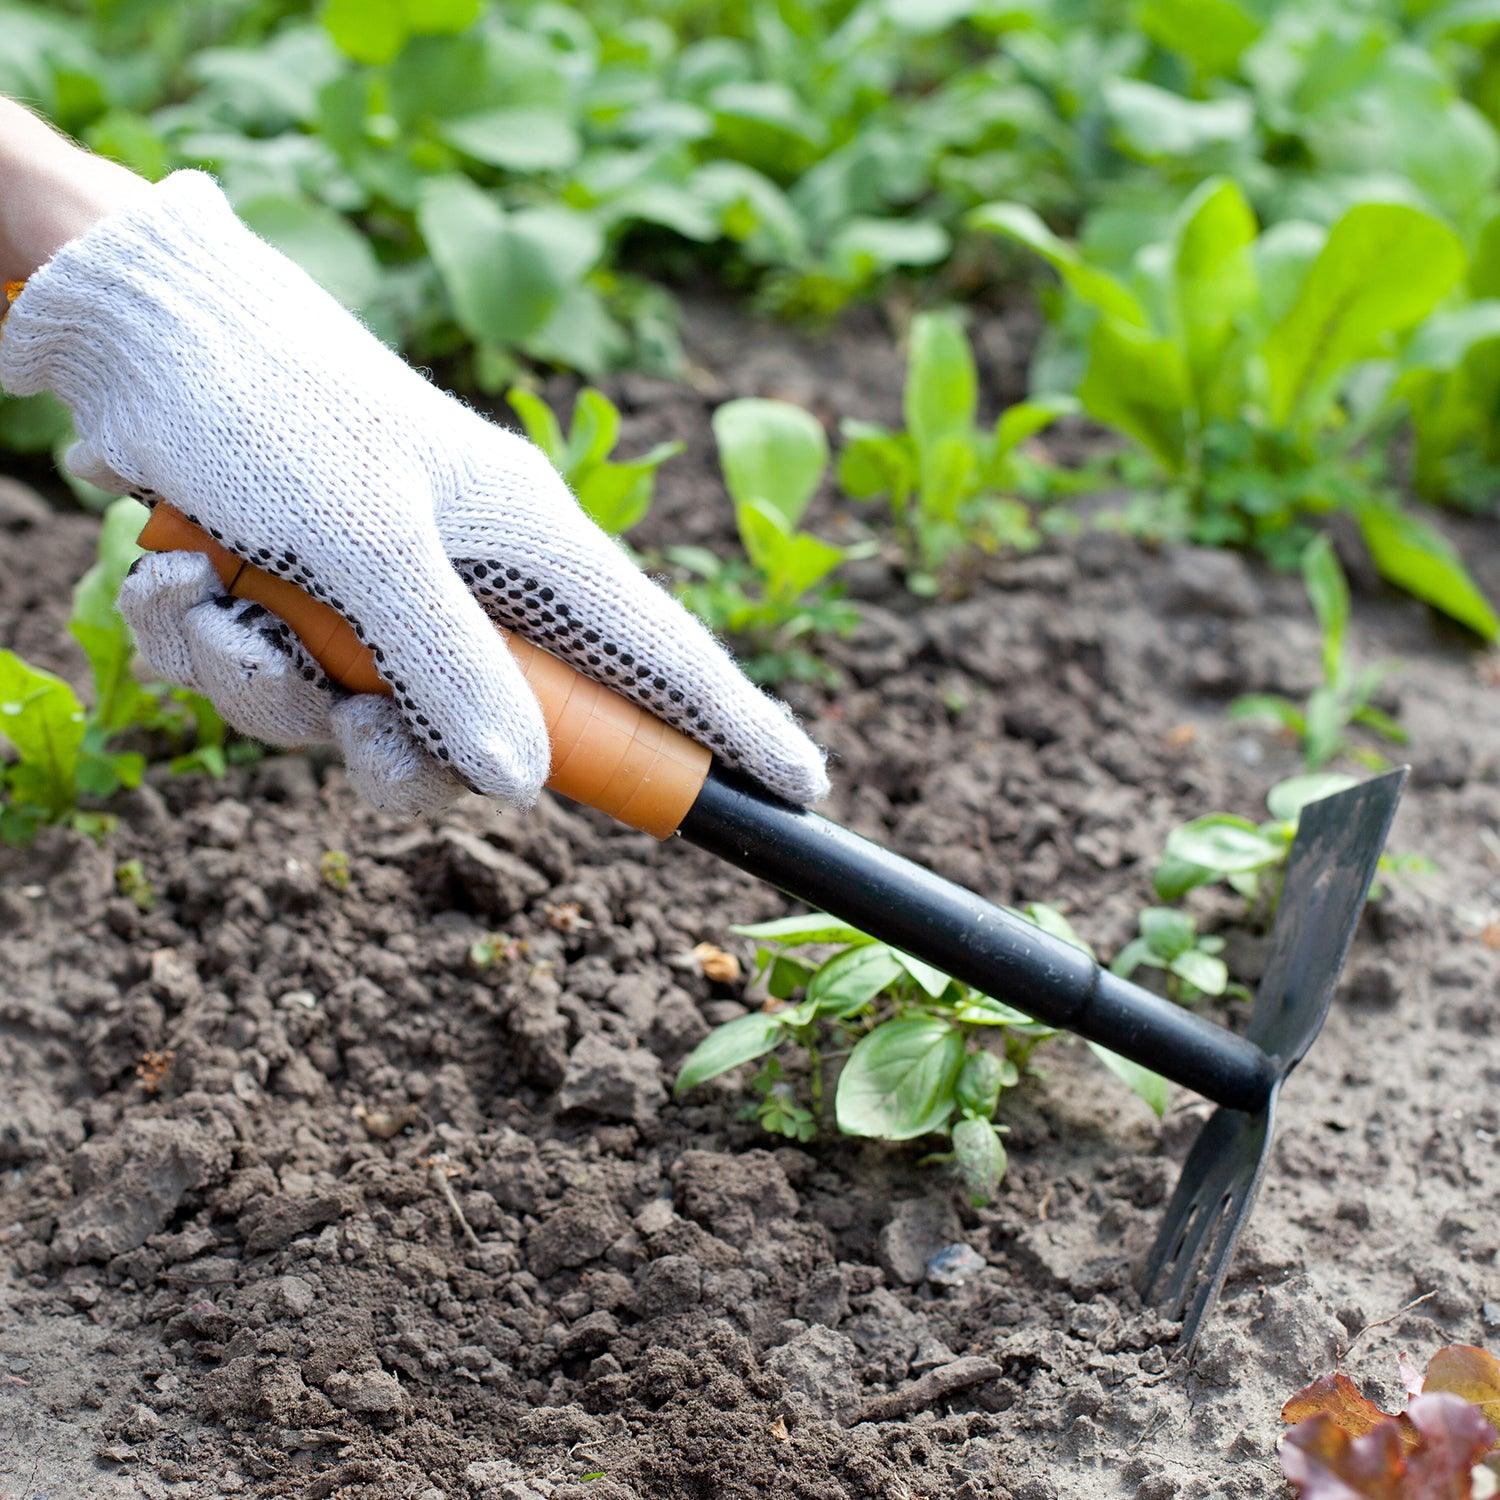
A collection of hand tools showing different handle types and blade shapes for various garden tasks.
Source: rogersgardens.com
Conclusion
The right digging garden tools turn a dreaded chore into productive, satisfying work. Match each tool to the job, keep the edges sharp, and use proper body mechanics. The initial investment in quality—whether in forged steel, comfortable handles, or a soil auger—pays off with every session.
Start with a solid core kit: a spade, a round-point shovel, a garden fork, and a good trowel. Add a mattock or trenching shovel when a project demands it. And get into the habit of cleaning and storing your tools properly; they'll last longer and work better for you.
Your back and your garden will both thank you. If you're ready to build your kit, focus on the tools you'll actually use. A smaller set of quality tools beats a wall of cheap ones every time. For more guidance on keeping your garden in top shape, consider how healthy soil and a few good habits can reduce how much digging you need to do year after year.


