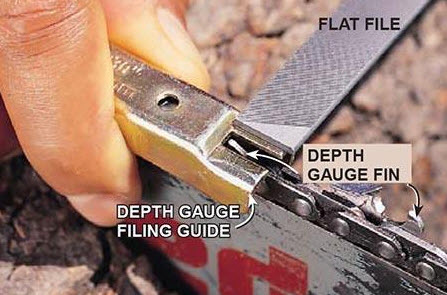
Place the gauge on each raker, file until it’s flush, then repeat evenly.
If you run a saw, you need sharp cutters and correct rakers. This guide shows how to use a chainsaw depth gauge with clear steps, pro tips, and safety notes. I have set thousands of rakers in the field and in the shop, and I will help you cut faster and safer. Read on to master how to use a chainsaw depth gauge the right way.

Understanding What a Depth Gauge (Raker) Does
The depth gauge, also called the raker, sits in front of each cutter. It controls how deep the cutter bites into the wood. If the raker is too high, the saw makes dust and cuts slow. If it is too low, the saw grabs, chatters, and can kick back.
Most standard chains run well at about 0.025 inch. Softwood can handle a bit lower, and hard, frozen wood often needs a bit higher. Always check your chain maker’s spec for exact numbers.
When you learn how to use a chainsaw depth gauge, you tune bite depth for speed and control. Small changes make a big feel at the bar. Treat this step as precision work, not guesswork.

Tools You Need
You do not need much to do this well. A simple kit beats guesswork every time.
- Depth gauge tool that fits your chain pitch
- Flat file in good shape, usually 6 inches
- Round file and guide for sharpening cutters
- Stump vise or bench vise to hold the bar
- Work gloves and eye protection
- Marker to track where you start
If you are learning how to use a chainsaw depth gauge for the first time, keep the setup simple. A stable saw and a clean chain help you get it right.
Safety First
A chainsaw can bite even when the engine is off. Respect the tool at all times.
- Wear gloves and eye protection.
- Engage the chain brake. Unplug or remove the spark plug boot if you can.
- Clamp the bar in a vise. Keep the chain snug but able to move by hand.
- File away from your body and keep your other hand clear.
Safety is part of how to use a chainsaw depth gauge well. Slow is smooth, and smooth is fast.

Step-by-Step: How to Use a Chainsaw Depth Gauge
This is the clean process I teach new techs in the shop. Follow each step and stay consistent around the loop.
- Clean and inspect the chain. Brush off oil and chips. Check for cracks, blueing, or missing parts. Do not file a damaged chain.
- Sharpen the cutters first. Depth gauge work comes after cutter sharpening so both stay in balance.
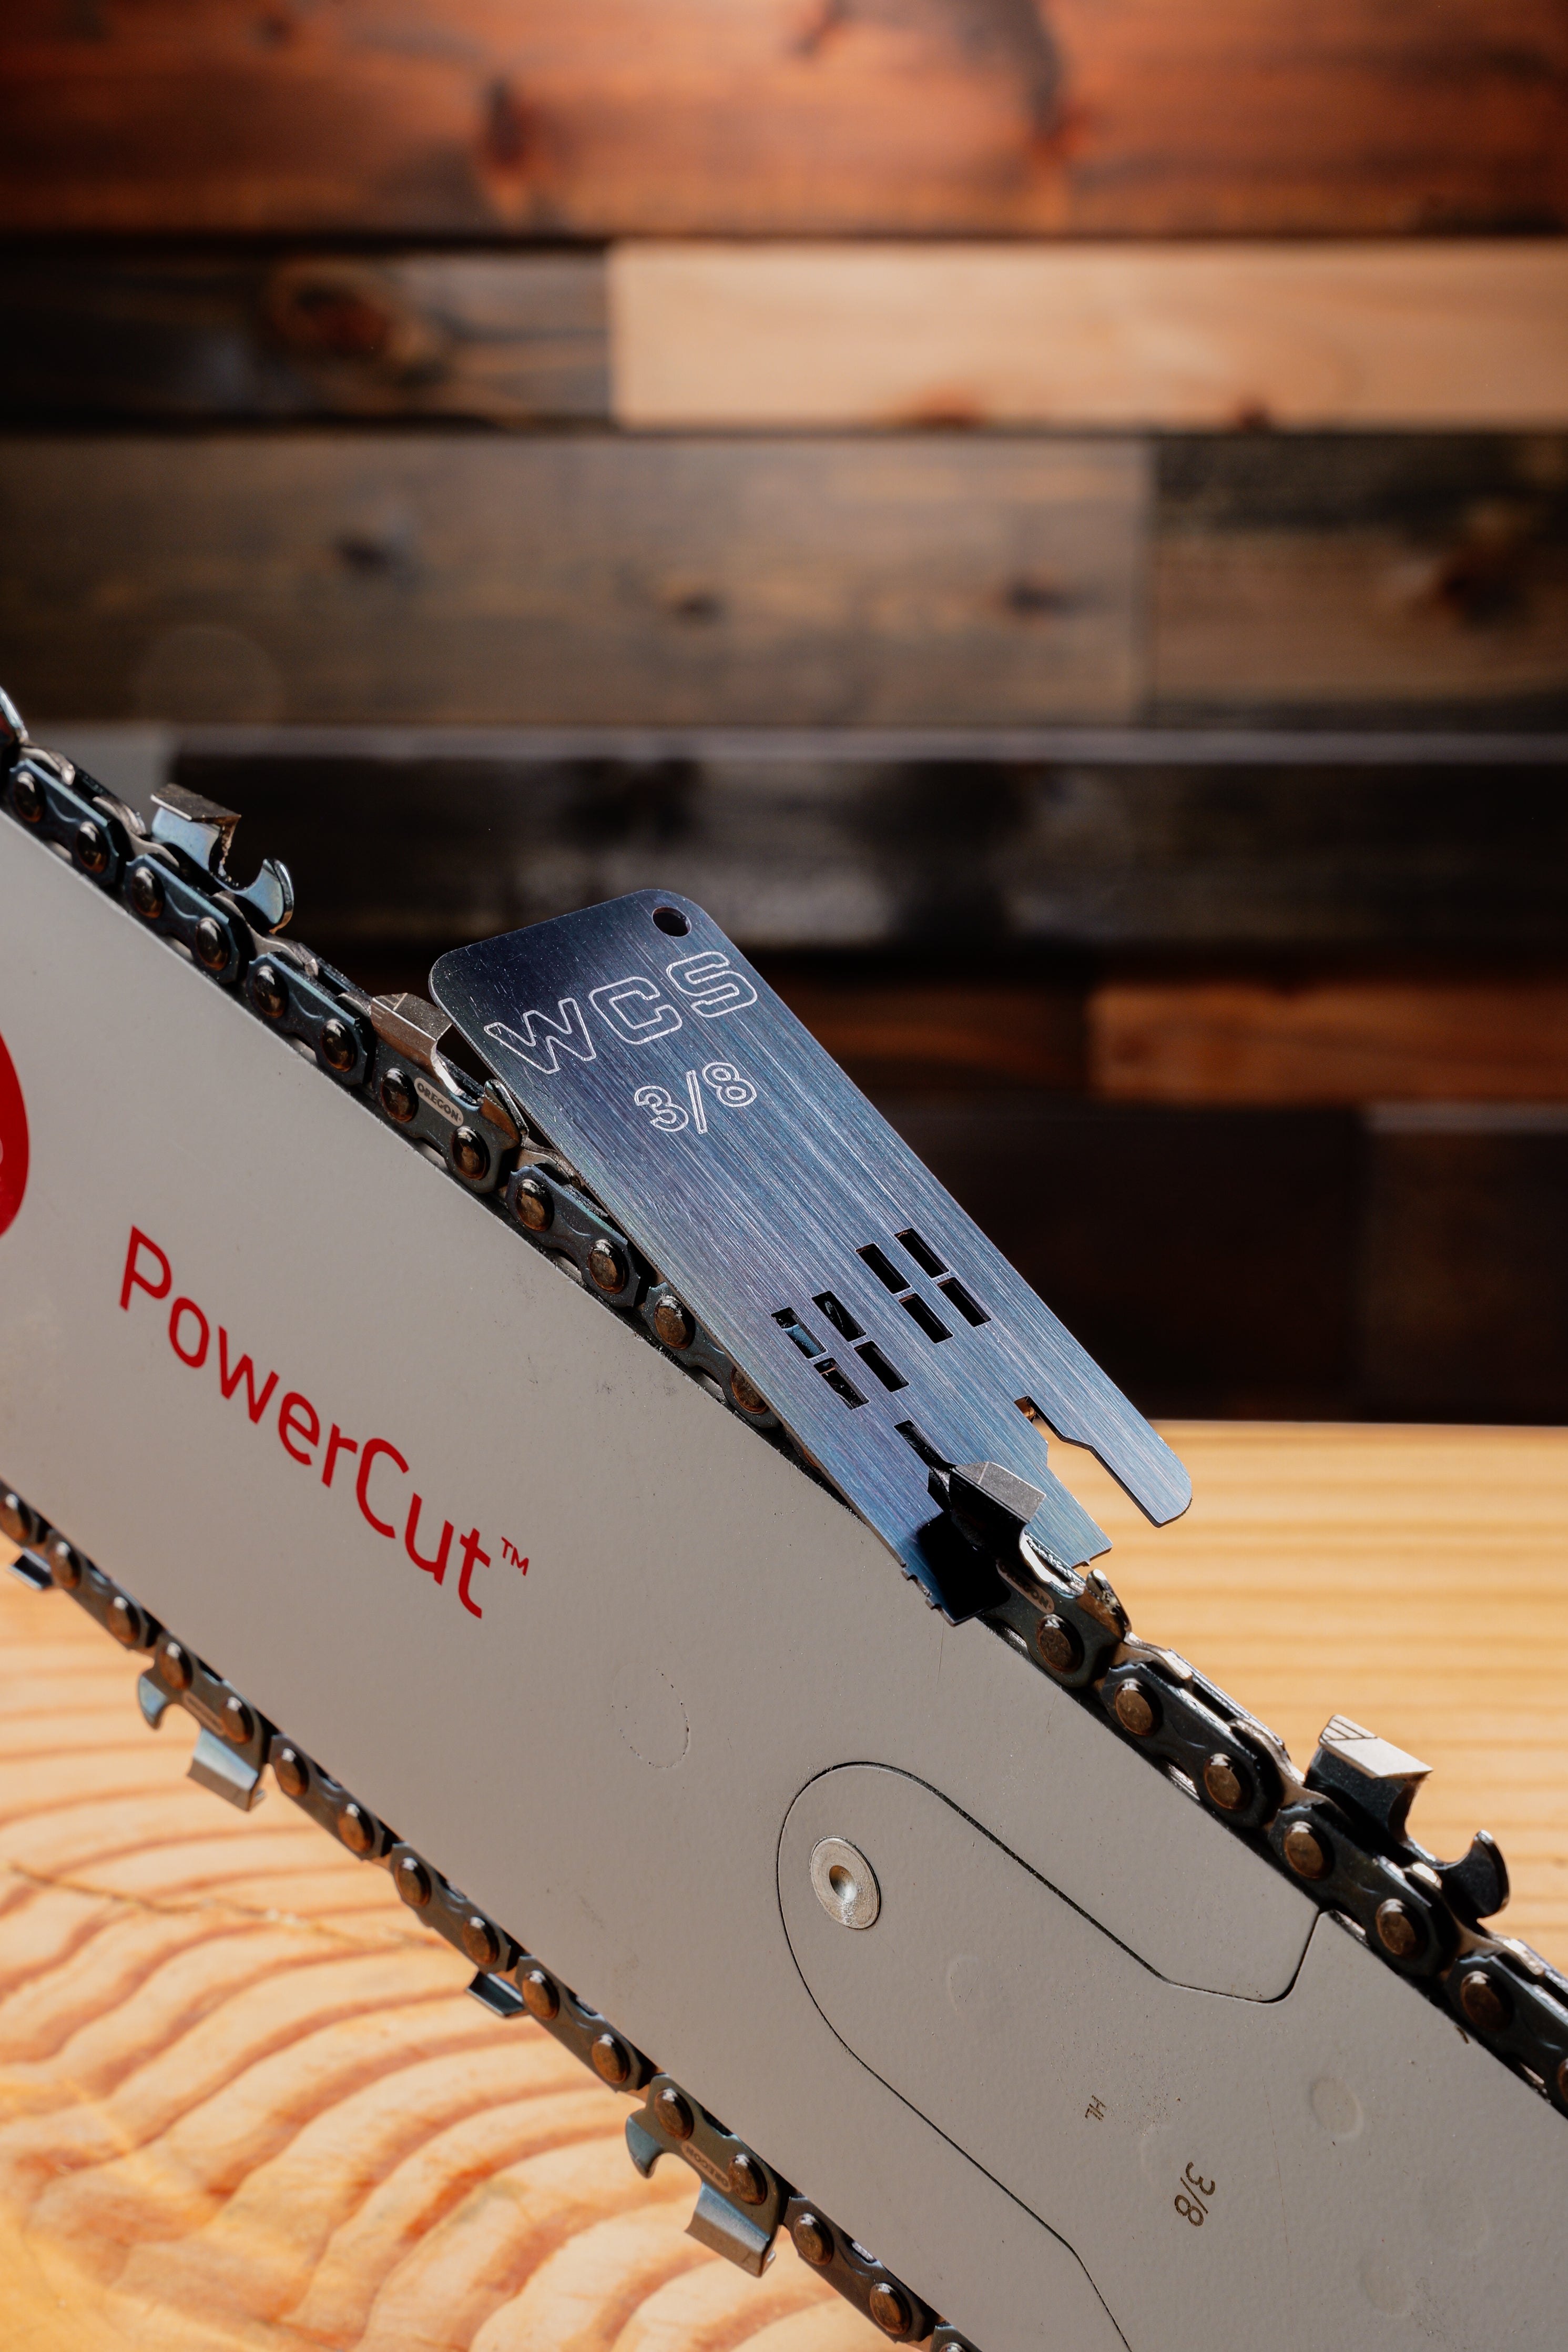
- Pick the right gauge tool. Match it to your chain pitch, such as 3/8 low profile, .325, or 3/8.
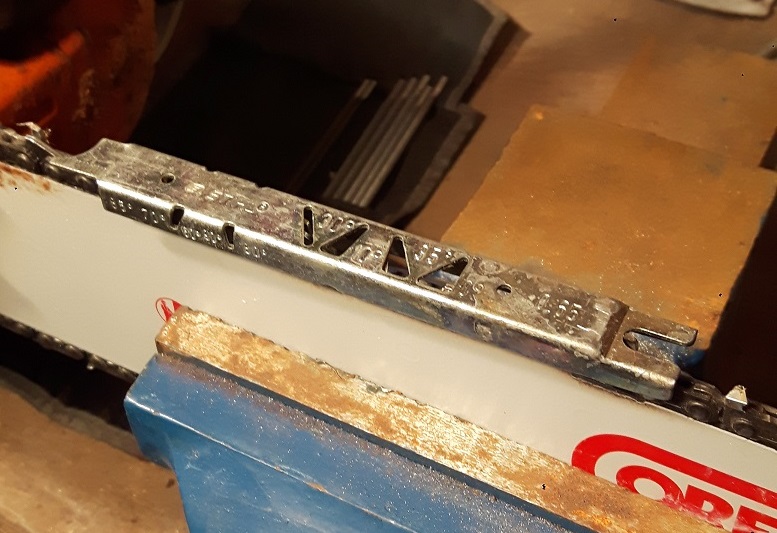
- Place the gauge over the chain. The tool bridges the cutters. The raker pokes through the slot or window.
- Check what sticks up. If the raker is higher than the tool, it needs filing. If it is flush or below, move on.
- File the raker. Use the flat file. Short, level strokes toward the tip. Stop when it is flush with the gauge.
- Shape the raker nose. Keep a smooth ramp. Do not create a sharp edge or a dip.
- Mark your start spot. Rotate the chain and repeat on each raker. Keep the same number of strokes side to side.
- Recheck a few rakers. Place the tool again after every three or four. File only what is high.
- Final pass. Lightly dress any burrs. Spin the chain to feel for snags.
This is the core of how to use a chainsaw depth gauge. The aim is even bite on every tooth, not maximum bite on a few.
Choosing the Right Depth Gauge Setting
The right setting depends on chain type, bar power, and wood. Start with the maker’s spec. Most general chains are 0.025 inch. That suits most saws and most wood.
You can fine tune within safe limits.
- Softer wood or small saw power. 0.025 to 0.030 inch can speed up cuts.
- Hard or frozen wood. 0.020 to 0.025 inch keeps the cut smooth and safe.
- Dull cutters. Do not lower rakers to make up for dull teeth. Sharpen first.
When people ask how to use a chainsaw depth gauge for faster cuts, I say tune in small steps. One or two thousandths down can change chip size a lot. Record what works for your saw.

Progressive vs Standard Gauges
Standard gauges set every raker to a fixed height. They are simple and work well for most users. Progressive gauges factor in cutter length. As cutters get shorter, the tool sets a new raker height to keep bite even.
If you sharpen by hand and your cutter lengths vary, a progressive tool keeps the cut smooth. If your cutters are very even, a standard tool is fast and fine. When you learn how to use a chainsaw depth gauge with a progressive tool, the process feels the same, but you align the tool to each cutter before you file.

Common Mistakes and How to Avoid Them
I see the same errors come through my bench. They are easy to fix once you spot them.
- Filing rakers too low. The saw grabs and the bar chatters. Use the tool every time and stop at flush.
- Uneven rakers left to right. Count strokes and check often. Consistent technique is key.
- Skipping raker work. Sharp cutters with high rakers only make dust. Check rakers after every two or three sharpenings.
- Wrong file or angle. Use a flat file and keep it level. Do not file the cutter top.
- Dirty chain. Grit eats files and skews the cut. Clean first.
How to use a chainsaw depth gauge comes down to control. Treat each raker the same way, and the saw will reward you.
Troubleshooting Cut Quality with the Depth Gauge
Your chips tell the story. Big, square chips mean good bite. Fine dust often means high rakers or dull cutters. Grab and chatter mean rakers may be too low or uneven.
Try these quick checks.
- Slow cut, fine dust. Check raker height with the tool. Lower to spec.
- Hard pull to one side. Likely uneven cutter length or dull teeth on one side. Fix teeth first, then recheck rakers.
- Vibration or chatter. Raise bite by using the correct spec. Remove any sharp edges on rakers.
- Burn marks. Dull cutters or low rakers can cause heat. Sharpen and reset rakers.
If you want to diagnose fast, learn how to use a chainsaw depth gauge and a straight edge together. The gauge sets height. The edge reveals obvious outliers at a glance.
Maintenance Schedule and Record Keeping
Good habits save time and chains. You do not need to guess if you track what you do.
- Check rakers after every two or three full sharpenings.
- Note your setting for each chain and wood type.
- Replace a chain when cutter witness marks get close. Do not drop rakers to chase speed at end of life.
- Inspect the bar and drive sprocket. A worn groove can mimic bad raker work.
Part of how to use a chainsaw depth gauge is knowing when not to file. If the raker is already flush, move on.
Pro Tips from the Field
Here are lessons I learned the hard way and wish I had known early.
- Color the raker top with a marker. File until the color is gone at flush. It is a fast visual cue.
- Work in quarters. File one quarter of the chain at a time to avoid fatigue and mistakes.
- Keep one fresh flat file for rakers only. It keeps your cut smooth and consistent.
- Use light oil on the file to reduce clogging if your chain is dirty.
- When teaching someone how to use a chainsaw depth gauge, start with a standard tool. Move to progressive once they are consistent.
These small habits make the job feel simple and repeatable. They also make your saw feel new.
Frequently Asked Questions of how to use a chainsaw depth gauge
How often should I adjust rakers?
Check rakers after every two or three sharpenings. If you cut dirty wood or hit soil, check sooner.
Do I need a special tool to set rakers?
Yes, use a depth gauge tool matched to your chain pitch. It ensures you do not remove too much or too little.
What happens if rakers are too low?
The saw grabs, vibrates, and risks kickback. It also strains the engine and bar.
Can I set different depths for hardwood and softwood?
Yes, within maker limits. Stay near 0.025 inch for most, slightly lower for softwood, slightly higher for hard or frozen wood.
How do I know I am filing the right part?
You file the raker in front of each cutter with a flat file. Do not file the cutter top plate when setting rakers.
What if my chain still cuts slow after setting rakers?
Sharpen the cutters and confirm they are even. High rakers and dull cutters both cause slow cuts.
Conclusion
A smooth, fast cut depends on sharp cutters and correct rakers. Now that you know how to use a chainsaw depth gauge, you can set bite depth with accuracy and confidence. Follow the steps, keep notes, and make small, tested changes.
Take ten minutes before your next job to set your rakers. Your saw will cut truer, your arms will feel better, and your work will go faster. Want more guides like this? Subscribe, share your results, or drop your questions in the comments.