How To Grow Vegetables From Seed: 2026 Pro Tips
Starting vegetables from seed is one of the most rewarding—and cost-effective—ways to build a productive garden. Yet many home growers stumble on the same predictable hurdles: leggy seedlings, damping-off disease, poor germination, and transplant shock.
The good news? These problems are almost entirely preventable. After starting thousands of seedlings for home gardens and small farms, I can tell you that success comes down to a handful of non-negotiable fundamentals: fresh seed, sterile mix, steady warmth, intense light, and consistent airflow. Master those five elements, and everything else falls into place.
This guide walks through the entire process—from reading a seed packet to transplanting sturdy, garden-ready plants. You will also find practical troubleshooting, a seasonal planning framework, and the money-saving math behind growing your own starts.

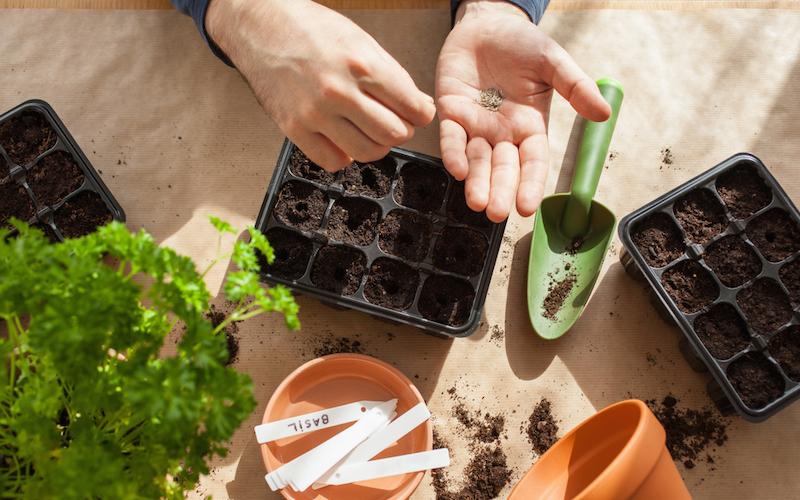
Well-prepared seed trays in a sunny spot give your vegetables a strong head start.
Source: bhg.com
Why Growing From Seed Beats Buying Transplants
The most obvious advantage is cost. A single packet of tomato seeds—usually $3 to $5—contains 25 to 50 seeds. Compare that to $4 or more per six-pack of transplants at a garden center. If you grow forty tomato plants from seed, you save well over $100 in one season alone.
But the savings go deeper than dollars. Seed catalogs offer hundreds of varieties you will never see at a nursery: unusual heirloom tomatoes, disease-resistant hybrid peppers, and cold-hardy salad greens bred for specific regions. Buying starts limits you to whatever survived the retail supply chain—often a handful of mainstream varieties that may not suit your local climate.
Growing your own seed also gives you complete control over the growing conditions. You decide whether plants are organic, how they are fed, and when they are ready for the garden. For anyone serious about self-sufficiency, seed starting is a foundational skill.
Understand Your Climate and Timing
Great results begin with timing, not technique. Your two reference points are your average last frost date in spring and your first frost date in autumn. These dates define your growing window and tell you exactly when to sow.
Know Your Frost Dates
Your local cooperative extension service publishes frost date maps based on decades of weather data. You can also use the USDA Plant Hardiness Zone Map to understand your region's temperature extremes, though frost dates matter more for seed starting than zones.
Once you know your last frost date, count backward to determine sowing dates. The seed packet usually gives this directly: "Start indoors 6–8 weeks before last frost." Mark that date on a calendar. Then count forward to transplant: "Set out after danger of frost has passed."
Cool-Season vs. Warm-Season Crops
This distinction drives every decision you make. Here is how the two groups differ:
| Crop Type | Examples | Soil Temp Range | Notes |
|---|---|---|---|
| Cool-season | Lettuce, spinach, kale, peas, radish, broccoli, cabbage | 45–65°F | Tolerate light frost; often bolt in heat |
| Warm-season | Tomatoes, peppers, eggplant, squash, beans, cucumbers | 60–85°F | Killed by frost; need warm soil to thrive |
Cool-season crops can be direct sown early, often four to six weeks before the last frost. Warm-season crops need a longer indoor head start in most regions—six to eight weeks for tomatoes and peppers, just two to four weeks for squash and cucumbers that transplant poorly and are often direct sown.
A common mistake is starting everything indoors at the same time. Cucumbers and squash grow rapidly and become root-bound within three weeks. Tomatoes, by contrast, need a full two months to develop properly. Read each packet's recommended indoor duration and create a sowing calendar accordingly.
Select Seeds Like a Pro
Not all seed is created equal. The difference between a 95% germination rate and a 60% rate often comes down to seed age, storage conditions, and quality control.
Read the Packet Like an Expert
Beyond the obvious planting instructions, look for these details:
- Days to maturity — This tells you how long from transplant (or from sowing) until harvest. In short-season climates, choose varieties that mature well before your first frost.
- Disease resistance codes — Letters like V, F, N, and T indicate resistance to specific diseases. For example, "F" on a tomato packet means Fusarium wilt resistance. In humid climates, these codes matter enormously.
- Packed-for date — Seeds lose viability with age. Most vegetable seeds stay viable for 2–5 years if stored in cool, dry conditions, but fresh seed germinates fastest. Onion and parsnip seeds are notably short-lived—replace them yearly.
Open-Pollinated vs. Hybrid
- Open-pollinated seeds pollinate naturally and produce offspring identical to the parent. This makes them ideal for seed saving year after year.
- Hybrid seeds (F1) result from controlled crosses that deliver vigor, uniformity, and often superior disease resistance. Their offspring will not come true to type, so you must buy fresh seed each year.
Neither is inherently better—it depends on your goals. Beginners often find hybrids more forgiving. Seed savers and heirloom enthusiasts prefer open-pollinated varieties.
Best Crops for Beginners
If this is your first season, start with forgiving, fast-germinating crops: lettuce, radish, bush beans, peas, zucchini, and cherry tomatoes. These give you quick wins and teach you the fundamentals before you move on to trickier crops like celery, parsley, or artichokes.

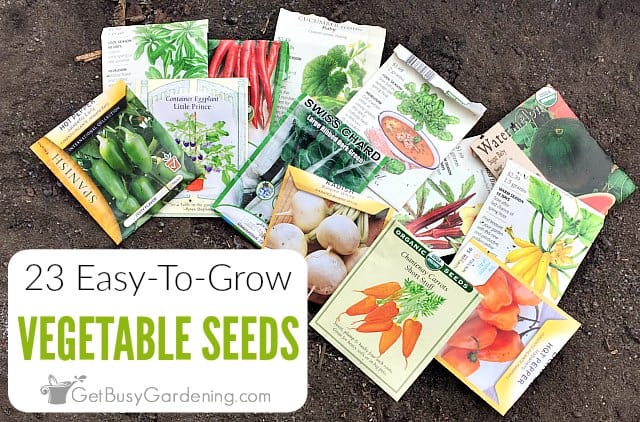
Reading seed packets carefully before planting prevents most timing and depth errors.
Source: sandiaseed.com
Gather Tools and Supplies
You do not need a greenhouse or expensive equipment to start seeds successfully. A surprising amount of high-quality gear can be assembled for under $100. Here is what actually matters:
- Seed-starting trays or small pots — Cell trays, recycled yogurt cups, or soil blocks all work. The only requirement is drainage holes.
- Sterile seed-starting mix — This is non-negotiable. Garden soil is too dense, may harbor pathogens, and compacts in containers. A quality mix contains peat or coir, perlite, and vermiculite.
- Labels and a waterproof marker — Write the variety and sowing date on every container. Pencil on plastic labels works; marker fades under grow lights.
- A spray bottle or bottom-watering tray — Gentle watering prevents washing tiny seeds around.
- A heat mat — Warm-season crops germinate significantly faster when soil stays at 75–85°F. This is the single best investment you can make.
- LED grow lights — A bright south window can work for a few crops, but most homes lack the light intensity needed for sturdy seedlings. Affordable LED shop lights are more than adequate.
- A humidity dome — A clear plastic cover maintains moisture during germination. Remove it as soon as sprouts appear.
Cleanliness matters more than equipment quality. Sterilize trays with a 10% bleach solution before reuse. Damping-off disease—a fungal problem that kills seedlings at soil level—thrives in dirty containers and soggy conditions.
Prepare the Seed-Starting Mix
The right medium is light, airy, and moisture-retentive without staying soggy. Roots need oxygen as much as water. Compacted mix suffocates them and invites fungal disease.
Pre-Moisten the Mix
Dry mix repels water. If you fill trays and then water from above, the water runs straight through channels and leaves the center bone dry. The fix is simple: pre-moisten the mix before filling.
Place the mix in a large bucket, add warm water, and stir thoroughly. The goal is a texture like a wrung-out sponge—damp but not dripping. Fill your trays and gently level the surface. Do not press down hard; loosely settled mix provides better aeration.
Why Sterile Mix Matters
Garden soil contains weed seeds, insects, and fungal pathogens that can devastate young seedlings. Commercial seed-starting mixes are heat-treated to eliminate these problems. Once you move seedlings outdoors, they will face soil-borne challenges—but during their vulnerable first weeks, a sterile medium keeps them safe.
For readers interested in improving long-term soil health in their outdoor beds, different rules apply—see our guide on building healthier garden soil for details about amending your garden beds.
Planting Seeds: Depth, Spacing, and Method
Planting depth follows a simple rule: sow seeds two to three times as deep as their width. A tomato seed the size of a pinhead goes barely under the surface. A bean the size of your fingernail goes half an inch down.
Seeds That Need Light
Some tiny seeds—lettuce, celery, petunias—require light to germinate. Do not bury them. Press them onto the surface of the mix and mist gently. The seed packet will note "surface sow" or "needs light to germinate" if this applies.
Indoor Sowing Steps
- Make shallow holes with a dibber, pencil eraser, or chopstick.
- Drop one or two seeds per cell. The second seed acts as insurance; thin it out later.
- Cover with mix at the appropriate depth. For surface-sowing types, skip this step.
- Mist the surface gently and label immediately.
- Place under a humidity dome and set on a heat mat if using one.
Direct Sowing Outdoors
Direct sowing follows a similar logic but requires more soil preparation:
- Rake the bed smooth, removing clumps and stones.
- Use a trowel or rake handle to create a shallow furrow at the recommended depth.
- Sow seeds thinly—it is tempting to over-sow, but crowding causes weak, spindly plants.
- Cover with fine soil, water gently, and mark the row with a label.
A reliable trowel makes this job far easier. If you are unsure which design fits your hand, our guide on choosing and holding a trowel walks through proper grip and technique.
Create the Right Germination Environment
Seeds need two things to sprout: moisture and warmth. Most vegetable seeds germinate fastest between 70–85°F. For cool-season crops, cooler is acceptable—they will sprout at 60°F, just slower. Warm-season crops, particularly peppers and eggplant, genuinely benefit from a heat mat.
The Humidity Dome
A clear cover traps moisture around the seed and raises humidity to near 100%. This keeps the surface from drying out during germination. Once sprouts appear—even just one or two—remove the dome. Trapped humidity without leaves to absorb it creates the damp conditions where damping-off thrives.
Light: The Non-Negotiable
The moment seeds sprout, they need bright light. A south-facing window usually provides enough intensity for a few trays, but seedlings will lean and stretch toward the glass. In practice, I recommend grow lights for anyone starting more than a couple of varieties.
Position LED lights 2–4 inches above the seedlings and run them for 14–16 hours per day. A simple outlet timer automates this. Research from university extension services consistently confirms that sufficient light hours prevent the "leggy" stretched stems that plague indoor seedlings. If you run lights 24 hours a day, you will not gain anything—seedlings need a dark period for healthy growth.
Seedling Care: Light, Water, and Nutrition
Once your seedlings have their first true leaves (the second set that appears after the initial cotyledons), the real care begins.
Watering Correctly
Water from the bottom whenever possible. Place trays in a shallow pan of water and let the mix wick moisture upward for 15–30 minutes. This keeps leaves dry, which dramatically reduces fungal problems. Between waterings, let the mix surface dry slightly. Soggy mix suffocates roots and favors damping-off.
Airflow Strengthens Stems
A small oscillating fan set on low, positioned a few feet from the seedlings, does wonders. The gentle breeze strengthens stems and discourages fungal growth. Run it for 15–30 minutes a few times daily. This simulates the outdoor environment seedlings will eventually face and is one of the most underrated tricks in seed starting.
Early Nutrition
The seed itself contains enough energy for the first week or two. After true leaves develop, switch to a mild, balanced liquid fertilizer at half strength every 7–10 days. Something like a 5-5-5 or 10-10-10 formulation works well. Avoid high-nitrogen formulas that create lush, weak growth.
Potting Up and Thinning
Thinning Without Fuss
If you sowed two seeds per cell, thin to one strong seedling once the second set of leaves appears. Use small scissors to cut the weaker seedling at soil level. Do not pull it—pulling disturbs the roots of the seedling you are keeping.
Knowing When to Pot Up
As seedlings grow, roots fill their cells. Signs include roots emerging from the drainage holes, slowed growth, or yellowing lower leaves. When this happens, transplant to a larger container—a 3–4 inch pot or similar-sized cell.
Handle seedlings by the leaves, never the stems. A crushed stem kills the plant; a damaged leaf is survivable. This is one of those rules I learned the hard way after losing a full tray of peppers by gripping stems too firmly.
Use fresh moistened mix and plant at the same depth, unless you are growing tomatoes—those can be buried deeper to encourage additional root growth along the stem.

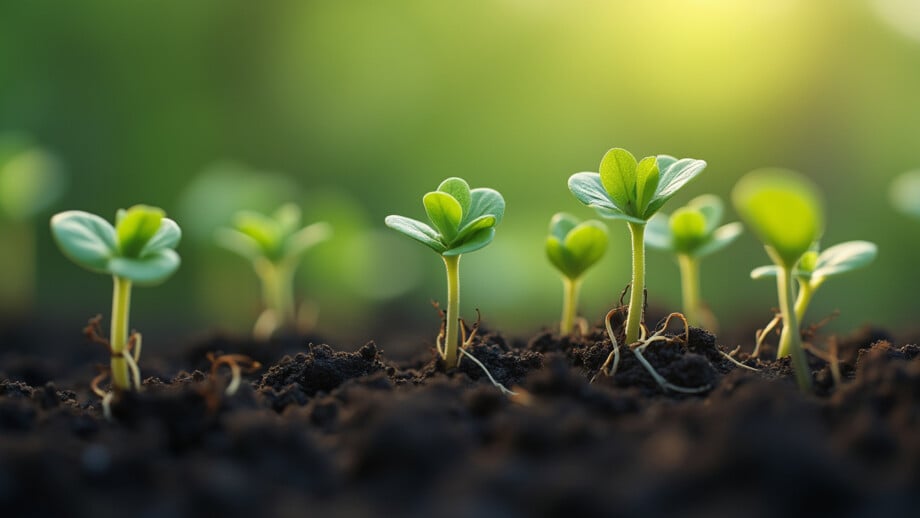
Healthy, stocky seedlings are ready for potting up into larger containers.
Source: planetnatural.com
Hardening Off and Transplanting
Indoor-grown seedlings are pampered. They have never felt wind, direct sun, or temperature swings. Placing them straight into the garden causes shock—or death. Hardening off is the gradual exposure process that prepares them for outdoor life.
The 7–10 Day Transition
- Days 1–2: Place seedlings outdoors in a shaded, sheltered spot for 1–2 hours.
- Days 3–4: Increase to 3–4 hours, adding some morning sun.
- Days 5–6: Extend to 5–6 hours with more direct sun and light wind exposure.
- Days 7–10: Leave them out most of the day, bringing them in at night if frost threatens.
Throughout this process, protect seedlings from strong wind and intense afternoon sun initially. The goal is gradual adaptation, not an endurance test.
Transplant Day
Choose a calm, cool, or overcast day—plants transplant best under cloudy skies. Water the seedlings an hour before moving them. Dig holes slightly larger than the root ball, water the holes, then set plants in place and firm soil gently around the roots.
For tomatoes and other deep-planting crops, remove the lower leaves and bury the stem up to the first set of true leaves. This encourages adventitious roots along the buried stem.
Water thoroughly after transplanting and mulch to retain moisture. Consider shade cloth or row cover for the first few days to ease the transition.
Direct Sowing Success
Many crops are better off direct sown—seeded straight into the garden where they will grow. Beans, peas, carrots, beets, radishes, and squash generally dislike transplanting. Their roots are sensitive, and they grow quickly enough that an indoor head start provides little benefit.
For these crops, soil temperature matters more than air temperature. Use a soil thermometer to check that the ground has reached the packet's recommended range. Carrots germinate when soil hits about 50°F; beans prefer 60°F or warmer.
A few practical tips:
- Sow slightly thinner than the packet suggests. Thin to final spacing after emergence—crowded roots produce undersized vegetables.
- Use row cover to warm soil in early spring. Black plastic or floating row cover can raise soil temperatures by several degrees.
- Water gently with a fine mist. Heavy watering crusts the soil surface and blocks emergence.
For continuous harvests of quick crops like lettuce and radish, sow a new row every 1–3 weeks. Called succession sowing, this technique keeps your table supplied for months rather than weeks.
Troubleshooting Common Seed-Starting Problems
Even experienced growers face setbacks. Here are the most common issues and their fixes:
| Problem | Symptoms | Likely Fix |
|---|---|---|
| Damping-off | Seedlings fall over at soil line | Sterile mix, better airflow, bottom-watering only |
| Leggy seedlings | Tall, thin, weak stems | More light hours, move lights closer, add fan breeze |
| Yellow leaves | Pale or yellowing foliage | Mild fertilizer; check drainage; roots not sitting in water |
| Poor germination | Very few seeds sprout | Warmer soil, more even moisture, fresh seed, correct depth |
| Fungus gnats | Tiny flies around trays | Let mix dry between waterings, sticky traps, avoid overwatering |
| Damping-off recurrence | Patchy die-off after thinning | Sterilize trays, improve airflow, NEVER reuse contaminated mix |
Catching problems early saves entire trays. Inspect seedlings daily—a task that takes two minutes and prevents most disasters.
Smart Planning: Succession Sowing, Companion Planting, and Seed Saving
Succession Sowing for Steady Harvests
The biggest mistake new gardeners make is planting everything on the same weekend. You get a glut of lettuce for two weeks, then nothing for a month. Instead, stagger your plantings.
Fast crops like radish, lettuce, and arugula can be sown every 1–2 weeks. Slower crops like beans and carrots benefit from 3-week intervals. In 2026, smart gardeners are also extending seasons with cold frames and shade cloth—techniques that let you plant earlier in spring and later in autumn.
Companion Planting Synergies
Some crop combinations genuinely help each other. Basil planted near tomatoes improves flavor and repels certain pests. Marigolds near peppers and squash attract beneficial insects and deter nematodes. These pairings are not a substitute for good growing conditions, but they add resilience to a garden ecosystem.
Seed Saving Basics
Once you are comfortable growing from seed, saving your own is a natural next step. Start with self-pollinating crops: peas, beans, and tomatoes. These rarely cross-pollinate with other varieties, making them reliable for beginners.
Label parent plants with the best flavor and production. Let seed pods mature fully on the plant. Dry seeds thoroughly—moisture is the enemy of seed storage—and keep them in labeled envelopes in a cool, dark place. Properly stored seed can remain viable for years.
Cost, Yield, and Sustainability Benefits
Growing from seed is a sustainability win with immediate financial benefits:
- One $4 tomato seed packet replaces $40–80 of transplants.
- Self-saved seed costs nothing in future seasons.
- Seed starting eliminates plastic pots from retail nurseries.
- You control inputs—no mystery fertilizers or unseen pesticides.
Fresh vegetables picked at peak ripeness also taste markedly better than store-bought produce. Flavor compounds diminish within hours of harvest. A tomato still warm from the sun, picked red and ripe, is a different food entirely from a supermarket one picked green weeks earlier.
The deeper benefit, though, is self-reliance. Knowing you can produce food from a handful of tiny seeds—through planning, patience, and skill—connects you to a tradition that is both practical and deeply satisfying.
Frequently Asked Questions
How long does it take for seeds to germinate?
Most vegetable seeds germinate in 3–14 days, depending on crop and soil temperature. Warmth and consistent moisture speed germination significantly. Peppers and parsley can take 2–3 weeks; radishes may sprout in under a week.
Do I need grow lights to start seeds?
A bright south-facing window can work for a few crops, but grow lights are far more reliable. They prevent the leggy, weak growth that occurs when light is insufficient. Affordable LED shop lights cost very little to run and outperform most windows by a wide margin.
How often should I water seedlings?
Water when the top of the mix looks dry—roughly every 1–3 days. Bottom watering is best because it keeps leaves and stems dry. Consistency matters more than frequency; seedlings prefer even moisture without soggy conditions.
When should I start seeds indoors?
Count back from your last frost date using each packet's recommended lead time. Most warm-season crops need 6–8 weeks. Cool-season crops often only need 4–6 weeks. Creating a simple calendar with sowing and transplant dates prevents both impatient and tardy starts.
Why are my seedlings falling over?
Two causes: damping-off disease or insufficient light. Damping-off presents quickly and spreads through the tray—use sterile mix and improve airflow. Legginess also causes weak stems that cannot support weight. Combine good light and airflow, and most problems disappear.
Can I reuse seed-starting mix?
It is best to use fresh mix each season. Used mix can harbor pathogens and contains little nutrition. Recycle old mix into outdoor garden beds or compost where soil biology will handle any pathogens safely. You can also get more out of old mix by spreading it in your yard as a light top-dressing—see our advice on recycling garden hoses and related waste for broader sustainability tips.
Conclusion
You now have a complete, proven roadmap for growing vegetables from seed—from selecting varieties and timing your sowing, through germination and seedling care, to hardening off and transplanting with confidence.
The fundamentals are simple but non-negotiable: fresh seed, sterile mix, steady warmth, intense light, and balanced airflow. Master these five elements, and you will produce transplants that rival anything from a nursery at a fraction of the cost.
Start with one or two beginner-friendly crops this week. Keep notes—what worked, what did not, and what you would adjust. Learning your own microclimate, your home's quirks, and your favorite varieties is part of the journey.
For those ready to expand their skills, explore our guide to selecting the right garden tools or learn about maintaining healthy lawn soil to support the wider ecosystem around your vegetable beds.
Growing your own food from seed is a skill that pays dividends for decades. The first season is the steepest learning curve—after that, it only gets easier, more reliable, and more rewarding.