Tools for Soil Preparation: Best Picks and Pro Tips 2026
Before a seed germinates or a transplant settles in, the soil has to be ready. It needs to be loose enough for roots to push through, open enough to drain well, and balanced enough to hold moisture and nutrients. Tools for soil preparation make that job faster, safer, and far more consistent.
In this guide, I break down the tools that actually matter for the 2026 growing season: hand tools, power tools, testing gear, and amendment tools. I’ve prepared beds in small backyard plots and worked rows in market gardens, and the biggest lesson is simple: the best tool for soil preparation is the one that fits your soil, your scale, and your season. This guide shows you how to choose that tool with confidence. You can also read our guide on how to prepare soil for planting vegetables.
Why Soil Preparation Matters
Soil preparation is more than digging. It is the first chance to set drainage, aeration, root penetration, and weed control for the entire season. A well-prepared bed gives seeds even contact with moist soil, lets transplants establish quickly, and gives beneficial organisms room to work.
The USDA’s soil health framework is built around minimizing disturbance, keeping the ground covered, and maintaining living roots. That means soil prep should be thoughtful, not aggressive. A common mistake is equating preparation with deep tillage. In practice, the best preparation is often the least destructive approach that still creates a smooth, workable seedbed.
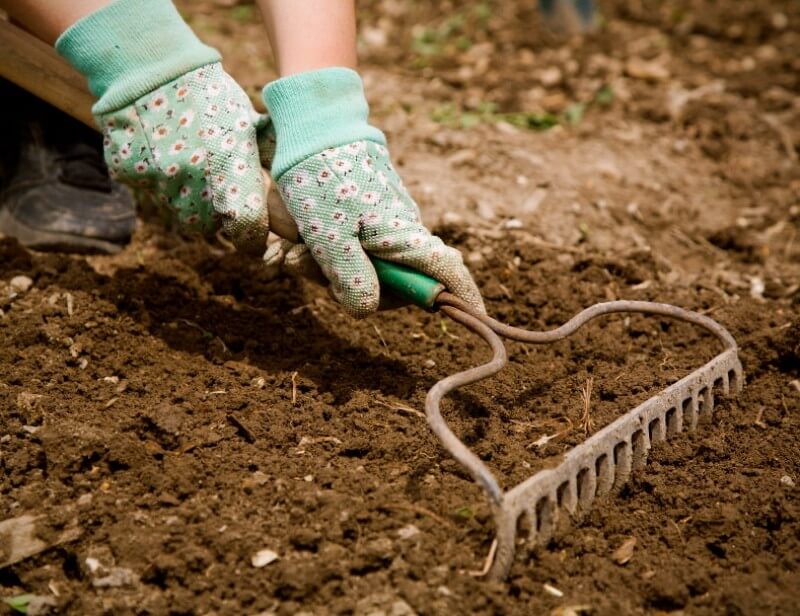 Image source: bullytools.com
A power tiller suits large plots, but it is easy to overuse.
What Counts as Tools for Soil Preparation?
Tools for soil preparation are the implements that help you loosen, level, amend, and assess soil before planting. They range from hand tools that cost a few dollars to heavy power equipment used on small farms.
At a glance, soil preparation tools fall into four groups:
| Category | Job | Examples |
|---|---|---|
| Disturbance tools | Loosen, mix, and aerate the soil | Spade, garden fork, broadfork, tiller |
| Surface tools | Level, shape, and clean the seedbed | Rake, hoe, bed shaper |
| Assessment tools | Measure pH, moisture, and nutrients | Soil test kit, pH meter, moisture meter |
| Amendment tools | Move, blend, and spread materials | Wheelbarrow, tarp, broadcast spreader |
Match the tool to the task. Digging a compacted new bed with a hand fork wastes energy, while running a tiller through a 4×8 raised bed damages soil structure for no benefit.
Hand Tools for Soil Preparation: Simple, Precise, Affordable
Hand tools are quiet, low-cost, and kind to soil structure. I still reach for them first for raised beds, perennial borders, and tight spaces where power tools feel heavy and clumsy.
The Six Hand Tools That Cover Most Beds
| Tool | Best For | Pro Tip |
|---|---|---|
| Spade or digging shovel | Cutting bed edges, slicing sod, digging trenches | Keep the edge sharp; use a spade for cutting, a shovel for moving soil |
| Garden fork | Loosening compacted zones, blending compost, lifting roots | Rock the handle gently to crack compaction instead of forcing it |
| Broadfork | Deep aeration in no-till beds | Press with your foot, then lean back slowly and lift with your legs |
| Hoe | Slicing weeds, shaping furrows, pulling soil | A sharp hoe cuts; a dull hoe bounces |
| Landscape rake | Leveling beds, breaking clods, pulling stones | Use light passes so the tines work soil instead of smearing it |
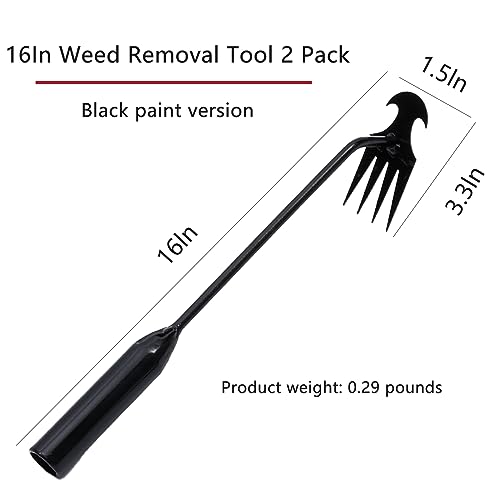
| Hand cultivator or claw | Aerating containers and the top few inches around seeds | Choose a forged head; cheap welded heads bend under pressure |
Moisture Check Before You Dig
The most useful soil-prep tool is a moisture test. Take a fistful of soil and squeeze it. If water runs out, or if the soil forms a glossy ribbon, it is too wet. If it crumbles easily when poked with a thumb, it is ready to work.
In practice, this small test prevents the most expensive mistake in gardening: tilling clay that is wet. Wet clay smears, dries into rock-hard clods, and drags your yields down for the rest of the season.
 Image source: 8billiontrees.com
A spade, fork, and rake handle most beds under 500 square feet.
Power Tools for Soil Preparation: When Muscle Needs Motors
Power tools earn their place when you need to flip sod, blend large amounts of compost, or renovate a bigger plot. They also create compacted layers if you use them too deep or too often.
| Tool | Best For | Watch Out For |
|---|---|---|
| Front-tine tiller | Small and medium beds, mixing shallow amendments | Bounces in hard ground; only cuts a few inches deep |
| Rear-tine tiller | Breaking sod and preparing large plots | Heavy; repeated deep passes can harm soil structure |
| Two-wheel tractor with power harrow or bed shaper | Market gardens and serious vegetable production | Pricey, but mixes top inches without inverting soil |
| Subsoiler or compaction breaker | Breaking hardpan in specific strips | Only needed where drainage and roots are blocked by a distinct layer |
| One-person auger | Planting holes for perennials, bulbs, and small trees | Saves time in tough soil but not useful for broad beds |
| String-trimmer tiller head | Light cultivation between rows | Not powerful enough for new beds |
Use power tools with care. One pass at the right depth beats three shallow churns, and working soil that is too wet does damage that lasts longer than the season itself. If you are opening new ground for the first time, consider renting a rear-tine tiller for a weekend before buying one; you will learn what your soil actually needs without spending a full price up front.
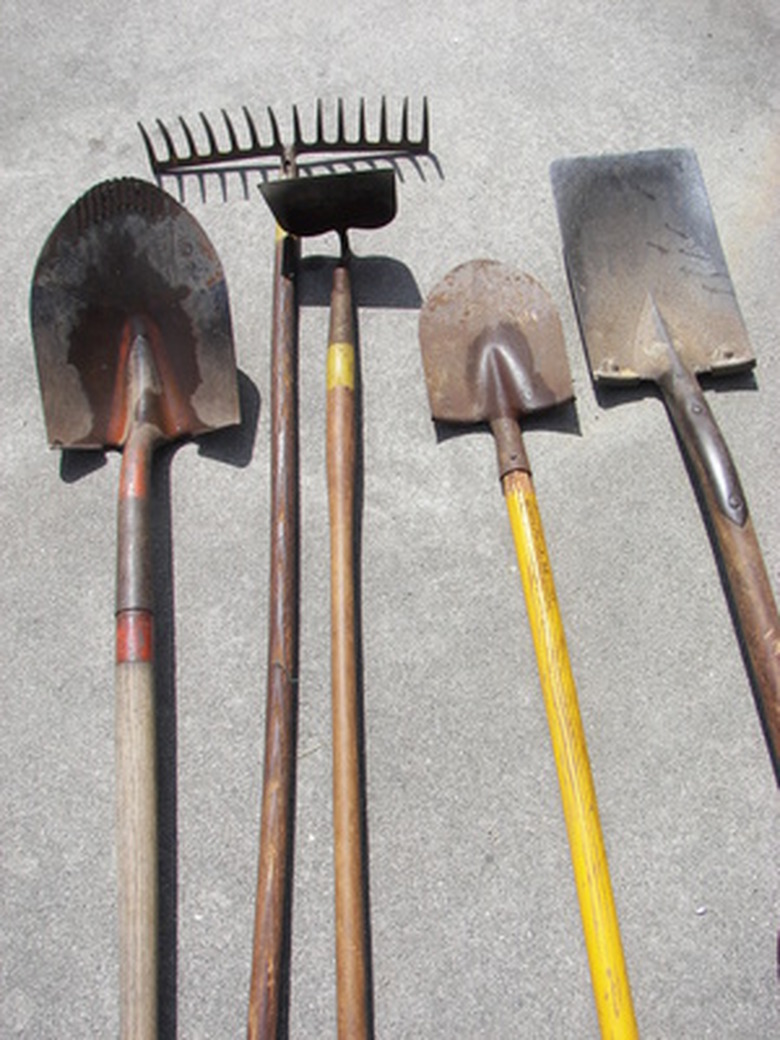 Image source: gardenguides.com
A rear-tine tiller is more stable than a front-tine model on hard ground.
Soil Testing and Amendment Tools: Start With Data
Great soil preparation begins with measurement, not guesswork. Before adding lime, compost, or fertilizer, find out what your soil already has.
Assessment Tools Worth Owning
- Soil test kit or lab test reveals pH, organic matter, phosphorus, and potassium. Retest every two to three years. For pH, phosphorus, potassium, and organic matter, a university soil-testing lab is the gold standard.
- pH meter or pH strips give a fast snapshot between lab tests, especially before applying lime or sulfur.
- Moisture meter removes guesswork from the squeeze test and helps you avoid working soil too wet.
- Compost thermometer confirms that compost is mature and safe for seedlings.
Amendment and Handling Tools
- Wheelbarrow and tarp move compost, leaves, and soil without spilling fine organic matter across the lawn.
- Broadcast spreader or hand spreader applies lime, fertilizer, and cover-crop seed at even rates.
- Watering wand and hose settle a freshly raked bed and pre-soak before direct seeding in dry weather.
Common Amendments at a Glance
| Amendment | When to Use | Application Note |
|---|---|---|
| Compost | Almost always, to build biology and structure | Screen it for a fine seedbed; avoid thick, chunky layers |
| Lime | Raises low soil pH | Base the rate on a soil test, not on habit |
| Elemental sulfur | Lowers high soil pH | Work it into the top few inches |
| Gypsum | Improves sodic clay and drainage | Does not change soil pH |
| Biochar | Increases water and nutrient retention | Charge it with compost or liquid fertilizer before adding |
If the project is turf rather than a vegetable bed, the lawn’s root zone benefits from the same testing rhythm before you spread fertilizer or seed.
 Image source: slideshare.net
Test before you amend. A soil test shows the limits of guessing.
When to Prepare Soil: Watch Moisture, Not the Calendar
There is no universal date for soil preparation. In many regions, late spring and early fall offer stable weather, but the soil’s moisture matters more than the month.
Work soil when it is moist but not sticky. A handful should form a loose ball, then break apart when you poke it. If it glistens, smears, or sticks to your boots, wait. If it powders and refuses to ball up, water lightly and wait a day.
Avoid walking on the prepared bed. Use planks to distribute weight, or work in strips from the edge. This simple habit prevents compaction before it starts.
Step-by-Step: How to Prepare Soil Like a Pro
A Repeatable 8-Step Workflow
- Assess the site. Check drainage, sun exposure, weeds, and soil texture. A quick soil test gives you the starting point.
- Clear the surface. Mow or cut down weeds, then remove large stones and old roots with a rake.
- Loosen the soil. Use a garden fork or broadfork to lift and aerate. In large areas or sod, a single rear-tiller pass is acceptable. For edging and planting holes, a set of sturdy digging tools pays for itself quickly.
- Spread amendments. Apply compost and minerals evenly based on your soil test.
- Blend and level. Rake the top few inches to mix amendments without deeply inverting the soil.
- Set moisture. Water lightly and let the bed settle overnight so fine particles fall into place.
- Make the final pass. Rake to a smooth, even surface and create furrows or planting rows.
- Plant or mulch. Seed right away, or cover the bed with mulch to protect exposed soil.
Time-saving tip: lay a tarp beside the bed before clearing. Rake stones, weeds, and clods onto the tarp, drag it away, and dump it once. This keeps the growing area clean and speeds up planting.
 Image source: rockys.com
Light, level raking creates a seedbed that sows evenly.
Choosing the Right Tools: Site, Scale, and Budget
Every tool is a trade-off between speed, cost, storage, and soil impact. The right choice depends on the size of your beds, your soil type, and the crops you want to grow.
| Your Situation | Best Starter Setup |
|---|---|
| Small raised beds and containers | Garden fork, hand cultivator, rake, tarp. No tiller needed |
| Mid-size vegetable garden | Broadfork, stirrup hoe, landscape rake, optional tiller rental |
| Large garden or small farm | Rear-tine tiller or two-wheel tractor, power harrow, bed shaper, heavy-duty rake |
For most new gardeners, the short list is simple: a garden fork, a stirrup hoe, a landscape rake, a soil test kit, and a tarp. Add a broadfork for no-till beds, or rent a tiller for one day if you are opening sod. That setup covers most soil preparation without a shed full of duplicates.
For narrow beds and containers, small-scale weeding tools handle routine upkeep better than full-size hoes. Buy fewer tools, but buy good ones; a forged head and a solid wooden or fiberglass handle will outlast several cheap alternatives.
 Image source: finegardening.com
Gear choice should match bed size and soil type, not habit.
Sustainable and No-Till Soil Preparation Options
You can build excellent beds without turning the soil over. No-till methods protect microbial life, hold organic matter, and reduce weed pressure over time. It is not a way to avoid work; it is a different kind of work.
Effective low-disturbance options include:
- Broadfork to lift and aerate without inverting layers.
- Shallow power harrowing to mix compost into the top few inches.
- Occultation tarps to smother weeds and soften sod before planting.
- Thick organic mulches such as straw, wood chips, or leaves.
- Cover crops such as rye, clover, and oats, mown or crimped before planting.
If you have trees, shredded fall leaves are one of the best free mulches for a no-till bed. They break down quickly, feed worms, and hold moisture without forming the mat that whole leaves create. No-till requires patience in the first season, but the soil improves with every cycle.
 Image source: ugaoo.com
Tarps, mulches, and cover crops reduce the need for deep tillage.
Safety, Ergonomics, and Tool Maintenance
The best soil preparation tools are safe, comfortable, and well maintained. A few simple habits protect your body and your equipment.
Safety Basics
- Wear gloves, eye protection, and hearing protection when using power tools.
- Use boots with solid grip; wet clay and newly raked soil are slippery.
- Keep children and pets away from tillers, augers, and sharp hand tools.
- Lift with your legs, keep the tool close to your body, and avoid twisting while carrying loaded soil.
Ergonomic Habits
- Choose handle lengths that fit your height. The grip should land around mid-thigh or hip height.
- Alternate tasks: forking, raking, and spreading amendments use different muscle groups.
- Take breaks during repetitive work. A short rest prevents sloppy technique and reduces strain.
Care and Storage
- Clean and dry tools after every use. Soil holds moisture against steel and causes rust.
- Sharpen spades, hoes, and trowel blades regularly. Sharp edges reduce effort.
- Sand rough wooden handles and treat them with linseed oil.
- Store tools off the ground in a dry shed or garage.
- For gas-powered equipment, use fresh fuel, check oil before every use, and add fuel stabilizer before storing.
A well-cared-for hand tool can last decades. Powered equipment that is cleaned and serviced will start faster and work safer through the whole season.
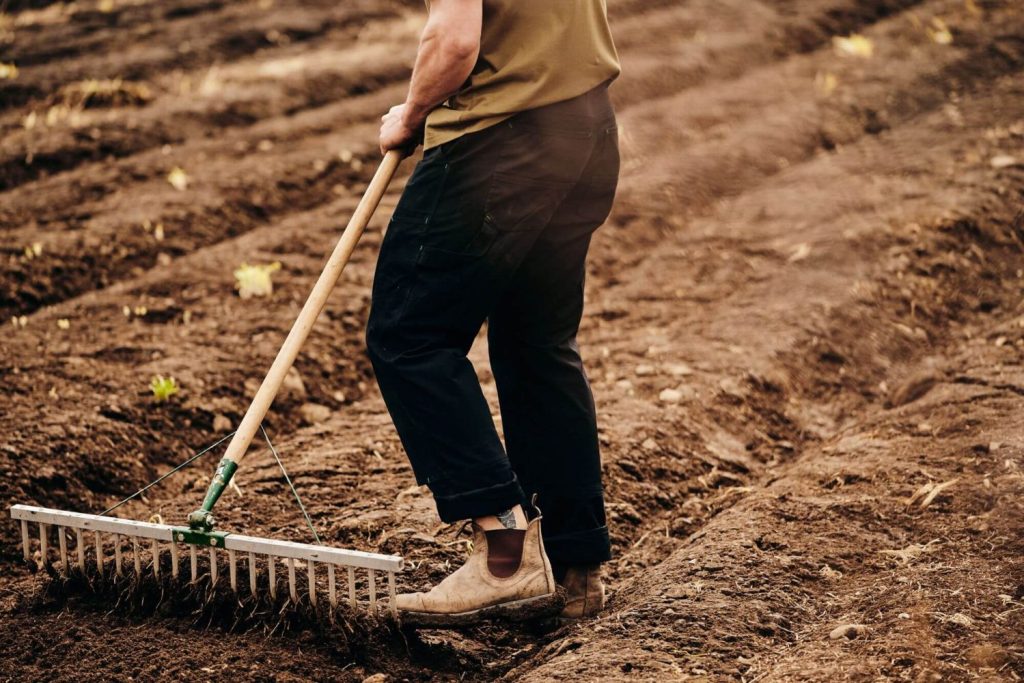 Image source: themarketgardener.com
A wide landscape rake makes the final pass quick and even.
Troubleshooting Common Soil Preparation Problems
Even with the right tools, soil can test your patience. Here are the most common issues and the fastest fixes.
- Persistent clods. Wait for the moisture to be right, rake lightly, and add compost. Avoid extra tilling, especially on clay.
- Compaction and pooling. Use a broadfork or subsoil in strips, add organic matter, and keep foot traffic off wet ground.
- Poor germination. Seed depth is often uneven. Level the bed better and water gently to settle fine soil around seeds.
- pH drift. Test the soil and adjust with lime or sulfur as recommended. Recheck after a few months.
- Weed explosion. Use an occultation tarp or shallow hoe at the white-thread stage, and mulch after planting.
Once beds are planted, a targeted weeder keeps new weed seedlings from becoming a problem. For taproots such as dandelion, a slim taproot weeder pulls the whole root without breaking it off.
Frequently Asked Questions About Soil Preparation Tools
What are the best tools for clay soil?
A broadfork and a garden fork are the best choices for clay. Add compost and a rake, and avoid deep, repeated tilling when the soil is wet.
How deep should I loosen the soil?
Most vegetables grow well in 6 to 8 inches of loose soil. Carrots and other long-rooted crops do better with 10 to 12 inches, but avoid inverting deeper layers.
Can I prepare soil without using a tiller?
Yes. Use a tarp to soften weeds, then broadfork, add compost, and rake level. It takes more passes at first, but it protects soil biology and structure.
When is the best time to prepare soil?
Work soil when it is moist but not sticky. In many regions, late spring and early fall offer the most reliable window.
What amendments should I add before planting?
Follow a soil test. Most beds benefit from screened compost, and lime or sulfur should only be applied if the test says your pH needs adjustment.
Are power harrows better than tillers?
For minimal disturbance, yes. A power harrow mixes the top layer without flipping deep soil, which preserves structure and makes a finer seedbed.
What tools help reduce weeds during preparation?
A stirrup hoe for shallow passes, a landscape rake to lift roots, and an occultation tarp to pre-sprout and kill weeds all work well.
Conclusion
Soil is the foundation of everything you grow. Choose tools for soil preparation that fit your soil type, your garden’s scale, and your comfort level, then follow a simple workflow: test, loosen, amend, level, and plant.
Start small. This weekend, pick one bed. Check its moisture, gather a fork, rake, tarp, and soil test kit, and prepare that bed before planting anything. Let the soil’s structure guide your choices, and you will build better beds every season.