

How To Hold A Gardening Trowel: Grip Tips For Control
The humble trowel is the most-used tool in the garden, yet most people grip it wrong without realizing it. Hold it too tightly and your hand cramps by the third planting hole. Bend your wrist even slightly and the blade skids across the soil instead of biting in. The difference between effortless planting and frustrating digging often comes down to a few small adjustments in how you hold the handle.
This guide breaks down the mechanics of a proper trowel grip, explains why your wrist angle matters more than you think, and shows you how to adapt your hold for specific jobs like transplanting, weeding, and scooping compost. With a few minutes of practice, you will reduce hand fatigue, dig more accurately, and actually enjoy the time spent with your hands in the dirt. You can also read our guide on how to sharpen lawn mower blades at home.
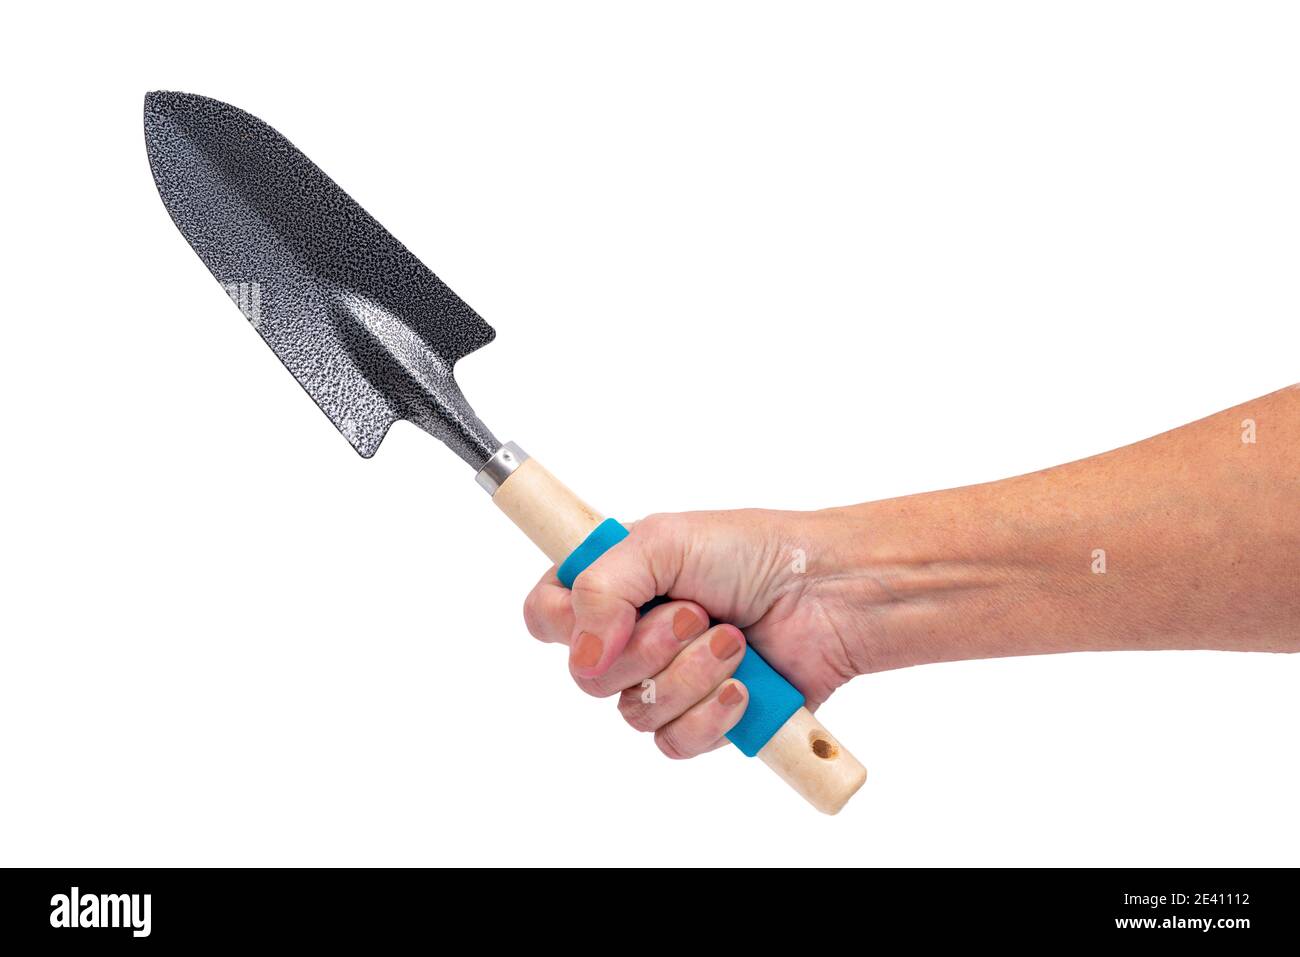
Notice how the wrist stays neutral and aligned with the forearm in this example.
Source: alamy.com
Why Your Grip Directly Affects Performance
Your grip is the connection point between your body’s power and the tool’s work. Get it wrong, and you compensate with extra force from your forearm and shoulder, which leads to rapid fatigue. Get it right, and the trowel becomes an extension of your arm.
The mechanics are straightforward. A relaxed grip allows blood to flow freely to your fingers and reduces muscle tension. A straight wrist keeps the tendons in your forearm aligned, which maximizes the force you can transfer through the handle. When you bend your wrist sharply, you lose leverage and put unnecessary strain on the joint.
In practice, this means the trowel blade should meet the soil at an angle that follows the natural arc of your arm swing. If you find yourself chopping at the ground with short, jerky motions, your grip or wrist position is likely forcing the blade into an awkward angle. Instead, the motion should feel like a smooth, continuous scoop.
Know Your Trowel Anatomy
Before we refine your grip, it helps to understand each part of the tool and how it responds to pressure. Different trowel designs call for slightly different hand positions.
The Blade
The blade does the actual cutting and lifting. Narrow blades (around 2 inches wide) penetrate hard, compacted soil more easily. Wide blades (3 inches or more) move larger volumes of loose soil or compost. Some blades have depth markings etched into the metal, which help you plant bulbs at consistent depths.
The Shank and Ferrule
The shank is the metal neck connecting blade to handle. The ferrule is the collar that joins the shank to the handle material. A forged, one-piece shank that runs deep into the handle resists bending better than a thin stamped shank. If your handle wobbles or twists, the ferrule has likely loosened — this will undermine any grip technique.
The Handle
Handles come in wood, plastic, rubber, and composite materials. Round handles allow your grip to rotate slightly, which helps with scooping motions. Contoured or ergonomic handles lock your fingers into a fixed position, which improves precision but reduces flexibility. T-handles provide extra leverage for digging in heavy clay but can feel awkward for quick, repetitive work.
The Weight and Balance
A trowel that sits forward-heavy in your hand helps penetrate hard soil with less effort. A neutral balance point feels nimble and works well for precise transplanting. Heavier trowels reduce hand strain in dense soil because gravity does some of the work. Lighter trowels reduce fatigue during long sessions in loose potting mix.

Source: shutterstock.com
The Core Grip: Step by Step
Master this basic grip first. It forms the foundation for every specialized technique that follows.
Position the handle in your palm. The butt end of the handle should rest against the fleshy pad at the base of your palm, not in the center of your hand. This positioning gives you maximum control and prevents the handle from sliding.
Wrap your fingers around the handle. Close your fingers naturally, allowing your middle, ring, and pinky fingers to do the primary gripping work. Your index finger rests loosely on the side of the handle — it acts as a guide rather than a clamp.
Place your thumb along the top of the handle. Your thumb should point toward the blade, running along the spine of the handle. This is your steering mechanism. It controls the angle of attack and prevents the blade from twisting sideways in the soil.
Keep your wrist straight. Your knuckles, wrist, and forearm should form a relatively straight line. A straight wrist transfers power efficiently and prevents the tendon strain that causes “gardener’s wrist.”
Tuck your elbow close to your body. A tucked elbow channels power from your larger arm and shoulder muscles rather than your small hand muscles. Flaring your elbow out forces you to rely on wrist strength, which leads to fatigue.
Angle the blade forward slightly. Tilt the blade forward by 20 to 30 degrees from vertical when cutting into soil. This angle lets the blade slice into the ground and then scoop outward naturally.
Quick Self-Correction Checks
- If your fingers feel tingly or numb, you are squeezing too hard. Relax your grip — the handle should rest in your hand, not be crushed by it.
- If the blade wobbles side to side, slide your thumb slightly forward along the handle to increase steering control.
- If your wrist aches after a few minutes, you are bending it too much. Move your feet closer to the work instead of reaching.
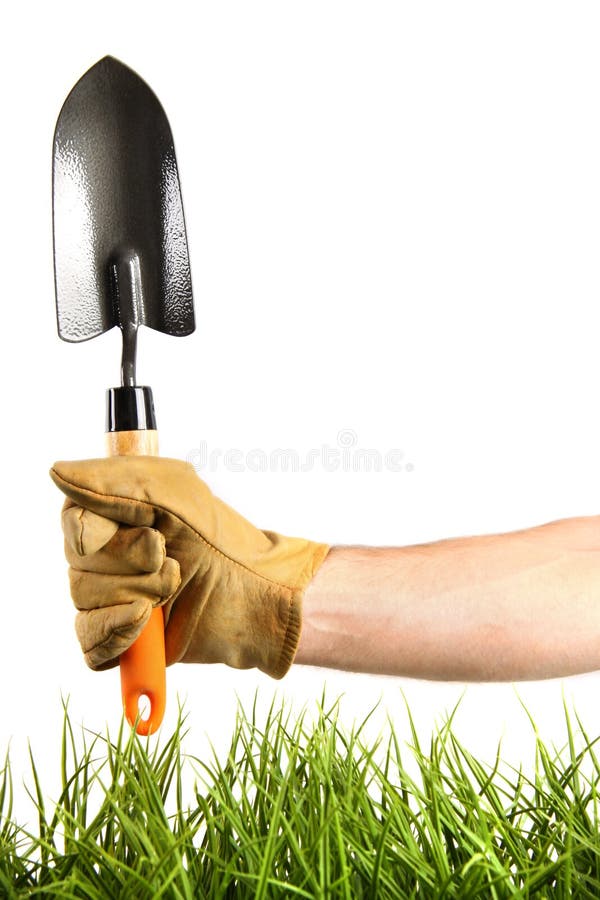
The thumb runs forward along the top of the handle to guide the blade.
Source: dreamstime.com
Task-Specific Grips and Techniques
The core grip works for general digging, but specific jobs benefit from adjustments. Think of these as shifting gears — the same tool, different hand positions for different workloads.
Digging Planting Holes
Use the full power grip described above. Start each hole with a short, firm chop to break the surface, then rock the handle backward to lever up soil. The levering motion should come from your hips and legs stepping back, not from bending your wrist. This technique makes a noticeable difference when planting bulbs or annuals in beds.
Transplanting Seedlings
Slide your hand up the handle so your thumb rests near the top of the handle, close to the ferrule. Pinch the handle between your thumb and index finger while your remaining fingers wrap loosely below. This precision grip gives you fine motor control for the gentle, small motions needed to work around fragile roots. Use small, slow scoops and let the narrow tip of the blade do the work.
Scooping and Moving Soil or Compost
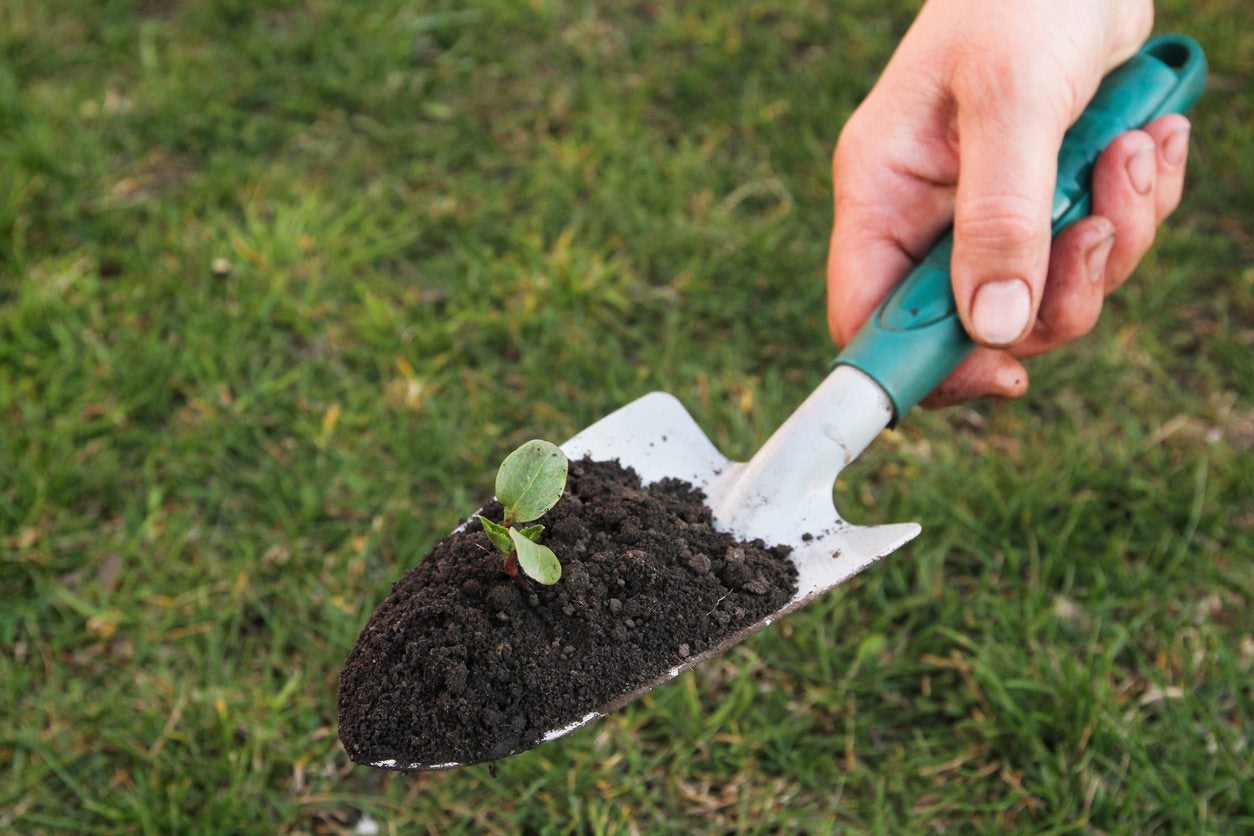
Shift your thumb to the side of the handle rather than on top. This “scoop grip” keeps the blade bowl facing upward and level as you lift. Pull soil toward you with short, smooth strokes, then lift and carry with the tool or dump it directly into your planting hole. Keep your wrist neutral even while scooping — resist the urge to curl your wrist upward.
Weeding and Slicing Roots
To slice through dandelion roots or cut through turf, shift to a knife grip: thumb pressed firmly along the top of the handle, index finger extended along the side for guidance. Keep the blade flat and close to the soil surface. Drive the blade forward and down with short, firm pushes, using your shoulder rather than your wrist for power.
Working in Tight Pots
Choke up on the handle — move your hand closer to the blade, gripping the shank area if it is comfortable. This shortening of your lever arm gives you the precise control needed to avoid damaging potted neighbors. Use short, shallow strokes and rotate the pot as needed rather than overreaching.

Source: shutterstock.com
Body Mechanics That Reduce Hand Strain
Your grip does not exist in isolation. How you position your body determines how much strain reaches your hands and wrists. The best grip in the world cannot compensate for poor posture.
Stand close to your work. If you are reaching, you are putting unnecessary load on your wrist and shoulder. Your feet should be planted near the edge of the bed or pot, staggered for balance.
Keep your wrist neutral and let your elbow and shoulder drive the tool. When you lever heavy soil, hinge at your hips and knees like a squat rather than bending at the waist. This shift engages your leg muscles — the largest in your body — instead of the small muscles in your forearm.
Switch hands every few minutes during long sessions. Alternating hands redistributes the workload and prevents overuse injuries. It may feel awkward at first, but the balance in muscle development is worth the practice time.
Take microbreaks. Every fifteen minutes, set the trowel down, shake out your hands, and roll your shoulders backward a few times. These brief pauses prevent the buildup of tension that leads to cramping.
Ergonomic research consistently shows that working with joints in a neutral, aligned position reduces strain and increases endurance. That principle applies directly to gardening, and it is why your wrist position matters more than your grip strength. For deeper guidance on hand and joint mechanics, resources from extension services provide practical ergonomic advice for outdoor work.
Mistakes That Sabotage Your Technique
Nearly every gardener makes these errors at some point. Recognizing them in your own technique is the first step to fixing them.
The death grip. Squeezing the handle as if it might escape. This causes hand cramps, blisters, and fingertip numbness. The fix: consciously relax your fingers and let the palm of your hand support the weight of the tool. Your grip should feel like a firm handshake, not a vise.
The bent wrist. Angling your wrist up, down, or to the side to compensate for poor body position. A bent wrist drastically reduces the force you can apply and stresses the tendons. The fix: step closer to the bed and align your wrist with your forearm.
Thumb too far back. Resting your thumb behind your fingers instead of along the handle spine. This removes the guidance mechanism, allowing the blade to wander and twist. The fix: slide your thumb forward until it points toward the blade.
Elbow flared outward. Holding your elbow away from your body like chicken wings. This loses leverage and forces your wrist to do the work. The fix: tuck your elbow close to your ribs and drive the tool from your shoulder.
Levering with your wrist. Trying to pry up soil by bending your wrist backward. This builds fatigue quickly and risks injury. The fix: hinge at your hips and knees, pushing the handle down while stepping back to lever the blade upward.
The most common mistake I see in real gardens is the death grip combined with a bent wrist. Find a gardener who complains of hand fatigue, and you will almost always find that exact combination. Loosening the grip and straightening the wrist fixes most complaints within a single session.
Source: gardeningknowhow.com
Choosing the Right Trowel for Your Hand Size
Technique matters, but tool fit matters just as much. A trowel that does not match your hand size will undermine every grip technique you try.
- Handle diameter for small hands: look for handles under 1.25 inches in diameter. A handle that is too thick forces your fingers into an overextended position that quickly fatigues.
- Handle diameter for large hands: look for handles over 1.5 inches in diameter, or check for contoured grips sized for larger hands. A grip that is too thin causes your fingers to curl excessively and cramp.
- Contoured handles are shaped to fit the natural curve of a relaxed hand. They distribute pressure across a wider surface area, reducing hot spots.
- Padded handles add a layer of shock absorption, which helps in hard or rocky soil. The trade-off is slightly less tactile feedback.
- Balance point: hold the trowel by the handle and see where it balances. Forward-heavy trowels help with penetrating hard soil. Neutral-balance trowels feel more nimble for fine work.
Materials also matter. Stainless steel resists rust and cleans easily but is heavier. Carbon steel takes a sharper edge and cuts more efficiently but requires drying after each use. Aluminum is lightweight but bends more easily under heavy loads. Quality varies widely, so you can find reliable guidance on tool selection and maintenance from university extension horticulture programs that test garden tools.
A quick fit test: hold the trowel in the grip you use most for thirty seconds. If you feel pressure points, strain, or an urge to adjust your grip, the handle shape is not right for your hand.
Practice Drills That Build Muscle Memory
These drills take five minutes a day and dramatically shorten your learning curve. You do not need perfect technique before starting — the drills build the technique for you.
Spill-Free Scooping
Fill a pot with moist soil and transfer it to a second pot using your trowel. The goal is to carry soil from one container to the other with zero spills over the rim. Sweep the blade level and move smoothly. This drill trains your scoop grip and wrist control simultaneously.
Straight Line Trenching
Tie a string across a prepared bed and cut a shallow trench along it, using the string as a guide. Focus on keeping your wrist straight and your blade perpendicular to the string. The trench should be uniform in width from start to finish.
Depth Repeatability
Plant five holes of the same depth in a row. Then check each with a ruler. This drill builds the consistency you need for planting bulbs or setting transplants at uniform depths. Pay attention that you use the same grip angle each time.
Non-Dominant Hand Practice
Repeat each drill with your non-dominant hand. This balances strength between hands and gives you a functional backup when one hand gets tired. Expect this to feel clumsy at first — that is normal and will resolve within a few sessions.
For related skills that complement your trowel work, our guide on maintaining sharp cutting edges across your toolkit explains how to keep blades efficient with minimal effort.
Cleaning and Maintaining a Secure Grip
A dirty or damaged handle ruins any grip technique. Mud, sap, and moisture create slipperiness that forces you to grip harder than you should. Sharp blades and secure ferrules reduce the force you need to apply.
After each use: wipe the handle down to remove dirt and plant sap. Rinse the blade and dry it completely — especially if it is carbon steel, which rusts quickly. Store the trowel out of direct sun and rain. Wood handles can dry out and crack, and plastic handles become brittle with prolonged UV exposure.
Periodic maintenance: tighten any loose ferrules or screws. Sand down rough spots on wooden handles and apply boiled linseed oil. Replace handles that are cracked or splintered — no grip technique compensates for a handle that turns in your hand.
Blade sharpness: a sharp blade requires significantly less force to penetrate soil. This reduces the strain on your entire arm, not just your grip. A sharpening stone or file can restore a trowel edge in minutes. The effort pays back immediately in reduced fatigue.
Handle texture: if you find yourself gripping harder than necessary on smooth wooden or plastic handles, consider wearing lightweight gardening gloves with textured palms or adding a grip wrap to the handle. Both options reduce the grip strength required.
When you clean up after a session, the same care extends to other garden tools. A good habit is to inspect your watering equipment and other frequently used items while you are cleaning up, so you catch wear early.
Frequently Asked Questions
What is the ideal wrist position for prolonged trowel work?
Your wrist should remain straight and aligned with your forearm for the majority of digging and scooping. A neutral wrist minimizes tendon strain and maximizes force transfer. Slight deviations are fine for detail work like transplanting, but return to a neutral position for anything repetitive.
Should I wear gloves when learning a new grip?
Yes, but choose thin gloves with textured palms rather than bulky garden gauntlets. Thick gloves deaden the tactile feedback you need to feel the handle and blade. Thin gloves protect against blisters while allowing you to sense what the blade is doing beneath the soil.
How do I know if I am gripping too tightly?
Signs include fingertip tingling, hand cramping, and a tendency to white-knuckle the handle after just a few minutes. A reliable test: your grip should feel like you are holding a small bird — firm enough to prevent escape, loose enough to avoid harm.
Do left-handed gardeners need different techniques?
The principles are identical, but you should mirror the grip positions described. Many trowels have symmetrical handles that work for both hands. If you cannot find a comfortable left-handed option, look for ergonomic trowels with ambidextrous designs. Avoid tools with pronounced right-handed contours that force an unnatural grip.
What type of trowel is easiest to learn with?
A medium-width stainless steel trowel with a contoured handle around 1.25 inches in diameter is the easiest starting point for most gardeners. This combination balances cutting power, control, and comfort. Avoid buying the cheapest option — the difference in handle quality matters significantly for technique development.
Conclusion
Good trowel technique boils down to three principles: relax your grip, straighten your wrist, and let your larger muscles do the heavy lifting. The tool should feel like an extension of your arm, not something you are fighting against.
Start with the core grip and practice the drills for a few minutes each day. Once the basic motion feels natural, experiment with the task-specific grips for transplanting, scooping, and weeding. Finally, check that your trowel actually fits your hand — the best technique cannot compensate for a handle that is the wrong size or shape.
Try one drill today before your next planting session. The difference we talk about is not theoretical — you will feel it within the first few minutes of digging.


