How To Grow A Persimmon From Seed: Beginner’s Guide 2026
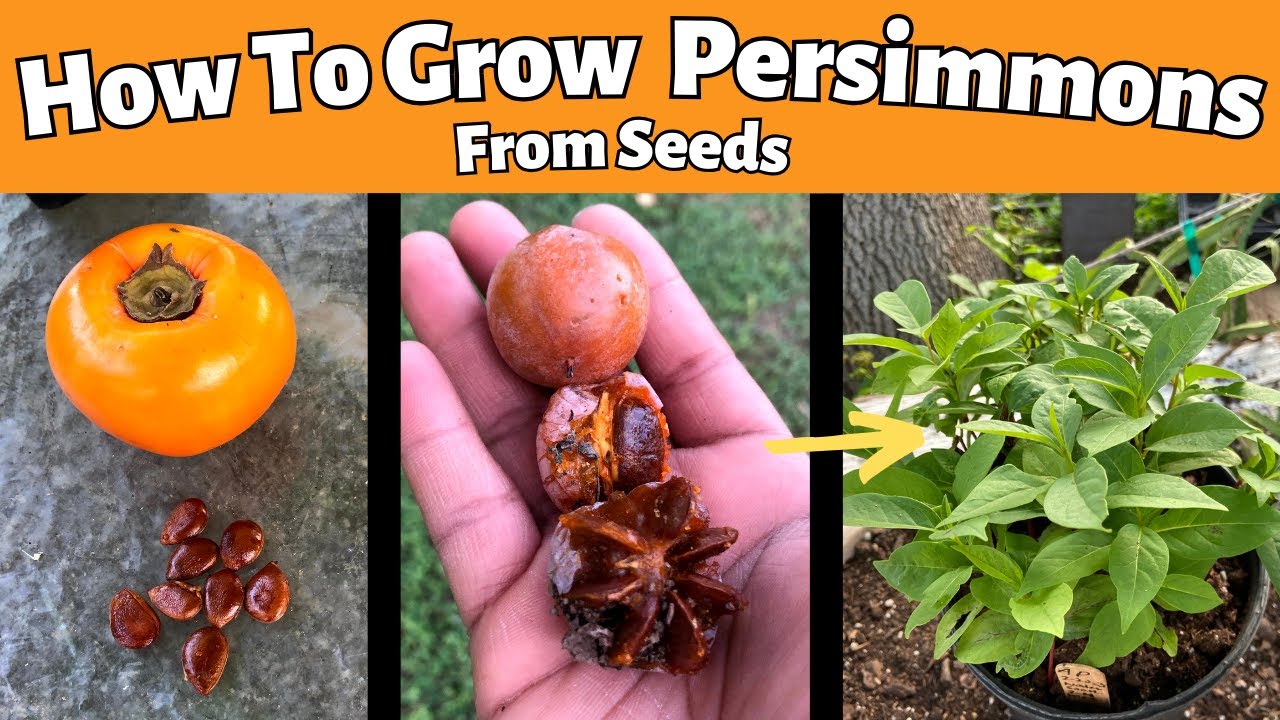
Growing a persimmon tree from seed is one of the most rewarding long-term projects a gardener can take on. It requires patience, a bit of fridge space, and a willingness to wait several years for your first harvest. But the payoff—biting into a fruit that no one else on your street has—is worth every season of waiting.
This guide walks you through the entire process, from selecting the right fruit to transplanting a healthy sapling into your yard. You will learn what works, what wastes a season, and how to avoid the most common beginner mistakes. You can also read our guide on how to drain a garden hose for winter.

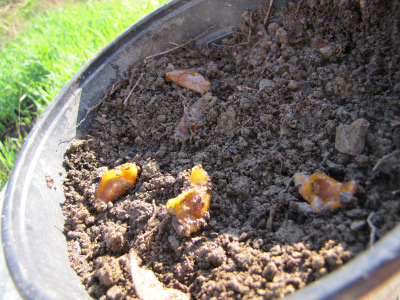
The taproot develops quickly, so use a tall pot from day one.
Source: waldeneffect.org
Choosing the Right Persimmon Species for Your Climate
Persimmons fall into two main groups, and choosing correctly between them determines whether your tree thrives or struggles for years.
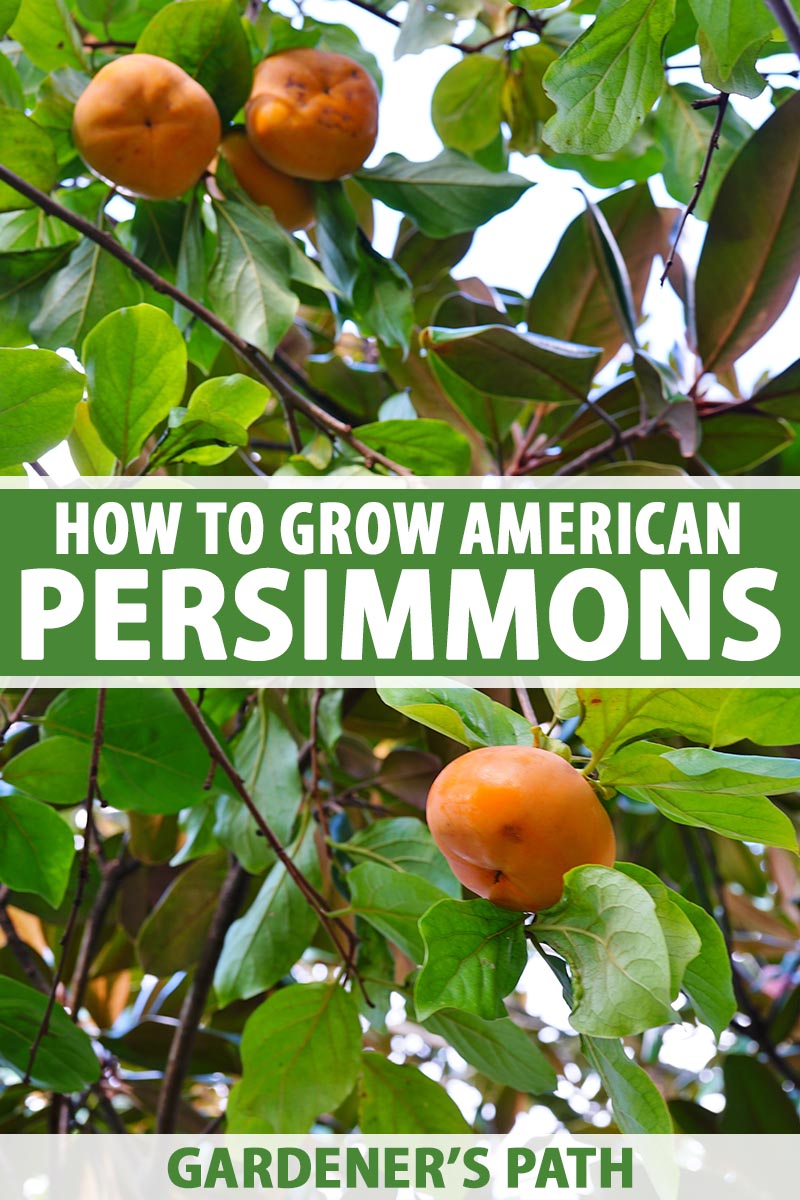
American persimmon (Diospyros virginiana) is native to the eastern United States. It tolerates cold down to zone 4 and handles a wide range of soil types. This is the best choice for northern gardeners or anyone with heavy clay soil. The fruit is smaller, usually 1 to 2 inches across, and intensely sweet when fully ripe. You can also read our guide on how to choose the right garden hose length.
Asian persimmon (Diospyros kaki) produces the large, tomato-sized fruit you see in grocery stores. It grows best in zones 7 through 10 and needs milder winters. Asian varieties also require more consistent moisture and better drainage than their American cousins.
There are also hybrids between the two species that combine cold hardiness with larger fruit. These are excellent choices for the zone 5 to 7 transition areas. You can also read our guide on how to maintain garden tools.
Before you collect a single seed, check your USDA hardiness zone and match it to the species. This single decision prevents years of frustration. If you are not sure which zone you are in, your local cooperative extension office can tell you—and they are also a great resource for regional growing advice from the USDA.
Where to Find Viable Persimmon Seeds
The most reliable source is a ripe, soft fruit from a healthy tree. Farmers markets, local orchards, and neighbors with established trees are ideal. You want fruit that is fully colored and gives slightly under gentle pressure—this means the seeds inside have matured.
Store-bought persimmons are hit or miss. Many commercial Asian varieties, especially Fuyu, are bred to produce fruit without seeds. You can still check by cutting one open, but do not buy a large quantity expecting every fruit to have viable seeds.
Wild American persimmons are a different story. Look for them along field edges and woodland margins in the fall. Fruit that has fallen to the ground and is still intact is often perfect—the seeds are mature, and wildlife has already done the ripeness test for you.
One practical tip: collect twice as many seeds as you think you need. Germination rates are rarely perfect, and seedling losses from damping-off or transplant shock will thin your numbers further.
Gathering the Tools You Will Need
The equipment list is short, and most items are probably already in your shed. What matters is that everything is clean—mold is the enemy of seed germination.
- Deep pots or tree pots (10 to 14 inches tall to accommodate the taproot)
- Seed starter mix or a blend of fine compost and perlite
- Zip-lock bags for stratification
- Vermiculite or damp peat moss
- A spray bottle for gentle watering
- Labels and a permanent marker
- A sieve for rinsing seeds clean
A note on pots: shallow trays are a mistake. Persimmon roots grow straight down, and a cramped seedling develops a coiled root that stunts the tree for years. Invest in tall pots designed for tree seedlings—your future self will thank you at transplant time.
Preparing Seeds for Stratification
Once you have your fruit, the seeds need to be separated from the pulp and cleaned thoroughly.
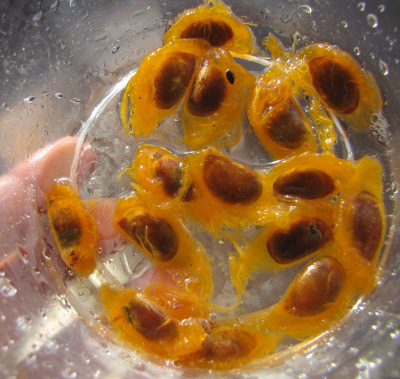
Squeeze the pulp into a bowl of cool water. The seeds will sink while most of the pulp floats. Swirl the mixture, pour off the floating debris, and repeat until the water runs mostly clear. Any seeds that still float after this process are probably not viable—discard them.
Soak the cleaned seeds in fresh, room-temperature water for 12 to 24 hours. This rehydrates the seed coat and signals that it is time to prepare for germination.
To reduce the risk of fungal problems, give the seeds a quick sanitizing rinse. A 10-minute soak in a 1:10 dilution of household bleach and water works well. Rinse thoroughly afterward and let the seeds surface-dry for an hour or two. This is not strictly required, but in practice it noticeably reduces mold growth during the long stratification period.
Cold Stratification: The Step Most People Get Wrong
Persimmon seeds evolved to survive winter before sprouting. If you skip this cold period, your germination rates will be low and erratic. This is the single most common reason a beginner's attempt fails.
The standard method:
- Mix the cleaned seeds with damp vermiculite or peat moss in a zip-lock bag.
- The medium should feel moist but not wet—you want no standing water in the bag.
- Seal the bag and label it with the species and the date.
- Store it in the refrigerator at 34 to 41°F (1 to 5°C).
- Leave it for 60 to 90 days.
Check the bag once a month. Open it briefly to let in fresh air, and look for any signs of mold. A few seeds may begin to sprout during stratification—this is a good sign, not a problem. Handle those carefully when it is time to plant.
The winter sowing alternative:
If you prefer a lower-effort method, you can sow seeds directly in a protected pot outdoors in late fall. The natural winter chill provides stratification, and the seeds sprout in spring. This works well but gives you less control over conditions and a slightly lower germination rate. It is a fine choice if you have many seeds and limited fridge space.
Germinating and Potting Up Seedlings
After the stratification period ends, it is time to plant.
Fill your deep pots with a fast-draining mix. In practice, a blend of one part compost, one part pine bark, and one part perlite works reliably. Press the seeds about 0.5 to 1 inch deep and water gently with your spray bottle.
Place the pots somewhere consistently warm—70 to 75°F (21 to 24°C) is ideal. A bright windowsill works if it stays warm, but a seedling heat mat gives more consistent results. Under LED grow lights, expect germination in 2 to 6 weeks.

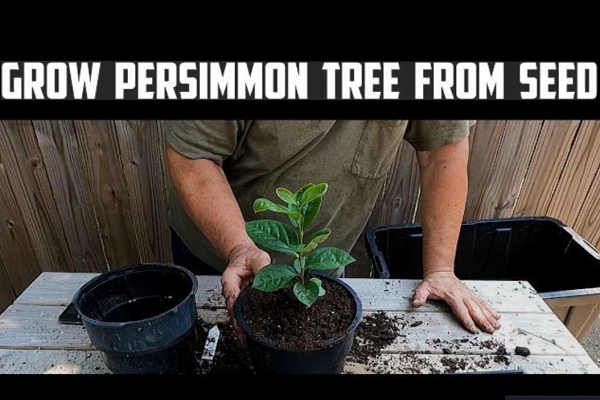
Leave the seed coat alone—it will drop off naturally when the first true leaves develop.
Source: youtube.com
The critical moment:
Persimmon seedlings form a deep taproot within the first few weeks. If you ever need to move a seedling, lift the entire root ball—never pull on the stem. Tugging the stem damages the connection between root and shoot, and the seedling will stall or die.
A common mistake is transplanting seedlings too early. If you started several seeds in one pot, wait until they have at least two sets of true leaves before separating them. Then move each one into its own pot with minimal root disturbance.
Transplanting Outdoors and Early Protection
Your seedlings will need to spend their first winter indoors in most climates. Move them outside the following spring, after the last frost date.
Hardening off is mandatory. Over the course of 7 to 10 days, give your seedlings progressively more time outdoors. Start with an hour in morning shade, then gradually increase both duration and sun exposure. This step prevents the sunburn and shock that kills unprotected seedlings.
Choose your planting site carefully:
- Full sun (at least 6 to 8 hours daily)
- Well-drained soil—persimmons hate standing water
- A pH between 6.0 and 7.5
- Protection from strong winds for the first year
Dig a hole three times wider than the root ball but no deeper. Set the tree at the same depth it was growing in the pot. Backfill, water deeply, and apply a 2 to 3-inch layer of mulch in a ring around the tree. Keep the mulch several inches away from the trunk to prevent rot.

A trunk guard and mulch ring give a young tree the best chance in its first outdoor year.
Source: bhg.com
During the first growing season, water deeply once a week if there is no significant rainfall. Adjust for heat waves and drought. The goal is consistently moist—never soggy—soil.
Wildlife is a far bigger threat than insects in most yards. Rabbits and voles will chew young bark in winter, and deer will browse tender shoots. A simple wire trunk guard and a small fence are inexpensive insurance that saves your tree from being destroyed in a single night.
Watering, Feeding, and Pruning for Long-Term Health
Persimmons are not heavy feeders. This is a case where less really is more.
Year one: Skip fertilizer entirely. The seedling has everything it needs in the soil and will establish faster without a nitrogen push.
Year two onward: Apply a balanced, slow-release fertilizer in early spring. Too much nitrogen produces lush, weak growth that attracts pests and fails to harden off before winter. If your tree is growing 12 inches or more per season, it is getting enough.
Pruning is simple but important:
Persimmons naturally want to form a strong central leader—a single dominant trunk. Your job is to help it. In late winter, remove any competing vertical shoots and crossing branches. Keep cuts small and clean. Do not top the tree or prune heavily; persimmons respond poorly to aggressive cutting.
Regional considerations:
In hot, sunny climates, consider whitewashing the trunk in the tree's first few winters. Young bark is prone to sunscald, which can kill the tree even in mild winters. A diluted latex paint or commercial tree wrap reflects sunlight and prevents this damage.
For more on building healthy soil that supports strong root systems, see our guide on improving garden soil naturally. Good soil health is the foundation your persimmon will rely on for decades.
Common Problems and How to Prevent Them
Damping-off is the number one killer of young seedlings. This fungal disease causes seedlings to rot at the soil line and fall over. Prevention is straightforward: use a well-drained mix, avoid overwatering, and provide good air circulation. If you see it starting, remove affected seedlings immediately and let the remaining soil dry out between waterings.
Root rot occurs when persimmons sit in waterlogged soil. The fix is prevention—improve drainage before planting, and water deeply but infrequently rather than shallowly and often.
Scale and mealybugs occasionally appear on established trees. Wipe them off with a cloth dipped in horticultural oil. Persimmons are generally pest-light compared to stone fruits, so heavy intervention is rarely needed.
Leaf spot can develop in humid weather. Improve air circulation by thinning crowded branches, rake and remove fallen leaves, and apply a copper spray only if the problem is severe and the product is labeled for food crops.
Wildlife, as mentioned, is often the real challenge. Trunk guards, fencing, and repellents all have their place. The key is to act before damage occurs, not after. Deer damage in late winter is especially frustrating because it often goes unnoticed until spring.
If you garden in an area with heavy deer pressure, you may also appreciate our advice on cleaning up dog poop in yard—keeping your yard clean reduces the attractants that bring wildlife near your trees.
Timeline, Expectations, and Grafting Options
Here is the honest timeline:
| Stage | Timeframe |
|---|---|
| Seed collection | Fall |
| Cold stratification | 60–90 days |
| Germination | 2–6 weeks after planting |
| First outdoor transplant | 1 year after sowing |
| First fruit (seedling) | 4–8 years |
| First fruit (grafted) | 2–4 years |
A key truth about seed-grown fruit:
Your seedling will not produce fruit identical to its parent. Persimmons are genetically diverse, and each seed is a unique combination. You might get a tree with exceptional, rich fruit—or one that is mediocre. This unpredictability is why commercial orchards graft named cultivars onto rootstock.
Grafting is your option for predictable quality.
If you want the reliable fruit quality of a named variety, graft a scion from a known cultivar onto your seedling rootstock. The seedling provides an excellent, cold-hardy root system, while the grafted scion produces fruit you can count on.
Graft in late winter or early spring when the tree is still dormant. Whip-and-tongue grafts work well on pencil-thick stock. Bark grafts are more forgiving for beginners. After the graft takes, keep one strong leader and remove competing growth.
This approach gives you the best of both worlds: a resilient, locally adapted root system and dependable fruit quality.
Harvesting and Enjoying Seed-Grown Persimmons
When your tree finally fruits, the reward is worth the wait.
Astringent varieties (like Hachiya) need to be completely soft—almost jelly-like—before eating. Biting into one too early is a mouth-puckering mistake you will only make once. They are excellent for baking and drying.
Non-astringent varieties (like Fuyu) can be eaten while still firm and crisp. They are great fresh and hold up well in salads.
Harvest fruit gently—persimmons bruise easily. Store them at room temperature until soft. Cold storage can cause browning in some types, so keep them on the counter unless you are immediately eating them.
Seedlings often surprise you with distinctive flavors. Some are rich and spicy, others are mild and honey-sweet. This variation is part of the appeal of growing from seed. You are not just growing a tree; you are creating a unique variety that exists nowhere else on earth.

Fully ripe fruit is translucent, soft, and intensely sweet—the payoff for years of patience.
Source: waldeneffect.org
Frequently Asked Questions
Do persimmon seeds always need cold stratification?
Most species germinate significantly better after 60 to 90 days of cold, moist stratification. Some seeds may sprout without it, but you will see lower germination rates and slower, less uniform emergence.
How long does it take a seed-grown persimmon to fruit?
Expect 4 to 8 years for most seedlings. Good sun, consistent water, and healthy soil can shorten the timeline, while poor conditions extend it.
Will the fruit be the same as the parent tree?
No. Seedlings are genetic mixes, so the fruit can be better, worse, or simply different from the parent. Grafting is the only way to guarantee a specific variety.
When should I transplant my persimmon seedling outdoors?
Move it outside after the last frost in spring, and harden it off over 7 to 10 days first. The first year outdoors is when the tree establishes its permanent root system.
What size pot is best for early growth?
Use tall, deep pots—at least 10 to 14 inches—to accommodate the taproot. Root-trainer pots prevent coiling and make later transplanting much more successful.
Conclusion
Growing a persimmon from seed is a slow craft that rewards patience. The process is not complicated, but it demands attention to detail: clean seed prep, proper cold stratification, gentle handling of the taproot, and consistent care through the first few years.
If you want predictable fruit quality, grafting a named cultivar onto your seedling is a smart pivot. If you want the joy of discovering a completely new variety, let the seedling grow and reveal its character. Both approaches are valid—choose the one that fits your goals.
The tools needed are simple. A few seeds, a bag of damp vermiculite, some fridge space, and a deep pot are all it takes to begin. The real investment is time, and that investment compounds every year.
Put a few seeds in the fridge this week and start your own experiment. Each tree you grow from seed adds something unique to your garden that money cannot buy. For more guidance on choosing the right tools for garden work, our overview of digging tools names with pictures covers the basics you will need for planting day.