How To Clean Gutters From The Ground With Leaf Blower: Tips
Cleaning gutters is one of those home maintenance tasks everyone knows they should do, but almost nobody enjoys. Climbing a wobbling ladder, scooping out slimy sludge, and risking a fall just to keep water flowing away from your foundation? There is a smarter way.
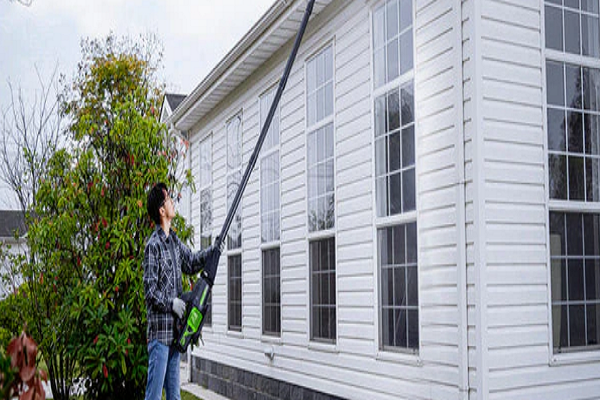
You can clean your gutters safely and effectively from the ground using a leaf blower with the right attachment. This method takes minutes instead of hours, eliminates ladder-related fall risk, and keeps your feet planted firmly on solid ground. In this guide, I will show you exactly how to clean gutters from the ground with a leaf blower, including the tools, techniques, and troubleshooting you need for a thorough job every time. You can also read our guide on how to use a leaf blower for yard cleanup.

Source: amazon.com
Why Ground-Level Gutter Cleaning Makes Sense
The most obvious benefit of ground-based gutter cleaning is safety. According to the Centers for Disease Control and Prevention, falls remain one of the leading causes of nonfatal injuries among homeowners, and ladder accidents are a big part of that statistic. Cleaning gutters from the ground removes that hazard almost entirely.
But safety is not the only advantage:
- Speed: A leaf blower with a gutter attachment can clear a single-story home in 30–60 minutes, compared to a full afternoon with a ladder and trowel.
- Consistency: You do not have to climb up and down to reposition a ladder every few feet. You simply walk along the edge of the house.
- Less strain: No heavy lifting, no balancing tools while on a ladder, and no awkward reaching. Your back and knees will thank you.
- Better visibility: From the ground, you can see debris blowing out of the gutter and downspout in real time, so you know precisely when the run is clear.
This method works best for single-story homes or the lower roofline of a two-story house. It handles light to medium debris well—think dried leaves, pine needles, twigs, and seeds. If your gutters are completely packed with heavy wet sludge, you may need to break up clogs first or consider a vacuum attachment.
Tools and Attachments You Need
Before you start, gather the right equipment. Using the wrong nozzle or an underpowered blower is the number one reason people give up on this method.
The Leaf Blower
Your blower should have at least 400 CFM (cubic feet per minute) of airflow to do this job comfortably. Here is how the types compare:
| Blower Type | Pros | Cons |
|---|---|---|
| Cordless battery | Quiet, lightweight, no cord management | Limited runtime (20–40 min typical), may lack raw power for wet debris |
| Corded electric | Unlimited runtime, consistent power, affordable | Need an extension cord and outdoor outlet nearby |
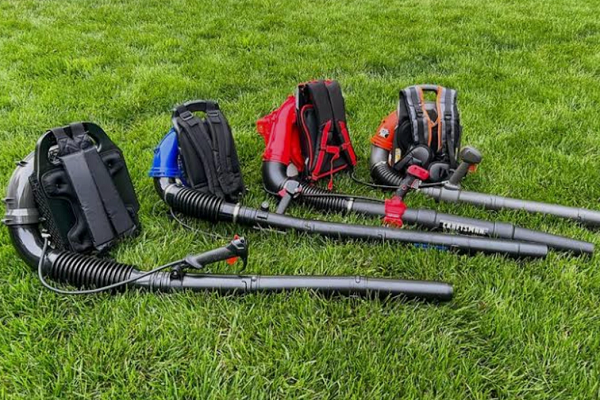
| Gas | Maximum power, moves heavy debris fast | Loud, heavier, requires fuel mixing and maintenance |
Variable speed control matters more than raw power. You will want a low, steady flow to start, then the ability to ramp up for stubborn clogs. If you already own a blower, check its CFM rating before buying any attachments. For more help narrowing down your options, see our roundup of the top-performing cordless models for home use.
The Gutter Attachment
A standard blower nozzle will not work—it just pushes air everywhere except the gutter. You need a U-shaped or curved gutter nozzle that attaches to your blower tube and bends airflow downward into the gutter channel. These are available as:
- Universal kits with rubber adapters that fit most blower brands
- Brand-specific attachments that lock directly onto your blower tube
- Extension poles (often 2–4 feet) that add reach for higher rooflines
A quality gutter kit costs between $20 and $60. It is a small investment for a tool that makes the job dramatically easier and will last for years.
Safety Gear
Do not skip this. Debris will fly out of the gutter at speed, and it has nowhere to go but toward you.
- Safety glasses or goggles (non-negotiable)
- Hearing protection (muffs or plugs, especially with gas blowers)
- Work gloves
- Dust mask if debris is dry and dusty
- A hat to keep debris out of your hair
Cleanup Supplies
- A tarp laid along the drip line to catch falling debris
- A leaf rake and contractor bags
- A garden hose with a spray nozzle for the final flush
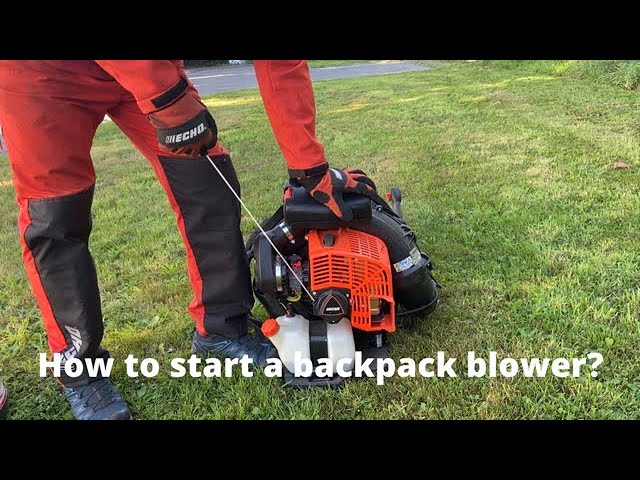
Also, if you have not used a blower for a while, check that the fuel mix is correct for gas models or the battery is fully charged for cordless ones. Learning how to properly mix oil and gas for your leaf blower ahead of time saves you from a frustrating mid-job sputter.

Source: arlocatcher.com
Safety Prep and Weather Checks
A little preparation prevents most of the problems you will encounter. Start by checking the forecast. Work only on a dry, calm day. Wind will blow debris back at you and into the yard. Rain turns dried leaves into heavy, sticky clumps that barely move, and wet surfaces are slippery underfoot.
Before you start blowing:
- Walk the perimeter: Look for hoses, toys, tools, or garden stakes that could trip you while you are focused upward.
- Clear the work zone: Move cars, patio furniture, and potted plants away from the house. Falling debris can scratch and stain.
- Mark power lines: Most gutters run near rooflines, which means you will be working close to overhead service lines. Keep your blower tube and any metal attachments well clear of them.
- Check downspout outlets: Make sure the bottom of each downspout is open and not blocked by leaves or a clogged drain. If it is blocked, debris will back up into the gutter as you blow.
- Secure loose gutter brackets: If you see a section of gutter sagging, do not blow full power into it. The pressure can worsen the bend or pull it away from the fascia.
One more practical note: tell anyone inside the house what you are doing. Ground-level cleaning is quiet enough that you will not disturb them, but they should stay away from windows near the work area—debris can bounce off walls and hit glass.
Step-by-Step: How to Clean Gutters from the Ground with Leaf Blower
Here is the exact process I use each time. Follow these steps in order, and you will get a clean gutter on the first pass.
Step 1: Lay a tarp along the drip line
Spread a tarp on the ground directly beneath the gutter line. Position it a little wider than the roofline, about 3–4 feet out from the foundation. This catches most of the debris that blows out. Anchoring the corners with bricks or heavy stones prevents the tarp from shifting as you walk.
Step 2: Assemble your blower and attachment
Attach the U-shaped gutter nozzle to your blower tube. Lock every joint tightly—a loose connection will wobble and waste airflow. If your kit includes extension poles, add them now and test the full assembly before you start.
Step 3: Start at low speed
Begin with the blower on its lowest setting. Hold the nozzle so the U-curve points down into the gutter. The goal is to feel the air moving through the channel, not to nuke it from ten feet away. Ramp up speed only after you feel comfortable controlling the direction.
Step 4: Work toward the downspout
Identify which side of the house has the downspouts. Start at the point farthest from each downspout and work your way toward it. This pushes debris in the correct direction so it exits through the outlet instead of piling up at the far end.
Step 5: Keep the nozzle angle shallow
Aim the nozzle outlet roughly parallel to the gutter run, about an inch above the gutter lip. Do not press the nozzle down into the gutter itself—that can chip enamel, lift shingle tabs, or scrape the gutter coating. A slight downward angle, not a sharp one, gives you the best blow path.
Step 6: Walk in slow, steady passes
Move at a walking pace, about 2–3 feet at a time. Do not rush. Watch the debris flow ahead of the airstream. If you see leaves tumbling out of the gutter and onto the tarp, you are doing it right.
Step 7: Pulse the trigger for stubborn spots
When you hit a packed section, do not hold the trigger wide open. Instead, use short, sharp bursts. The pulsing action breaks up compacted material better than a constant blast, and it generates less blowback.
Step 8: Clear the downspouts last
Once the gutter runs are clear, aim the nozzle straight down into each downspout opening and give it several short bursts. This dislodges moderate clogs. Do not force air into a completely blocked downspout—you might blow water or debris back out the top. More on this in the troubleshooting section below.
Step 9: Flush with water
A leaf blower gets the bulk of the debris, but it leaves behind a film of dust, pollen, and fine grit. Use your garden hose to flush each gutter run from the far end toward the downspout. Watch the downspout outlet: steady water means the channel is clear.
Step 10: Tidy up
Rake the tarp pile into bags. Do a quick visual check of the fascia boards and roofline while you are there—look for peeling paint, soft wood, or gaps that signal larger problems. This five-minute inspection catches small issues before they become expensive repairs.

Source: kafaatsa.com
Techniques for Different Roof and Debris Types
Not all debris behaves the same. Adjusting your technique to match what is in your gutter is the difference between a clean job and a frustrating hour.
Dry Leaves and Oak Litter
Use medium speed with long, sweeping passes. Dried oak leaves are light and move easily with steady airflow. Full power actually hurts here—it blows them out of the gutter before they travel the channel, scattering them across the yard.
Wet Sludge and Mud
This is the hardest scenario. Wet leaves compact into a dense mat that resists airflow. Work in short bursts to break the surface, then sweep the loosened material down the gutter. You may need to make two passes: one to break up the mat, a second to move the pieces. A hose flush at the end is essential to wash away the residue.
Pine Needles and Seeds
Pine needles are thin and tangle around gutter screws and seams. They also pack down tightly. Use higher speed in short bursts to disentangle them, then sweep at medium speed. A stiffer U-nozzle gives you better control for dislodging matted needles.
Gutter Guards
Perforated snap-in guards can usually be cleaned from the top. Tilt the nozzle at a shallow angle and blow across the surface—air passes through the holes and pushes debris along the top. Solid covers (like reverse-curve designs) do not let air through, and if you force it, you risk lifting the cover off its clips. For those systems, a manual scoop or a leaf blower with a vacuum attachment is the safer choice.
Two-Story Homes
Ground-level cleaning works on the lower roofline of a two-story home, but you will need a longer extension pole (6–10 feet) and a lighter blower to reduce arm fatigue. Move in smaller sections and pause to let your arms rest. If you have a steep upper roof, complex valleys, or heavy wind exposure, call a professional—this is not the job for a DIY ground-level attempt.

Source: toverster.net
Post-Clean Cleanup and Yard Care
Once the gutters are clear, take ten minutes to finish the job properly. The debris you blew out now sits on your tarp, and what you do with it matters.
- Rake the tarp pile into bags for composting or curbside pickup. If your municipal waste program accepts yard debris, use paper yard-waste bags rather than plastic—they break down and are often required.
- Check downspout splash blocks: If water pools near the foundation when it rains, add splash blocks, downspout extensions, or a buried drain.
- Inspect the gutter seams for gaps, and look for rust spots or peeling paint. Catching a problem now is far cheaper than repairing water damage later.
- Photograph the cleaned gutters before the season changes. A visual record helps you spot sagging sections or worn brackets during your next inspection.
That ground debris—mixed leaves, twigs, and seeds—actually makes excellent compost material. Rather than bagging it all, add the smaller pieces to your compost bin. If your lawn suffers from compaction after heavy foot traffic during the cleaning, now is also a good time to think about improving your lawn's soil health. Healthy soil drains better, which reduces puddling near your foundation.

Source: amazon.com
Maintenance Schedule and Time Investment
How often you clean your gutters depends on your trees and your local climate. As a baseline:
- Twice per year (late spring and late fall) suits most homes without overhanging trees.
- Three to four times per year is realistic for homes under pines, oaks, or maples.
- After major storms with high winds or heavy rain, do a quick check. A single storm can deposit a season's worth of leaves.
A full ground-level clean of a single-story home takes 30–60 minutes, including setup and cleanup. After the first time, you will likely cut that in half.
The upfront cost is a one-time investment: a gutter nozzle kit typically runs $20–60, and if you already own a blower, you are done. That is dramatically cheaper than a professional cleaning service, which charges anywhere from $100 to $250 per visit for a typical single-story home. Plus, having a leaf blower with a gutter attachment means you can do quick spot-checks after storms without committing to a full cleaning session.
Common Mistakes and Troubleshooting
Even experienced homeowners make these errors. Avoid them, and you will have a smoother experience.
Using maximum power the entire time
This is the most common mistake. Full throttle scatters debris everywhere—over the yard, across the driveway, onto the roof. Start low, use steady medium airflow for the main sweep, and ramp up only for brief bursts into packed corners.
Blowing against the flow direction
Always move debris toward the downspout. If you blow from the downspout end, you are pushing material into a dead end. It will pack at the corner and you will be stuck climbing up anyway.
Ignoring downspout clogs
If water pools in the gutter after cleaning, the downspout is still blocked. Try pulsing air directly down the pipe from the top. If that does not work, remove the downspout bends at the bottom and check for a clog there. A hose jet from the top or a plumbing snake from the bottom usually clears persistent blockages.
Working in bad weather
Wind blows debris back into your face and up onto the roof. Wet conditions make leaves cling to the gutter surface. Check the forecast and wait for a dry, calm day.
Holding the nozzle too close to shingles
A deep gutter angle can lift asphalt shingle tabs, which compromises your roof's water shedding and leads to leaks. Keep the nozzle tip at least an inch above the gutter lip, parallel to the run.
If a clog will not move
Sometimes debris is so compacted that air cannot penetrate. Switch to a hose with a jet nozzle and blast from the top. If standing water remains after both attempts, the gutter likely has a pitch problem—water is pooling instead of draining. At that point, the fix is re-hanging the gutter with proper slope, not more blowing.
Alternatives and When to Call a Pro
Ground-level blowing is excellent, but it is not the only method, nor always the right one. Know your options.
Gutter Vacuum Kits
These attach to your blower (or a dedicated vacuum) and suck debris out of the gutter into a collection bag. They handle wet sludge well and produce less ground mess. Downsides: they are heavier, more expensive, and slower than blowing.
Pressure Washer Gutter Wands
These extend your reach and blast debris out with water. They are powerful, but high-pressure water can force moisture under shingles and into the fascia. Use them only on low pressure and never on older roofs.
Telescoping Manual Scoops
A handle with a scoop attachment lets you pull debris out by hand from the ground. It is precise for packed sections but slow for full runs. Useful as a complement to blowing for stubborn corners.
Leaf Mulching
After the blowout, the debris on your tarp can be processed through a leaf mulcher. Mulched leaves break down quickly and make a nutritious addition to garden beds. If you are interested in this approach, here is a practical guide on how to use a leaf mulcher effectively.
When to hire a professional
Call a pro if you have:
- A steep or complex roof with multiple valleys
- Three or more stories
- Fragile or old shingles that could be damaged by airflow
- Persistent downspout clogs you cannot clear
- Evidence of rot or structural damage in the fascia
A professional gutter cleaning service has the equipment, harnesses, and insurance to handle high-risk work safely.
Frequently Asked Questions
Is it safe to clean gutters from the ground with a leaf blower?
Yes, this is one of the safest gutter-cleaning methods for a single-story home. You stay on the ground the entire time, eliminating the fall risk of ladder work. Always wear eye and ear protection and work in calm, dry weather.
What blower is best for this job?
Choose a blower with at least 400 CFM of airflow and variable speed control. Cordless models are lighter and easier to handle, while gas models offer more power for heavy debris. Check your blower's CFM rating before buying a gutter attachment.
Do I need a special gutter attachment?
Yes. A standard blower nozzle pushes air in a straight line; a U-shaped gutter nozzle bends the airflow down into the channel and gives you directional control. Universal kits with rubber adapters fit most blower brands.
How often should I clean gutters this way?
Twice a year—late spring and late fall—suits most homes. Homes under heavy tree cover, especially pines, should be cleaned three to four times per year. Always check after major storms.
Will this method clear downspout clogs?
It can clear moderate clogs with short, direct bursts of air straight down the pipe. For stubborn blockages, use a hose jet from the top or a plumbing snake from the bottom outlet.
Can I use this method on two-story homes?
Yes, for the lower roofline. You will need a longer extension pole and a lighter blower to reduce arm strain. For upper rooflines or steep roofs, hire a professional.
Does this method work with gutter guards?
It works on perforated snap-in guards, where airflow passes through the holes. Solid cover systems cannot be cleaned this way—air cannot pass through, and forcing it may damage the covers.
Conclusion
Keeping your gutters clear does not have to mean climbing a ladder with a scoop in one hand and a prayer in the other. A leaf blower with the right attachment lets you do the job safely, quickly, and from the comfort of solid ground. Buy a quality U-shaped nozzle, match your technique to the debris type, and finish with a water flush to confirm free flow.
Start with the easiest run on your house—a single-story section without much tree cover. Time yourself, watch your angles, and adjust your speed as you learn how your specific gutter system responds to airflow. Once you have the process down, you will knock out the whole house in under an hour.
Ready to make this part of your regular home maintenance? Grab your blower, order a gutter attachment kit online or pick one up at your local hardware store, and try it on your next sunny day. Your gutters—and your ankles—will be glad you did.