How To Make A Chainsaw Mini Bike

How To Make A Chainsaw Mini Bike: Pro Guide For 2026

Building a chainsaw mini bike is one of the most rewarding DIY projects you can tackle in a weekend workshop. You take a humble powerhead destined for the scrap pile and transform it into a screaming, lightweight off-road machine that pulls harder than its size suggests.

This guide walks you through the entire process, from choosing the right donor saw to dialing in your gearing for reliable performance. Whether you're a first-time builder or a seasoned tinkerer looking for a refresher, you'll find practical advice grounded in real garage experience, not theory. You can also read our guide on how to water lawn efficiently.

Assessing a chainsaw engine for a mini bike build in a workshop setting

Before you buy anything, inspect the donor saw thoroughly for cracks, worn bearings, and compression issues.

Source: dirttricks.com

What You're Actually Building

A chainsaw mini bike is a simple machine at its core: a two-stroke engine mounts to a small frame, a centrifugal clutch engages at idle, and a chain transfers power to the rear wheel. The magic happens in the gearing, which converts the engine's high-rpm, low-torque output into something that can actually move you from a standstill.

The Appeal of a Chainsaw Engine

Chainsaw motors are ideal for this project for three reasons. First, they're lightweight, typically weighing between 8 and 15 pounds complete. Second, they're air-cooled and self-contained, needing no radiator or external oil system. Third, they're cheap, often free if you have an old saw gathering dust. You can also read our guide on how to clean leaf blower air filter.

The trade-off is that these engines produce peak power at high rpm, usually between 7,000 and 10,000 rpm, with very little torque at idle. Without proper gear reduction, the clutch will slip constantly, overheat, and fail within minutes. This is the single most common mistake in chainsaw mini bike builds.

Safety First: What You Need to Know Before Starting

This project involves welding, rotating machinery, and a high-rpm two-stroke engine. Treat it with respect.

Personal protective equipment is non-negotiable. Wear a DOT-approved helmet, shatter-resistant eye protection, heavy leather gloves, long sleeves, and steel-toe boots when riding. When fabricating, add a welding helmet with the correct shade lens, ear protection, and a respirator rated for metal fumes. For more on this, see our guide on how to make a mini chainsaw mill.

Work in a well-ventilated space. Two-stroke engines emit carbon monoxide and unburnt hydrocarbons. Never run the engine indoors or in an enclosed garage, even with the door open. The fumes are also highly flammable, so keep fuel and oily rags away from ignition sources.

Check your local laws before you build. Most municipalities classify these as off-road vehicles, meaning you cannot legally ride them on public streets, sidewalks, or trails without registration, insurance, and proper lighting. Understanding your local regulations before you invest time and money will save you from headaches later. In practice, plan to ride on private property or designated off-road areas only.

Gathering Tools and Parts

Before you start cutting metal, gather everything you'll need. A well-stocked workbench saves trips to the hardware store and keeps the build momentum going.

Essential Parts List

Component Specification Notes
Engine 35–62 cc two-stroke chainsaw Look for one with good compression and a clean air filter
Clutch Centrifugal, matched to crankshaft Common sizes are 10T and 12T for #35 chain
Sprockets 10T–12T front, 54T–80T rear Steel or aluminum; aluminum wears faster
Chain #35 or #41 #35 for lighter builds, #41 for extra durability
Frame 1-inch square steel tubing Or use a donor mini bike frame
Wheels 10–12 inch diameter Go-kart or mini bike wheels with ball bearings
Brake Mechanical disc or band Must be strong enough to lock the rear wheel
Jackshaft Optional Provides extra reduction and better chain wrap
Fuel system Tank, line, filter, shutoff valve Use ethanol-rated fuel line

Tools You'll Need

  • Angle grinder with cutting and grinding discs
  • MIG welder (or take your frame to a local fab shop)
  • Drill with metal bits and step bits
  • Adjustable wrenches, sockets, and a torque wrench
  • Calipers and a straightedge
  • Chain breaker tool
  • Files and deburring tools

A common mistake is buying a clutch that doesn't match the crankshaft diameter. Measure the crankshaft stub precisely with calipers before ordering. Most chainsaw clutches are either 3/4 inch or 20mm, but this varies by manufacturer.

A centrifugal clutch and chain drive system laid out on a workbench for inspection

Match your clutch sprocket to the chain pitch and rear sprocket for a smooth drivetrain.

Source: reddit.com

Understanding the Drivetrain

The drivetrain is where most chainsaw mini bike projects succeed or fail. Unlike a lawn mower engine, which produces decent low-end torque, a chainsaw motor needs to spin fast to make power. Your job is to multiply that torque through gear reduction.

Why Chainsaw Engines Need Gear Reduction

A typical chainsaw engine at 7,500 rpm produces maybe 2.5 horsepower, but almost no torque at the clutch engagement point, which is usually around 2,500–3,000 rpm. If you connect that directly to a 12-inch wheel, the bike will barely move and the clutch will burn up from slipping.

The solution is a total gear reduction of 10:1 to 13:1. This means the engine spins 10 to 13 times for every single revolution of the rear wheel. This keeps the engine in its powerband, allows the clutch to engage fully, and gives you usable acceleration.

The Role of the Jackshaft

A jackshaft is an intermediate shaft that provides an extra stage of gear reduction. Instead of trying to find a massive 80-tooth rear sprocket, you can use a 12T clutch, a 30T jackshaft input sprocket, and a 15T jackshaft output sprocket driving a 48T rear sprocket.

This arrangement offers several advantages: it allows better chain wrap around the sprockets, reduces the need for a huge rear sprocket, and gives you more flexibility in positioning the engine. The downside is added weight, complexity, and cost.

In practice, a well-designed jackshaft setup is the difference between a bike that's merely fun and one that pulls hills with authority. If your budget allows, plan for one from the start.

A chainsaw engine mounted to a mini bike frame showing the drivetrain layout

A typical engine mount plate with slotted holes allows for chain tension adjustment.

Source: slavensracing.com

Building the Frame

The frame is the skeleton of your mini bike. It needs to be strong enough to handle the engine's vibration, your weight, and the stresses of off-road riding, all while staying lightweight.

Option One: Weld Your Own Frame

If you have welding experience, building a simple frame from 1-inch square steel tubing is straightforward. A basic design consists of a main backbone running from the head tube to the rear axle, a seat post, and engine mounts.

Start by laying out the geometry on the floor with chalk. Mark where the wheels will sit, where the engine will mount, and where the seat will go. A wheelbase of 36–40 inches works well for most adult riders. Keep the engine low and centered for stability.

Use gussets at every stress point, especially where the head tube meets the main frame and where the rear axle mounts attach. These small triangular plates prevent cracks from forming over time.

Option Two: Use a Donor Frame

Many builders start with a used mini bike frame, often from a go-kart, pocket bike, or child's mini bike. These are cheap and already have the geometry dialed in. The challenge is adapting the engine mounts to fit your specific chainsaw powerhead.

Engine mounting plates with slotted holes are the standard solution. These allow you to slide the engine forward and backward to adjust chain tension. You can buy universal plates or weld your own from 1/4-inch steel plate.

Alignment Is Everything

A common mistake is welding the engine mounts in place without first checking sprocket alignment. Use a straightedge along the clutch sprocket and rear sprocket to ensure they're perfectly in line. Misalignment causes rapid chain wear, premature clutch failure, and constant derailments.

Take your time with the mock-up. Position the engine with wood blocks before welding anything. Verify the chain line visually, then adjust.

Mounting the Engine

With the frame ready, it's time to secure the powerplant. This is where you'll appreciate good planning.

Engine Plate Design

A flat steel plate with four mounting holes works for most builds. The plate should be at least 1/4-inch thick to prevent flexing, which causes misalignment. Drill the mounting holes to match the chainsaw's case bolts, typically M6 or M8.

Add slotted holes to the plate itself, running fore and aft, to allow chain tension adjustment. Use grade 8 hardware with lock washers or threadlocker to prevent vibration from loosening things.

Taming the Vibration

Two-stroke engines vibrate significantly at idle and high rpm. This vibration transfers through the frame, loosening bolts and rattling components apart.

  • Use rubber vibration isolators between the engine plate and frame
  • Apply threadlocker to every bolt, especially engine mounts and handlebar clamps
  • Use nylock nuts where possible
  • Wire-tie or clamp all cables and fuel lines to prevent chafing

In practice, adding rubber mounts is the single most effective way to improve reliability and rider comfort. Without them, you'll be re-tightening bolts every few rides.

Heat Management

The engine and exhaust get extremely hot. Route the exhaust away from your leg, the fuel tank, and the brake cable. Add a heat shield where the exhaust passes near the frame or bodywork.

Installing the Drivetrain

The drivetrain is where your planning pays off. This is the heart of the bike, and getting it right ensures reliable performance for years to come.

Choosing Sprockets

The clutch sprocket is typically 10 or 12 teeth. The rear sprocket size depends on your target ratio and wheel diameter. For a 12-inch rear wheel and a 10T clutch sprocket, a 65T rear sprocket gives you a 6.5:1 primary ratio.

If you're using a jackshaft, plan the intermediate ratio to reach your target total. For example, a 12T clutch driving a 36T jackshaft input (3:1), then an 18T output driving a 48T rear (2.67:1) gives a total ratio of approximately 8:1. That's a bit tall; you'd want something closer to 10–12:1 for a small engine.

A working formula for choosing sprockets is:

  • Total Ratio = Engine Peak RPM ÷ Target Wheel RPM
  • Target Wheel RPM = (Target Speed in mph × 336) ÷ Wheel Diameter in inches

Setting Chain Tension

Proper chain tension is critical. Too loose, and the chain slaps, wears, and derails. Too tight, and it puts excessive load on the clutch and bearings.

Aim for about 1/2 inch of slack at the midpoint between the two sprockets. Always check tension with the engine off and rotate the wheel to find the tightest spot in the chain's rotation. Some chains have slight pitch variations that make certain spots tighter than others.

Chain Guard Is Mandatory

A chain guard protects your leg from severe injury if the chain breaks or derails at speed. This is not optional. Use a sturdy plastic or aluminum guard that completely covers the chain along the top run near your leg.

A mini bike frame with the engine mounted and chain drive adjusted for proper tension

Check sprocket alignment with a straightedge before tightening the engine mounts.

Source: dirtbikeaddicts.com

Step-by-Step Build Process

Follow this sequence to avoid rework and frustration.

1. Plan the Layout

Position the wheels, seat, handlebars, and engine on the bare frame. Mock everything up with wood blocks and zip ties. Sit on the bike to check the riding position. The seat should be at a height that lets you plant both feet flat on the ground when stopped. The handlebars should be at a comfortable reach.

2. Build or Modify the Frame

Weld up your frame or adapt the donor frame. Add gussets at high-stress points. Drill mounting holes for the engine plate, seat, and rear axle.

3. Mount the Engine

Install the engine plate and secure the engine. Use a straightedge to verify sprocket alignment. Shim the plate as needed. Lock everything down with threadlocker.

4. Install the Drivetrain

Mount the clutch, rear sprocket, and chain. Set tension to 1/2 inch of slack. Install the chain guard. Spin the wheel and check for binding or wobble.

5. Add Brakes

Mount the rear brake. For a band brake, position the band evenly around the drum. For a disc brake, align the caliper squarely with the rotor. Bleed or adjust the cable so the brake lever has firm, progressive feel.

6. Fit Throttle and Kill Switch

Mount the throttle assembly on the right handlebar. Route the cable with smooth bends to the carburetor. Install a positive kill switch on the left handlebar, wired to ground the ignition circuit.

7. Fuel System and Exhaust

Mount the fuel tank securely, away from heat sources. Run fresh ethanol-rated fuel line with an inline filter and shutoff valve. Secure the exhaust with new gaskets and springs.

8. Final Inspection

Go through every bolt with a torque wrench. Check that nothing is touching the chain or spinning parts. Test the brake with the rear wheel off the ground. It should lock the wheel solidly.

Gearing Math Made Simple

You don't need to be an engineer to figure out the right gearing. Here's a straightforward method.

Step 1: Find Your Target Speed

For a small chainsaw mini bike, 18–22 mph is the sweet spot. It's fast enough to be thrilling but slow enough to stay safe and manageable.

Step 2: Calculate Wheel RPM

Use the formula: Wheel RPM = (Speed in mph × 336) ÷ Wheel diameter in inches.

For a 12-inch wheel at 20 mph: Wheel RPM = (20 × 336) ÷ 12 = 560 rpm.

Step 3: Determine Total Ratio

Divide your engine's peak-rpm by the wheel rpm. If your engine makes peak power at 7,500 rpm and you want 560 wheel rpm, your total ratio is 7,500 ÷ 560 = approximately 13.4:1.

Step 4: Select Sprockets

You can achieve this with a 10T clutch, a 24T jackshaft input, an 11T jackshaft output, and a 65T rear sprocket. This gives you (10/24) × (11/65) = 2.4 × 5.9 = 14.2:1, which is in the right ballpark.

The Golden Rule

Start with more reduction than you think you need. You can always go taller later. A ratio that's too tall will burn up clutches and make takeoff miserable. A ratio that's too low just means you'll top out at 15 mph instead of 20, which is fine for a shakedown.

A gear ratio chart comparing sprocket sizes for chainsaw mini bike applications

Use a gear ratio calculator to accurately plan your sprocket combination.

Source: youtube.com

Wiring, Fuel, and Controls

The systems that make the bike run also keep you safe. A few hours of careful attention here prevents countless headaches.

Kill Switch Wiring

The kill switch is your most important safety device. Wire it to short the ignition coil to ground when pressed or, for fail-safe operation, wire it so the circuit must be closed for the engine to run. In that case, the kill switch breaks the circuit to stop the engine.

Use waterproof connectors and heat-shrink tubing on all connections. Route wires away from the chain, exhaust, and any moving parts. Secure them with zip ties or wire looms.

Fuel System Setup

Always use fresh fuel. Ethanol-blended gasoline absorbs moisture and degrades quickly, and the plastic components in older chainsaw carburetors can be damaged by ethanol.

  • Use fuel line rated for ethanol blends
  • Add an inline fuel filter between the tank and carburetor
  • Install a shutoff valve so you can run the carburetor dry for storage
  • Mix two-stroke oil at the ratio specified on your engine, usually 40:1 or 50:1

Throttle and Idle Adjustment

The throttle must snap shut instantly when you release the grip. Test this repeatedly with the engine off and check the cable routing for any binding or sharp bends.

Set the idle screw so the engine idles smoothly without the clutch engaging. If the bike creeps forward at idle, the clutch is dragging. Lower the idle speed or increase clutch engagement rpm.

Brakes Are Non-Negotiable

Make sure the brake system is robust enough to be your primary and emergency stopping system. A rear disc brake with a firm lever feel is ideal. Band brakes work but require more maintenance. Always inspect the brake pads or band for wear before each ride.

First Start, Tuning, and Break-In

The moment of truth has arrived. A methodical approach here prevents engine damage and frustration.

First Start Procedure

  1. Fill the fuel tank with fresh premix at the correct ratio
  2. Prime the carburetor by pressing the primer bulb or giving a few throttle pumps
  3. Pull the starter cord with the choke on until the engine pops
  4. Turn the choke off and pull again until it fires
  5. Let the engine warm up for 2–3 minutes at low idle

Carburetor Tuning

Most chainsaw carburetors have two adjustment screws: the low-speed and high-speed needles. Start with the factory settings that came with your saw.

Turn the low-speed needle in small increments, 1/8 of a turn at a time, until the engine accelerates cleanly off idle without bogging or hesitating. Then fine-tune the high-speed needle for a strong pull at full throttle. A lean mixture sounds sharp and "tinny"; a rich mixture sounds dull and four-strokes. Aim for a setting that's slightly rich to keep the engine cool and lubricated.

Break-In Riding

Keep the first tank of fuel for easy, steady riding. Vary the throttle but avoid prolonged full-throttle pulls.

After each of the first few rides, check:

  • Chain tension and alignment
  • Bolt tightness, especially engine mounts and axle nuts
  • Cable movement and brake feel
  • Exhaust gasket for leaks
  • Clutch temperature (it should be warm, not hot)

Troubleshooting Common Problems

Even well-built bikes develop issues. Here's how to diagnose and fix the most common ones.

Clutch Slipping or Burning

Symptoms: Squealing at takeoff, clutch smelling hot, the bike barely moves, or the clutch doesn't disengage. Causes: Gearing too tall, a clutch rated for higher rpm than your engine produces, or worn clutch shoes. Fix: Increase gear reduction by fitting a larger rear sprocket or jackshaft stage. Verify your clutch is matched to your engine's power band.

Chain Coming Off

Symptoms: Chain regularly derails under load. Causes: Misalignment between sprockets, broken or bent teeth, loose chain tension, or a worn chain. Fix: Give your chain and sprockets a close look for wear, realign the sprockets with a straightedge, set proper slack, and replace worn components.

Weak or Spongy Brake

Symptoms: Brake lever pulls to the handlebar, the bike takes too long to stop, or the lever feels soft. Causes: Air in the hydraulic line or stretched cable, worn pads, or a misadjusted caliper. Fix: Bleed hydraulic brakes or replace the cable, replace worn pads, and center the caliper over the rotor.

Excessive Vibration

Symptoms: The bike shakes at any speed, and parts literally vibrate loose. Causes: Engine vibration not isolated, wheel out of balance, or loose frame fasteners. Fix: Add rubber engine mounts, balance the rear wheel and tire assembly, and use threadlocker on everything.

Engine Won't Idle

Symptoms: The engine dies as soon as you release the throttle. Causes: Idle screw set too low, a clogged idle jet, an air leak at the carburetor base gasket, or a worn crank seal. Fix: Adjust the idle screw slightly higher. Clean the carburetor jets. Inspect the base gasket and crank seals for air leaks.

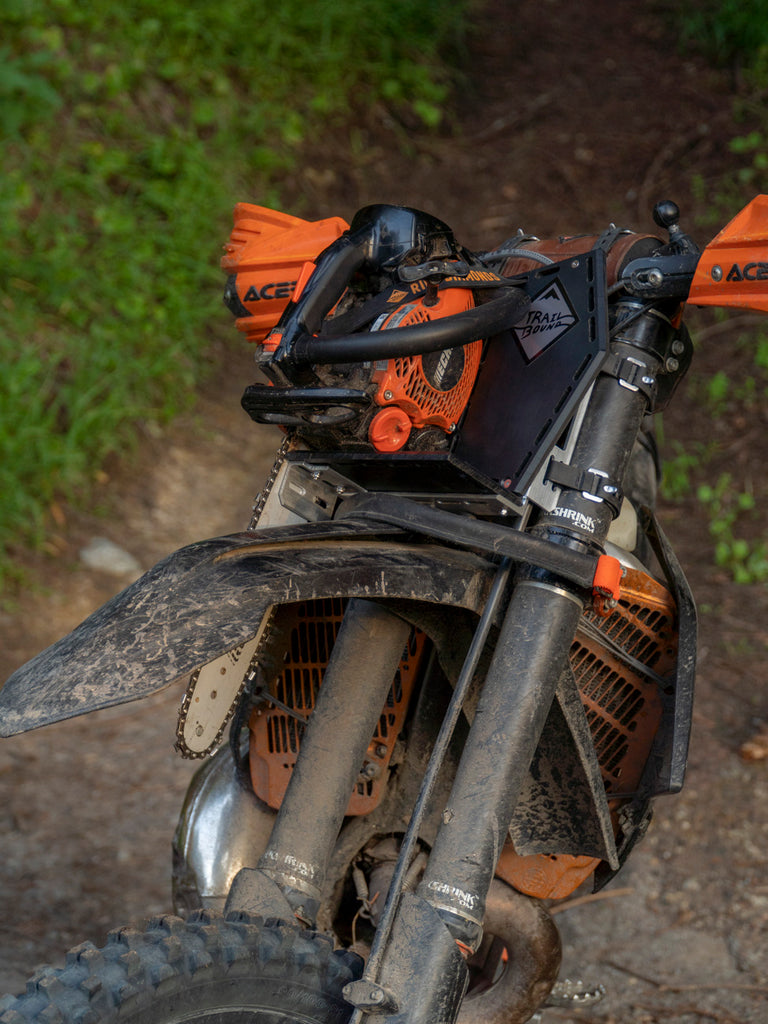
A workshop bench with a chainsaw engine, small wheels, and fabrication tools for the build

A finished build features a secure engine mount, clear wiring, and a protected fuel system.

Source: trailbound.co

Cost, Time, and Legal Considerations

Before you dive into any project, it pays to understand what you're getting into. A chainsaw mini bike is no exception.

What It Will Cost

Your total investment will vary widely depending on what you already have in the garage. Here's a realistic breakdown:

  • Donor chainsaw: $0 if you own one; $30–$100 at garage sales or online marketplaces
  • Clutch: $15–$40
  • Sprockets and chain: $25–$60
  • Jackshaft kit: $30–$70
  • Wheels and tires: $40–$80
  • Brake system: $20–$50
  • Throttle, cables, kill switch, fuel system: $30–$60

Expect a total cost of $150–$400 for a complete, safe build. The quality of your frame material and the condition of your donor saw are the biggest cost drivers.

Time Investment

A careful first build takes 15–25 hours spread over several weekends. This includes planning, fabrication, assembly, and initial tuning. Add another 3–5 hours for break-in riding and final tweaks.

If you're new to welding or have to rework parts, add 5–10 hours. Patience here is your best tool.

Legal and Registration Rules

Most areas treat these as off-road vehicles. In some states, you can register a homebuilt minibike as an off-highway vehicle (OHV), which opens up legal riding areas. Hop on your state's Department of Motor Vehicles website to see what's required. You'll usually need a title, proof of ownership for the frame and engine, and a safety inspection.

Never ride on public roads. These bikes lack the speed, lighting, and safety equipment to be street-legal. Stick to private property, designated OHV parks, and off-road trails where permitted.

Frequently Asked Questions

Is a chainsaw engine strong enough for a mini bike?

Yes. A 35–62 cc two-stroke engine produces enough torque to move a small frame and rider, provided you use the right gear reduction, typically 10:1 to 13:1. Without sufficient reduction, the clutch will slip and overheat, and the bike will have poor acceleration.

What kind of clutch do I need?

A centrifugal clutch matched to your engine's crankshaft diameter and peak rpm. Most builders use a 10-tooth or 12-tooth clutch for #35 chain. Make sure the clutch engages at a low enough rpm (around 2,500–3,000 rpm) so the engine doesn't need to be revved excessively to move the bike.

Do I absolutely need a jackshaft?

No, but it makes the drivetrain much easier to design. Without a jackshaft, you need a very large rear sprocket (65T–80T) to achieve the correct total ratio. A jackshaft lets you use smaller sprockets and gives you more flexibility in engine placement.

How fast will my chainsaw mini bike go?

With proper gearing, a healthy 50 cc engine will push you to 18–22 mph. You can gear it taller for more speed, but you'll sacrifice acceleration and risk overheating the clutch. For an off-road toy, 20 mph is plenty fast.

What fuel mix should I run?

Follow the recommendation for your specific chainsaw engine. Most modern two-strokes specify 40:1 or 50:1 with quality synthetic two-stroke oil. Use fresh fuel with no more than 10% ethanol, and add a fuel stabilizer if the bike will sit for more than a few weeks.

How do I keep the chain from coming off?

Sprocket alignment is the key to keeping the chain on. Use a straightedge from the clutch sprocket to the rear sprocket and shim as needed until they're perfectly in line. Set chain tension to about 1/2 inch of slack. Also check for bent sprocket teeth, which can grab the chain and throw it sideways.

Can I ride this on public streets?

Almost certainly not, unless you go through the process of titling and registering it as a motorized vehicle in your state. Even then, many jurisdictions require additional equipment like lights, mirrors, and a horn. Treat this as an off-road project unless you're prepared for the paperwork and mods.

Upgrading Your Build Later

Once you have a running, reliable bike, the fun really starts. Here are some popular upgrades worth considering:

Better Brakes

A hydraulic disc brake with a larger rotor provides dramatic stopping-power improvements over mechanical setups. This is the first upgrade I recommend after the initial break-in period.

Performance Exhaust

Aftermarket expansion chambers are available for some chainsaw engines. They boost top-end power but are loud and may require rejetting the carburetor.

Suspension

Adding a rear shock absorber and front suspension forks transforms the ride quality on rough terrain. This is a big project but completely changes the bike's character.

Bigger Engines

If your 35 cc build leaves you wanting more, consider swapping in a 62 cc or even 80 cc chainsaw powerhead. You'll need to redo the gearing math and strengthen the frame, but the extra torque is worth it.

Regular maintenance keeps your ride safe. Always check the chain, brakes, and fasteners before each outing. Proper fuel is critical too; a fresh mix keeps the carburetor clean and the engine running cool. And never underestimate the importance of a well-maintained chain—it's the only thing between the engine's power and your forward motion.

Conclusion

A chainsaw mini bike is a project that rewards careful planning, honest craftsmanship, and a willingness to learn through trial. Start with a solid frame, gear it low, and never cut corners on the brake system.

Take your time with the drivetrain alignment and throttle setup. These details are what transform a bike that barely runs into one that fires up instantly and puts a grin on your face every ride.

When it all comes together—the engine barks to life, the clutch engages smoothly, and the bike pulls away with authority—you'll realize it was worth every hour in the shop.

Now it's your turn. Grab that old chainsaw, round up a few tools, and start building. The community of DIY mini bike builders is always eager to help, so don't hesitate to share your progress, ask questions, and swap tips. Your next weekend project is waiting.

Similar Posts

Leave a Reply

Your email address will not be published. Required fields are marked *