How To Flush Radiator With Garden Hose: Quick DIY 2026
A radiator flush is one of the most satisfying DIY car maintenance jobs you can tackle in a driveway. With a garden hose, a drain pan, and about two hours of patience, you can restore your cooling system's efficiency without paying a shop $150 or more. This guide walks you through the entire process—from gathering the right tools to bleeding the air out of the system—so your engine runs cool and your cabin heater blows warm when you need it most.

Old, contaminated coolant circulating through your engine is the number one cause of premature cooling system failure.
Why a Radiator Flush Matters More Than You Think
Coolant doesn't last forever. Over time, the corrosion inhibitors in antifreeze break down, leaving your cooling system vulnerable to rust, scale, and sludge. These contaminants settle in the narrow passages of your radiator core, heater core, and engine block, restricting flow and reducing heat transfer. The result is an engine that runs warmer than it should, a heater that blows lukewarm air, and eventually, a water pump or thermostat that fails prematurely. You can also read our guide on how to drain a garden hose for winter.
Flushing your radiator with a garden hose is an effective, budget-friendly way to remove these deposits before they cause expensive damage. Unlike a chemical-only flush, a water rinse physically pushes debris out of the system. And unlike a professional power flush, a garden hose gives you complete control over pressure, which is crucial for protecting fragile components like the heater core.
Beyond engine protection, clean coolant also means better cabin comfort. The same fluid that cools your engine also carries heat to your heater core. When that core is clogged with sludge, your defroster and heater struggle to do their job. A thorough flush keeps those small passages clear, which is a bonus most drivers don't expect from a maintenance job. For more on this, see our guide on how to flush a radiator with a garden.
Tools and Materials: What You'll Need Before You Start
Before you pop the hood, gather everything you need. Running to the auto parts store mid-job with a disconnected radiator hose is no fun.
| Tool/Material | Purpose | Notes |
|---|---|---|
| Garden hose with adjustable spray nozzle | Flushing water source | Keep pressure low |
| Drain pan (2-3 gallon capacity) | Catching old coolant | Metal or heavy plastic |
| Safety glasses and chemical-resistant gloves | Protection | Coolant is toxic |
| Pliers or hose clamp pliers | Removing clamps | Spring clamps need special pliers |
| Flathead and Phillips screwdrivers | Various clamps | |
| Socket set | Drain plug access | |
| Funnel and measuring jug | Mixing and filling coolant | |
| Distilled water (2-4 gallons) | Final rinse and fill | Tap water leaves minerals |
| Correct coolant type for your vehicle | System fill | Check owner's manual |
| Shop towels or rags | Cleanup | Coolant stains paint |
| Optional: chemical flush solution | Heavy rust removal | Use with caution |
| Optional: new radiator cap and hose clamps | Replacement parts | Cheap insurance |
This kit covers most cars and light trucks. If your vehicle has a pressurized coolant reservoir instead of a traditional radiator cap, you'll still use the same basic process—just follow the factory bleed procedure for your specific model. For more on this, see our guide on how to recycle garden hose.
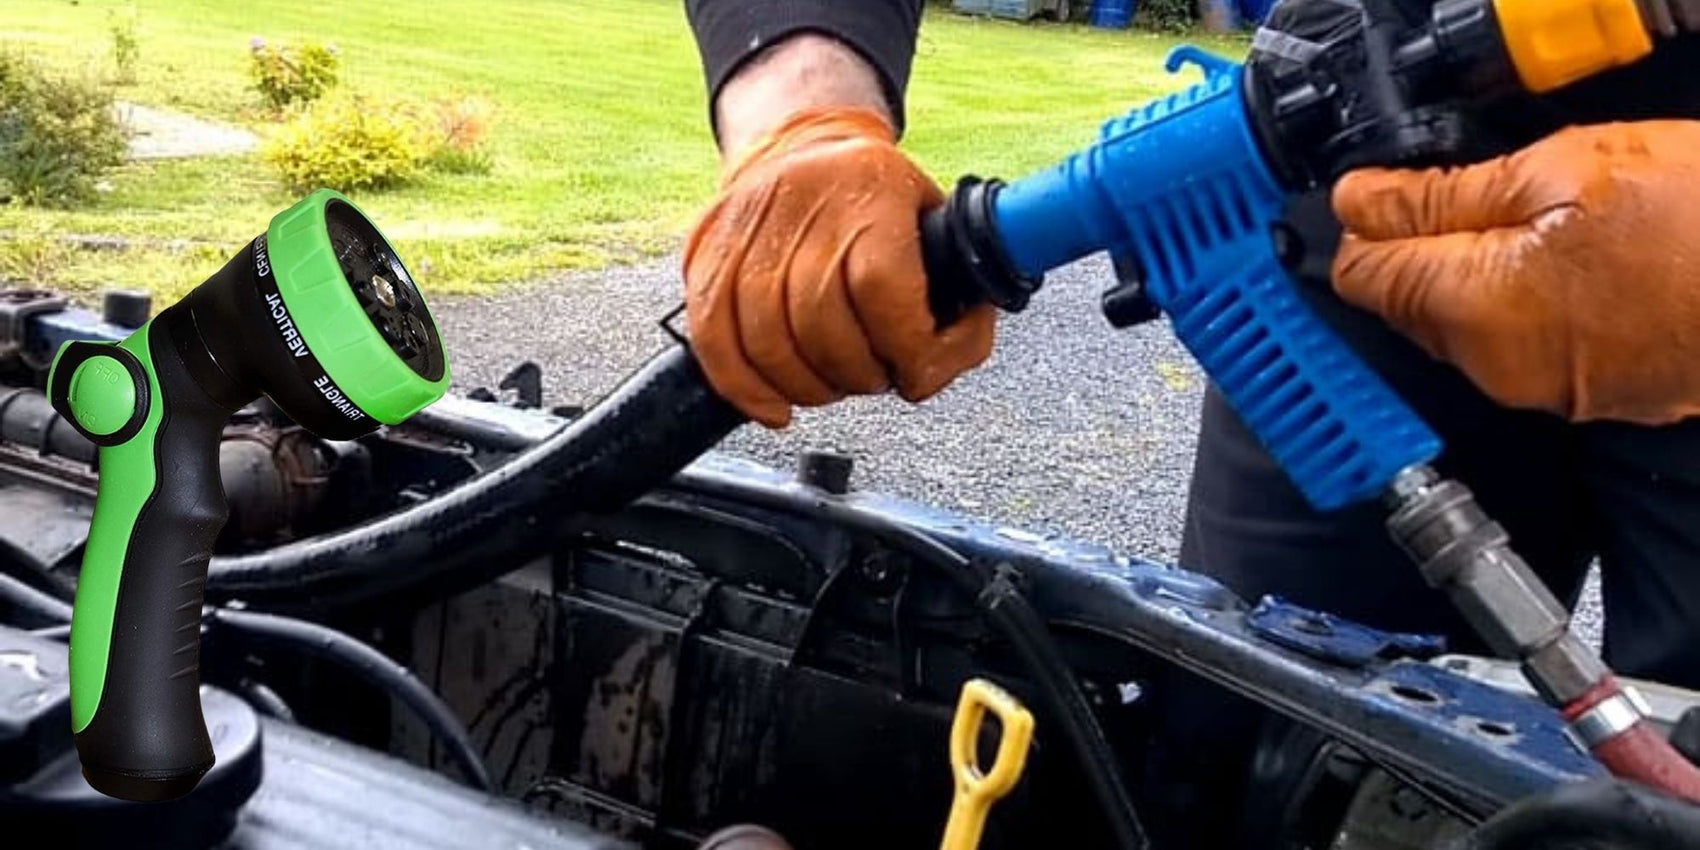
The basic toolkit for a driveway radiator flush: hose, drain pan, gloves, and the correct coolant.
Safety and Environmental Prep: Do These First
Never open the radiator cap on a hot engine. Pressurized coolant can reach temperatures above 200°F and will cause severe burns. Always let the engine sit for at least two hours after running, or ideally overnight, before you start any cooling system work.
Set your vehicle's heater to maximum hot before turning the engine off. This opens the heater control valve, allowing coolant to flow through the heater core during the flush. On many cars, this valve is vacuum-operated and only opens with the dash control set to hot. For more on this, see our guide on 1 2 vs 5 8 garden hose reddit.
Work on level ground with the parking brake engaged. Place sturdy jack stands under the vehicle if you need to access a low-mounted drain plug. Never rely on a floor jack alone.
Antifreeze is highly toxic and has a sweet taste that attracts pets and children. Collect every drop in your drain pan and transfer it to sealed containers immediately. Most auto parts stores and municipal recycling centers accept used antifreeze at no charge. Never pour coolant down a drain, into a storm sewer, or onto the ground—it's both illegal and dangerous.
One more safety note: garden hoses can deliver 40-60 psi of water pressure. That's far too much for a heater core, which is designed to handle roughly 15-16 psi of system pressure. Keep the nozzle spray gentle throughout this entire process.
Step-by-Step: How to Flush Your Radiator With a Garden Hose
Step 1: Let It Cool and Prep the System
Park the vehicle on level ground and set the parking brake. Let the engine cool completely. Set the heater to maximum hot. When the engine is cool to the touch, remove the radiator cap or open the pressurized reservoir cap slowly, allowing any residual pressure to escape.
Step 2: Drain the Old Coolant
Position your drain pan under the radiator drain cock, which is typically located at the bottom corner of the radiator. Open the valve and let the old coolant flow out. If your engine block has a separate drain plug, crack it open too—this releases coolant trapped in the block that won't drain through the radiator.
While you're waiting for the system to drain, inspect the old coolant. Rusty brown or murky fluid confirms your flush is overdue. Clean, bright coolant that matches the color of what you're putting in suggests you're just doing preventative maintenance.
Step 3: Disconnect the Upper Radiator Hose
Loosen the clamp at the radiator end of the upper radiator hose. Twist the hose to break the seal, then pull it free. Angle it downward into your drain pan to catch any remaining fluid. Leave the lower radiator hose connected—it'll serve as the exit point during the flush.
Step 4: Flush the Radiator Core
Insert your garden hose into the radiator filler neck and run a gentle stream through the core. Water will flow out through the lower radiator hose or drain cock. Continue until the water runs completely clear. This takes two to five minutes depending on how dirty the system is.
Step 5: Flush the Engine Block Through the Upper Hose
Place the garden hose into the loose end of the upper radiator hose and run a light stream. Water will push through the engine block, out the lower radiator hose, and into your drain pan. Continue until clear. This step removes sludge that has settled in the engine's coolant passages.
Step 6: Backflush the Heater Core
The heater core is a small radiator inside your dashboard that's often overlooked. If it's clogged, your cabin heat will be weak or nonexistent. Locate the two heater hoses at the firewall—the bulkhead separating the engine bay from the passenger compartment. Remove them and gently run water through one side, then the other, using very low pressure. You'll see sludge and rust-colored water come out. Flush until clear.
Step 7: Optional Chemical Rinse for Heavy Rust
If your flush water still shows heavy rust after the basic rinse, consider a chemical cooling system flush. Reconnect the hoses, close all drains, and fill the system with water plus the flush chemical per the product instructions. Run the engine at idle with the heater on until it reaches operating temperature, then let it cool and drain again. Rinse with plain water until clear before proceeding.
Step 8: Rinse With Distilled Water
Close all drains, reconnect the upper radiator hose, and fill the system with distilled water only. Run the engine at idle with the heater on until warm, then let it cool and drain. This final rinse removes any remaining tap water minerals and old coolant traces. If the drained water still shows color, repeat this step.
Step 9: Fill With the Correct Coolant Mix
Check your owner's manual for both system capacity and the correct coolant type. Modern vehicles typically use specific formulations—OAT, HOAT, or silicate-based—and mixing incompatible types can cause gelling or corrosion.
If you're using concentrate, pour about half the total system capacity in pure antifreeze, then top off with distilled water. If you're using pre-mixed 50/50 coolant, simply fill to the neck or maximum line. A 50/50 mix provides protection to approximately -34°F and works for most climates, but check your manual for extreme conditions.
Step 10: Bleed Air From the System
Trapped air in the cooling system causes hot spots and overheating. Run the engine with the heater on maximum, and open any bleed screws your vehicle may have. Squeeze the upper and lower radiator hoses to help burp air pockets. As the thermostat opens and coolant begins circulating, you'll see the level in the radiator drop—top it off as needed.
Once the engine reaches operating temperature and the cooling fans cycle on and off, close the cap and fill the overflow bottle to the cold fill mark.
Step 11: Check for Leaks and Test Drive
With the engine running, inspect all hose connections, drain plugs, and the water pump area for any signs of seepage. Wipe everything dry, then take the vehicle for a short drive. Afterward, recheck all connections for dampness and confirm the temperature gauge stays steady in the normal range.
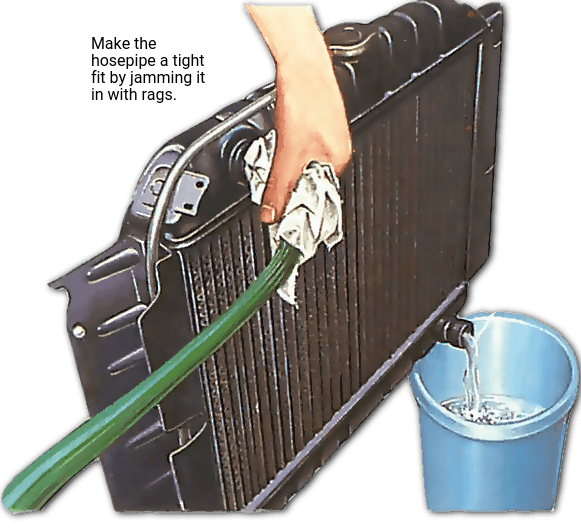
The upper radiator hose is the main access point for flushing both the radiator and the engine block.
Aftercare: How to Verify a Successful Flush
After your flush, the real test is in the driving. Monitor the temperature gauge during your first drive—it should rise to normal operating temperature and stay steady, even in traffic. If the gauge climbs abnormally high or fluctuates, you likely have trapped air and need to repeat the bleeding process.
Check the cabin heater after the engine is fully warmed. It should blow hot air consistently at idle and while driving. If heat is weak, the heater core may still be partially blocked, or the heater control valve may not be opening.
Let the engine cool completely, then recheck the overflow or reservoir tank level. Top it off if needed. Check again after a day or two of driving, and inspect under the vehicle for any dried coolant residue, which would indicate a leak in the system.
Common Mistakes and How to Avoid Them
Opening the cap on a hot engine. This is the most dangerous mistake. Always let the vehicle cool completely before opening any cooling system component.
Using full city water pressure. A garden hose at full blast can damage your heater core and radiator fins. Use a gentle, controlled stream throughout the entire flush.
Mixing incompatible coolant types. Different coolant chemistries can react and form sludge. Always use the exact type specified in your owner's manual.
Skipping the heater core flush. The heater core is often the first component to clog. Taking five extra minutes to backflush it can save you from a dashboard-out repair job.
Filling with tap water. Tap water contains minerals that leave deposits in the cooling system. Use distilled water for the final fill and rinses.
Forgetting to bleed air. Air pockets cause localized overheating that can crack cylinder heads. Always bleed thoroughly.
Reusing worn hoses and clamps. If your hoses feel soft or cracked, or the clamps are rusted, replace them while the system is drained. It's much cheaper than dealing with a blown hose on the highway.
If the engine still overheats after a proper flush, you may be dealing with a stuck thermostat, a weak radiator cap, a partially blocked radiator, or a failing water pump. These components often cause symptoms similar to a clogged system and may need professional diagnosis.
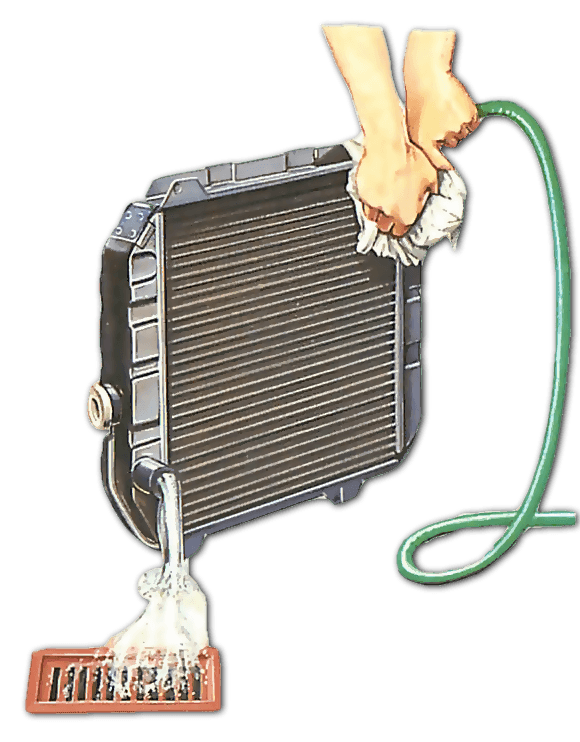
Backflushing forces water through the radiator in the opposite direction of normal coolant flow, loosening stubborn deposits.
How Often Should You Flush Your Radiator?
Modern extended-life coolants (OAT and HOAT types) typically last five years or 100,000 miles. Older-style green coolant requires servicing every two to three years or 30,000 to 50,000 miles. Always follow the maintenance schedule in your owner's manual, which takes precedence over general guidelines.
You can test your coolant's health with inexpensive test strips that check pH and freeze point. If the pH is below 7 or the freeze point is higher than your climate demands, it's time to replace the coolant.
Signs you need a flush sooner than scheduled include:
- Orange, brown, or muddy-looking coolant
- Sludge visible in the overflow tank or radiator neck
- A sweet smell from the engine bay after driving
- Weak cabin heat, especially at idle
- Temperature gauge running higher than normal, particularly on hills or in traffic
Catching these symptoms early avoids the cascade of failures—water pump seizure, thermostat failure, even head gasket damage—that follow extended operation with degraded coolant.
Cost, Time, and Skill Level: Is This a DIY Job?
Time: Plan for one to three hours depending on your vehicle and how dirty the system is. Heavily rusted systems may require multiple rinse cycles.
Cost: Expect to spend $30 to $100. Distilled water costs about $2 per gallon, coolant runs $15 to $30 per gallon depending on type, and a new radiator cap is $5 to $20. A professional radiator flush costs $100 to $200, so you'll save significantly by doing it yourself.
Skill level: This is a solid intermediate DIY job. If you can change your own oil and replace wiper blades, you can handle a radiator flush. The key is patience—rushing the process is where mistakes happen.
However, some vehicles present challenges. Systems with electric water pumps, complex bleed procedures, or active grille shutters may require factory diagnostic tools. European vehicles and hybrids often have specific coolant requirements and bleed sequences. If your engine bay looks intimidating or you're not confident about the bleed procedure, a professional who has done this work on your specific model is a reasonable investment.
Field Tips From Years in the Garage
Pre-mixing coolant in a clean jug before pouring saves you from the guessing game of filling with concentrate and topping up with distilled water. Mix the exact 50/50 ratio in a large container, then pour. This ensures every drop going into your system has the right freeze protection.
Keep a towel wrapped around the radiator neck whenever you're filling or burping the system. Coolant splashes are inevitable, and the fluid is both toxic and damaging to paint. A small spill can stain a driveway permanently.
When working on a vehicle with a dead heater, always suspect the heater core first. In many cases, a gentle garden hose backflush of the core revives the heat without any other repairs. The water pressure clears years of accumulated debris.
Check your upper and lower radiator hoses for firmness while the system is warm. A collapsed or soft hose indicates a worn-out component that should be replaced during the flush.
Also check your radiator's condition—if the fins are crushed or corroded, no amount of flushing will restore airflow. While the coolant is drained, you have a perfect opportunity to assess these components.
Frequently Asked Questions
Can I use tap water to fill the system after a flush?
Tap water is fine for flushing cycles because it's just moving debris out. Never use it for the final fill. Mineral deposits from tap water accumulate in the cooling system and cause the same clogging problems you just flushed out.
Do I need to remove the thermostat to flush?
Not usually. A careful garden hose flush with the thermostat in place works well for most vehicles. Some professionals recommend removing the thermostat for a more thorough flush, but this adds complexity and risk. The method described here achieves excellent results without touching it.
Can I flush through the overflow tank only?
On systems without a traditional radiator cap, yes, you can flush through the pressurized reservoir, but you must follow the factory bleed procedure. Many of these systems require raising the front of the vehicle or using special bleed tools to prevent air pockets.
How long should I run the hose during the flush?
Continue flushing each section until the water runs completely clear. This typically takes two to five minutes for the radiator and another few minutes for the engine block. Expect to use 10 to 20 gallons of water total for a thorough flush.
Will a garden hose damage my heater core?
Only if you use high pressure. Heater cores have thin fins and small tubes that can't handle full city water pressure. Use a gentle, low-flow stream and you'll have no problems.
What coolant should I use after the flush?
Use exactly what your owner's manual specifies. Common types include OAT (organic acid technology) for many GM and Asian vehicles, HOAT (hybrid OAT) for Ford and Chrysler, and traditional green silicate coolant for older vehicles. Mixing types can reduce corrosion protection or cause gelling.
Can I flush an aluminum radiator with a garden hose?
Yes, but use extra caution. Aluminum radiators are thinner and more fragile than older brass or copper units. Low pressure and distilled water for the final fill are essential. Avoid aggressive chemical cleaners unless the manufacturer specifically approves them for aluminum.
Is it worth adding a coolant flush kit tee?
A flush tee installed in the heater hose makes future flushes much easier, but it adds a potential leak point to the system. Most DIYers don't need one if they're comfortable removing hoses. If you plan to flush annually, the convenience may justify the small risk.
Final Checklist Before You Start
- Engine completely cool
- Heater set to maximum hot
- Parking brake engaged, vehicle on level ground
- Drain pan, safety gear, and tools ready
- Correct coolant type and distilled water on hand
- New radiator cap and hose clamps if replacing
- Used coolant disposal plan confirmed
Conclusion
Flushing your radiator with a garden hose is a straightforward job that protects one of your engine's most critical systems. The process takes a couple of hours and costs less than $100 in materials, yet it prevents overheating, preserves your water pump, and keeps your cabin heater effective through the coldest months.
The keys to success are simple: work on a cold engine, use low water pressure to protect fragile components, flush each section until clear, fill with the manufacturer-specified coolant mixed with distilled water, and bleed all air from the system before driving. Follow these steps, and your cooling system will reward you with steady temperatures and years of trouble-free service.
Set aside a weekend morning, gather your tools, and give your cooling system the maintenance it deserves. And if you run into a stubborn problem you can't solve, don't guess—consult a professional and have them pressure-test the system. A small service fee now is far cheaper than an engine replacement later.