How To Connect Garden Hose To PVC Pipe: Leak-Free Guide
Connecting a garden hose to PVC pipe seems simple—until water sprays everywhere and you're left staring at a mess of mismatched threads. The truth is, most leaked connections fail for one of three reasons: wrong adapter, bad thread sealing, or rushed glue joints. Each one is easy to avoid once you understand what's happening at the connection point.
This guide walks you through the entire process: the exact parts you need, the thread standards that confuse everyone, a step-by-step installation, and the troubleshooting habits that keep connections dry for years. By the end, you'll be able to build a leak-free hookup in under an hour—and know precisely what to do when something drips. You can also read our guide on how to choose the right garden hose length.
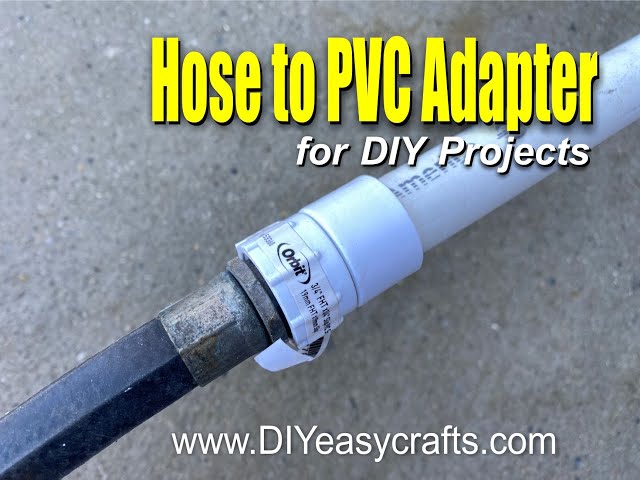
The core components: a GHT-to-NPT adapter, PVC fittings, PTFE tape, and a rubber washer.
Source: goldsione.com
Understanding Garden Hose Thread vs. PVC Pipe Thread
Before touching any tools, you need to understand why a garden hose doesn't just screw onto PVC pipe. The two use completely different thread standards, and forcing them together is the fastest way to strip threads and create a permanent leak.
GHT: The Garden Hose Standard
Garden Hose Thread (GHT), also called NH (National Hose), is a straight thread measuring 3/4 inch with 11.5 threads per inch. Because the threads are straight rather than tapered, they cannot seal on their own. Instead, GHT connections rely on a rubber washer inside the female swivel nut to create the watertight seal. That's why you should never wrap PTFE tape on garden hose threads—it does nothing useful and can actually interfere with the washer seating properly. For more on this, see our guide on pvc vs vinyl garden hose.
NPT: The Pipe Thread Standard
National Pipe Thread (NPT) is the standard for PVC pipe fittings. Unlike GHT, NPT threads are tapered—they get slightly narrower toward the end. This taper means the threads themselves wedge together and create the seal when tightened. Pipe thread tape or pipe dope helps lubricate the threads and fill microscopic gaps.
Why They Don't Mate
GHT and NPT have different thread angles, pitches, and sealing mechanisms. Screwing them together directly will cross-thread almost immediately, damaging both pieces. That's why you always need a purpose-built adapter that transitions between the two standards. For more on this, see our guide on how to fix garden hose leak.
PVC Size Confusion
Here's a trap that catches many DIYers: PVC pipe sizes are nominal, not actual measurements. A 1/2-inch PVC pipe has an outside diameter of about 0.84 inches, not 0.5 inches. Similarly, a 3/4-inch PVC pipe measures roughly 1.05 inches outside. When shopping for adapters, you need to match the fitting size stamped on the PVC, not what the tape measure shows.

Hold both fittings side by side and you'll see the difference—GHT is straight, NPT tapers.
Source: amazon.com
What You Need: Complete Parts and Tools List
Having the right parts before you start makes the difference between a 20-minute job and a frustrating afternoon. Here's everything you'll need:
Essential Parts
- GHT-to-NPT adapter: The most common type is 3/4-inch GHT female swivel to 1/2-inch or 3/4-inch male NPT. Brass versions cost more but resist UV damage better than polymer.
- PVC fittings: A slip socket, a female NPT adapter (FIP), or a male NPT adapter (MIP), matching your pipe size.
- PVC primer and cement: Must be rated for your pipe schedule (40 or 80). Check the label before buying.
- PTFE thread tape: For sealing NPT threads only.
- Rubber washer: Most new GHT adapters include one, but keep spares handy.
- Optional ball valve: Adds a shut-off point right at the connection.
Necessary Tools
- Adjustable wrench or pliers (a strap wrench is gentler on plastic fittings)
- Hacksaw or PVC cutter
- Utility knife or deburring tool
- Marker and tape measure
- Clean rag
A Personal Note on Spares
I keep a small parts box with three different GHT-to-NPT adapters—1/2-inch and 3/4-inch NPT, plus a spare brass one. It saves a trip to the store when a project's pipe size turns out different than planned, which happens more often than you'd think. For more on this, see our guide on how to connect garden hose to outdoor faucet.
Step-by-Step: How to Connect Garden Hose to PVC Pipe
This method works for yard taps, drip irrigation manifolds, and temporary wash stations. Follow these steps in order for a connection that stays dry the first time.
Step 1: Plan the Layout
Decide exactly where the hose will connect and how much room you have to work. Remember that the GHT swivel nut needs space to rotate when you attach the hose. If the adapter ends up jammed against a wall, you'll struggle every time you connect or disconnect.
Step 2: Cut the PVC Pipe Square
A square cut is essential for a proper solvent weld. Use a PVC cutter or fine-tooth saw, then remove burrs from the cut edge with a utility knife or deburring tool. Rough edges prevent the pipe from seating fully into the fitting socket.
Step 3: Dry-Fit Everything First
Assemble all PVC pieces without glue to check alignment. This is the time to add a union or ball valve if you want easy future service. Mark alignment lines on pipe and fittings with a marker so you can match them during glue-up.
Step 4: Prime and Cement the PVC Joints
Apply primer to both the pipe end and the inside of the fitting socket. Let it dry for a few seconds. Then apply PVC cement to both surfaces, insert the pipe fully, and give it a quarter-turn to distribute the cement evenly. Hold for 10–15 seconds to prevent push-out.
Step 5: Let Joints Cure
Follow the cure times on your cement can. For small pipe at room temperature, light handling is usually fine after 15 minutes, but full cure can take up to 2 hours. Cold weather and high pressure extend those times significantly.
Step 6: Wrap the NPT Threads
Take the male NPT threads on your adapter and wrap PTFE tape clockwise (as viewed from the end) so it doesn't unravel as you thread the fitting on. Two to three wraps is right—more tape doesn't mean a better seal and can cause the fitting to bind before it's fully seated.
Step 7: Thread the Adapter Into the PVC Fitting
Start by hand to avoid cross-threading, then give it a quarter to half turn with a wrench. The key is snug, not brutal. Over-tightening a plastic NPT adapter into a PVC fitting is one of the most common causes of cracked fittings.
Step 8: Check the Washer
Look inside the GHT swivel nut and confirm the rubber washer is present, clean, and not cracked. This washer is doing the real sealing work on the hose side—a missing washer means an immediate leak.
Step 9: Attach the Garden Hose
Screw the hose onto the GHT swivel. Hand-tight is sufficient; the rubber washer creates the seal, not torque. Resist the urge to grab a wrench and crank it down.
Step 10: Pressurize and Test
Open the water valve slowly. Watch every joint and listen for hisses. Start at low pressure if you can, then bring it up to full. If you see a drip at the NPT connection, shut off water and tighten another quarter turn. If the leak persists, you'll need more tape and a re-seat.

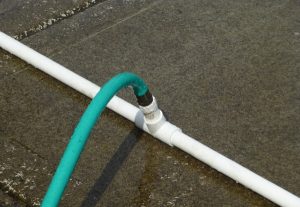
The GHT swivel seals with a rubber washer—hand-tight is all you need.
Source: reddit.com
Alternative Connection Setups
The standard adapter method covers most situations, but some projects call for different approaches.
Quick-Connect Coupler
Adding a quick-connect set on the GHT side makes swapping tools fast and reduces wear on the swivel threads. You'll need one male coupler that stays on the PVC adapter and a female connector for each hose end or tool. This is a solid upgrade for anyone frequently switching between sprinklers, nozzles, and pressure washers.
Inline Shut-Off Valve
Installing a PVC ball valve just before the GHT adapter gives you local control without walking back to the main spigot. This is especially useful for drip irrigation systems where you want to shut off individual zones. Choose a full-port ball valve to avoid restricting flow.
Backflow Prevention
If your connection ties into potable water, many local codes require a vacuum breaker or backflow preventer. This device sits between your PVC pipe and the hose connection, preventing contaminated water from being siphoned back into your drinking supply. Check with your local building department—requirements vary by jurisdiction, and the EPA has guidance on cross-connection control.
Adapting Between PVC Sizes
- 1/2-inch PVC: Use a 1/2-inch FIP or slip fitting, then a GHT adapter with a 1/2-inch male NPT side.
- 3/4-inch PVC: Match with a 3/4-inch NPT side on the adapter—this is the most common setup.
- 1-inch PVC: Reduce to 3/4-inch NPT with a bushing, then attach the GHT adapter.
Barbed Adapter with Hose Stub
For installations that need vibration absorption or slight angle flexibility, slide a barbed adapter into a short piece of hose, secure with a hose clamp, and glue the other end into your PVC line. This provides a flexible transition that protects rigid joints from strain.

A ball valve before the adapter makes service and flow control much easier.
Source: youtube.com
Adhesives, Sealants, and Curing Times
The quality of your solvent weld determines whether your PVC joints stay leak-free for decades or fail within months.
Primer First, Always
Primer cleans and softens the PVC surfaces so the cement can create a molecular bond. Skipping primer is the single most common cause of failed solvent welds. Use clear primer for visible joints or purple primer where appearance doesn't matter.
Matching Cement to Pipe
PVC cement comes in formulations for different schedules and temperature ratings. Standard PVC cement works for schedule 40; schedule 80 pipe requires cement rated for that thicker wall. Read labels carefully—using the wrong cement is a hidden time bomb.
Proper Application Technique
Apply primer to both the pipe end and inside the fitting. Let it flash off for a few seconds. Then apply a even coat of cement to both surfaces. Insert the pipe fully, rotate a quarter turn, and hold for 10–15 seconds. A proper weld shows a small bead of cement squeezing out around the joint.
Cure Time Realities
The "15 minutes to handle" guidance you'll see on cans assumes small pipe at room temperature with moderate pressure. For larger pipe, cold weather, or high-pressure applications, extend cure times significantly. When in doubt, wait longer—a rushed joint is a future leak.
PTFE Tape on NPT Only
Remember: tape goes on tapered NPT threads only. The tape lubricates threads during assembly and fills the microscopic spiral gaps between them. GHT threads never get tape because they seal with the rubber washer instead.

Clean surfaces and proper cure times produce solvent welds that outlast the pipe itself.
Source: reddit.com
Pressure Ratings and Safety Checks
Understanding your system's pressure helps you make smart material choices and avoid failures.
Typical Household Pressure
Most homes run between 40 and 60 psi. Schedule 40 PVC is rated for considerably more than that at room temperature, but the ratings drop as temperature rises. Sun exposure also degrades PVC over time, making it brittle.
Protecting PVC from UV Damage
Keep PVC pipe out of direct sunlight whenever possible. If it must be exposed, paint it with a UV-stable exterior latex paint or wrap it in a pipe sleeve. Unprotected PVC in full sun becomes chalky, brittle, and prone to cracking within a few seasons.
Managing Pressure Spikes
Water hammer from quick-closing valves can produce pressure spikes far above your normal operating pressure. Open valves slowly and consider a water hammer arrestor if you hear banging in your pipes. A pressure regulator is worth installing if your supply runs high or erratic.
Strain Relief
A straight, rigid connection transfers every wiggle and tug directly to the adapter and PVC threads. Adding a short length of flexible hose between your rigid PVC and the garden hose absorbs movement and prevents stress fractures at the connection point.
Freeze Protection
PVC filled with water will crack when it freezes. Before winter, drain the line completely or blow it out with an air compressor. Even a small amount of residual water can expand and split the pipe or fittings.
Diagnosing Common Leaks
- Drip at GHT joint: Bad or missing rubber washer, or the swivel isn't tight enough.
- Drip at NPT joint: Add one more wrap of tape and re-seat, snugging gently.
- Weeping at glued PVC joint: Poor prep or insufficient cure time. You'll need to cut out the joint and redo it.
Troubleshooting and Maintenance
Even well-built connections develop issues over time. Catch these problems early and fixes are cheap.
Cross-Threaded Parts
If you feel resistance within the first turn or two, stop immediately. Back off, realign, and try again. Forcing it will strip threads and ruin both parts. A slightly mangled thread is sometimes salvageable with a thread chaser, but replacement is usually the better option.
Over-Tightened Plastic Fittings
Plastic fittings crack when over-tightened. Look for hairline cracks at the hex or near the base of the adapter. If you see any, replace the part now—before it fails under pressure and causes water damage.
Water Hammer Knocks
That banging sound when valves close is water hammer. Open valves slowly and install air chambers or mechanical arrestors if the noise persists. Left unchecked, water hammer will eventually loosen fittings and cause leaks.
Clogged Screens and Washers
Sediment in the water supply can clog the screen inside the hose end or degrade the rubber washer. Clean screens with a small brush and replace washers seasonally. Cheaper than a leak repair and takes about two minutes.
Thread Maintenance
If you've removed and reattached an adapter more than twice, the PTFE tape is likely worn. Rewrap the NPT threads fresh each time you disassemble. Keep threads clean—grit acts like sandpaper and accelerates wear.
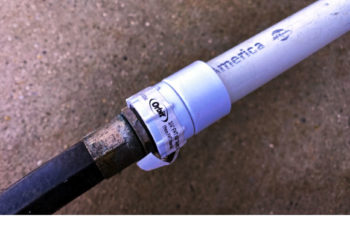
Seasonal washer and tape replacement prevents most common leaks.
Source: 247garden.com
Cost, Time, and Planning Considerations
Budget and timeline expectations help you plan the project properly.
Typical Material Costs
| Item | Price Range |
|---|---|
| GHT-to-NPT adapter (polymer) | $5–$12 |
| GHT-to-NPT adapter (brass) | $8–$20 |
| PVC fittings and pipe | $5–$25 |
| Primer and cement set | $10–$20 |
| Quick-connect kit | $8–$25 |
| Total for typical project | $30–$80 |
Realistic Time Budget
- Layout and cutting: 15–30 minutes
- Glue-up: 10–20 minutes
- Cure time before testing: 15–60 minutes
- Total same-day completion: 1–2 hours
Smart Planning Tips
Buy two adapters in case one cross-threads or cracks during installation. The extra $8 saves a trip to the store and a day of waiting. Measure twice, cut once, and dry-fit everything before applying any glue.
Common Mistakes to Avoid
Learn from the failures that plague most DIY PVC-to-hose connections.
Forcing GHT Into NPT
The threads are incompatible. Forcing them together strips both threads and creates an unfixable leak. Always use the correct adapter.
Skipping Primer
Primer is not optional. It cleans and softens the PVC so the cement can form a proper molecular bond. Skipping it produces a weak joint that fails under pressure.
Over-Tightening NPT
NPT seals when the tapered threads wedge together—but plastic wedges have limits. Snug plus a quarter turn is right. Beyond that, you're cracking fittings and creating the very leak you're trying to avoid.
Forgetting the Hose Washer
The GHT side seals exclusively through the rubber washer. Missing it means an immediate leak, no matter how tight you crank the swivel. Always check before connecting.
Testing at Full Pressure Immediately
Slow and steady wins. Open the valve gradually and watch every joint. If something's wrong, you'll catch it before it becomes a geyser.
Frequently Asked Questions
What adapter do I need to connect a garden hose to PVC?
You need a 3/4-inch GHT (garden hose thread) to NPT (National Pipe Thread) adapter matching your PVC fitting size. Most residential builds use 1/2-inch or 3/4-inch NPT.
Do I need thread tape on garden hose threads?
No. GHT is a straight thread that seals with a rubber washer. PTFE tape belongs only on tapered NPT threads.
Can I glue a garden hose directly to PVC?
No. Garden hoses are flexible and won't solvent-weld to PVC. Use a GHT adapter or a barbed fitting with a hose clamp.
Will PVC hold normal house water pressure?
Yes. Schedule 40 PVC easily handles typical 40–60 psi residential pressure at room temperature. Protect it from direct sun and freezing, and follow proper glue cure times.
How do I stop leaks at the adapter?
For GHT leaks, replace the rubber washer inside the swivel. For NPT leaks, rewrap with fresh PTFE tape and snug gently. Never force plastic fittings.
Can I add a shut-off valve at the hose connection?
Absolutely. Install a PVC ball valve before the GHT adapter for local flow control and easier future servicing.
Are GHT and NPT the same size?
No. GHT is a straight thread sealed by a washer; NPT is tapered and seals on the threads themselves. They are not interchangeable without an adapter.
Conclusion
Connecting a garden hose to PVC pipe comes down to three fundamentals: the right adapter for your thread types, clean solvent-welded PVC joints, and proper sealing technique on each connection type. Skip any of these and you'll be chasing drips. Get them right, and the connection will outlast the hose attached to it.
Start with a dry fit, take your time with primer and cement, and test slowly before calling the job done. Add a ball valve and quick-connect while you're at it—future you will appreciate the convenience. If you're planning a bigger irrigation layout, you might also want to think about how different hose diameters affect your flow and pressure before locking in your design. Happy building—may your connections stay dry.