How To Grow Herbs At Home: Beginner Tips For 2026
There is a small, quiet satisfaction in snipping fresh basil straight into a pan or dropping a few mint leaves into a glass of cold water. Growing herbs at home is one of the easiest ways to eat better, spend less, and keep something green alive—even in a small apartment. This guide walks you through the whole process: choosing the right spot, picking herbs that will actually thrive with you, planting them properly, and keeping them productive for months. No greenhouse required.
Why Grow Herbs At Home?
Freshness is the biggest reason. Store-bought herbs often travel for days before reaching the shelf. Homegrown herbs go from plant to plate in seconds, with the aromatic oils still intact. In practice, one healthy basil plant can keep producing for months—far outlasting the clamshells that wilt in your fridge within a week. You can also read our guide on how to drain a garden hose for winter.
Cost matters too. A packet of seeds costs about the same as one bunch of herbs at the store, and it can yield dozens of harvests. You also cut food waste because you harvest only what you need and leave the rest of the plant to keep growing.
Beyond the practical benefits, a small herb garden is a daily ritual. Checking the soil, pinching a leaf, watching new growth appear—it grounds you in a way that buying produce never could. If you are a total beginner, herbs are the ideal gateway: most are forgiving, grow quickly, and tolerate a fair amount of neglect. You can also read our guide on how to choose the right garden hose length.
Decide Where Your Herbs Will Live
Before buying anything, take a hard look at your space. Do you have a sunny windowsill, a balcony, a shelf near a window, or only a dim corner? The honest answer determines which herbs will thrive and how much equipment you will need.
If you eventually want to expand into a full outdoor garden, preparing raised beds properly will save you from a different set of problems later. For now, a single pot in the right spot is enough to start. You can also read our guide on best cordless leaf blowers for home use.
Light: The Most Important Variable
Most culinary herbs need 6 to 8 hours of bright light per day. In the Northern Hemisphere, a south-facing window is the most reliable spot. West-facing windows also work well for most herbs. East-facing windows give gentler morning light, which suits parsley, cilantro, and chives.
If your windows face north, or if trees and buildings block the sun, do not give up. A decent LED grow light changes everything. When choosing one, the LED lighting guidance from the Department of Energy is a useful starting point: look for higher efficacy and full-spectrum output. Keep the light 6 to 12 inches above the leaves and run it 12 to 14 hours a day. You can also read our guide on best backpack leaf blowers for home use.
A simple way to judge natural light: hold your hand about a foot above the spot where the pot will sit. A crisp, well-defined shadow means strong direct light. A fuzzy shadow means bright indirect light. No shadow at all means you will need a grow light for most herbs.
Temperature and Airflow
Most herbs are happiest between 60°F and 75°F (15°C to 24°C)—the same range most people find comfortable. Windowsills are trickier than they look. In summer, glass can push temperatures well over 100°F; in winter, drafts can drop them below 50°F. Check the actual conditions on the sill before committing to it. You can also read our guide on best backpack leaf blowers for home.
Airflow matters as much as warmth. Stagnant air weakens stems and encourages fungal disease. Leave a few inches between pots, open a window when the weather allows, or run a small fan on low for a few hours a day.
Humidity
Indoor air, especially in winter, is often drier than herbs prefer. Dry air speeds up water loss and causes crispy leaf edges. A simple fix is a pebble tray: fill a shallow tray with pebbles, add water, and set the pots on top. Just make sure the water level stays below the pot bases—otherwise the soil wicks up moisture and stays soggy. You can also read our guide on best fill for raised garden beds.
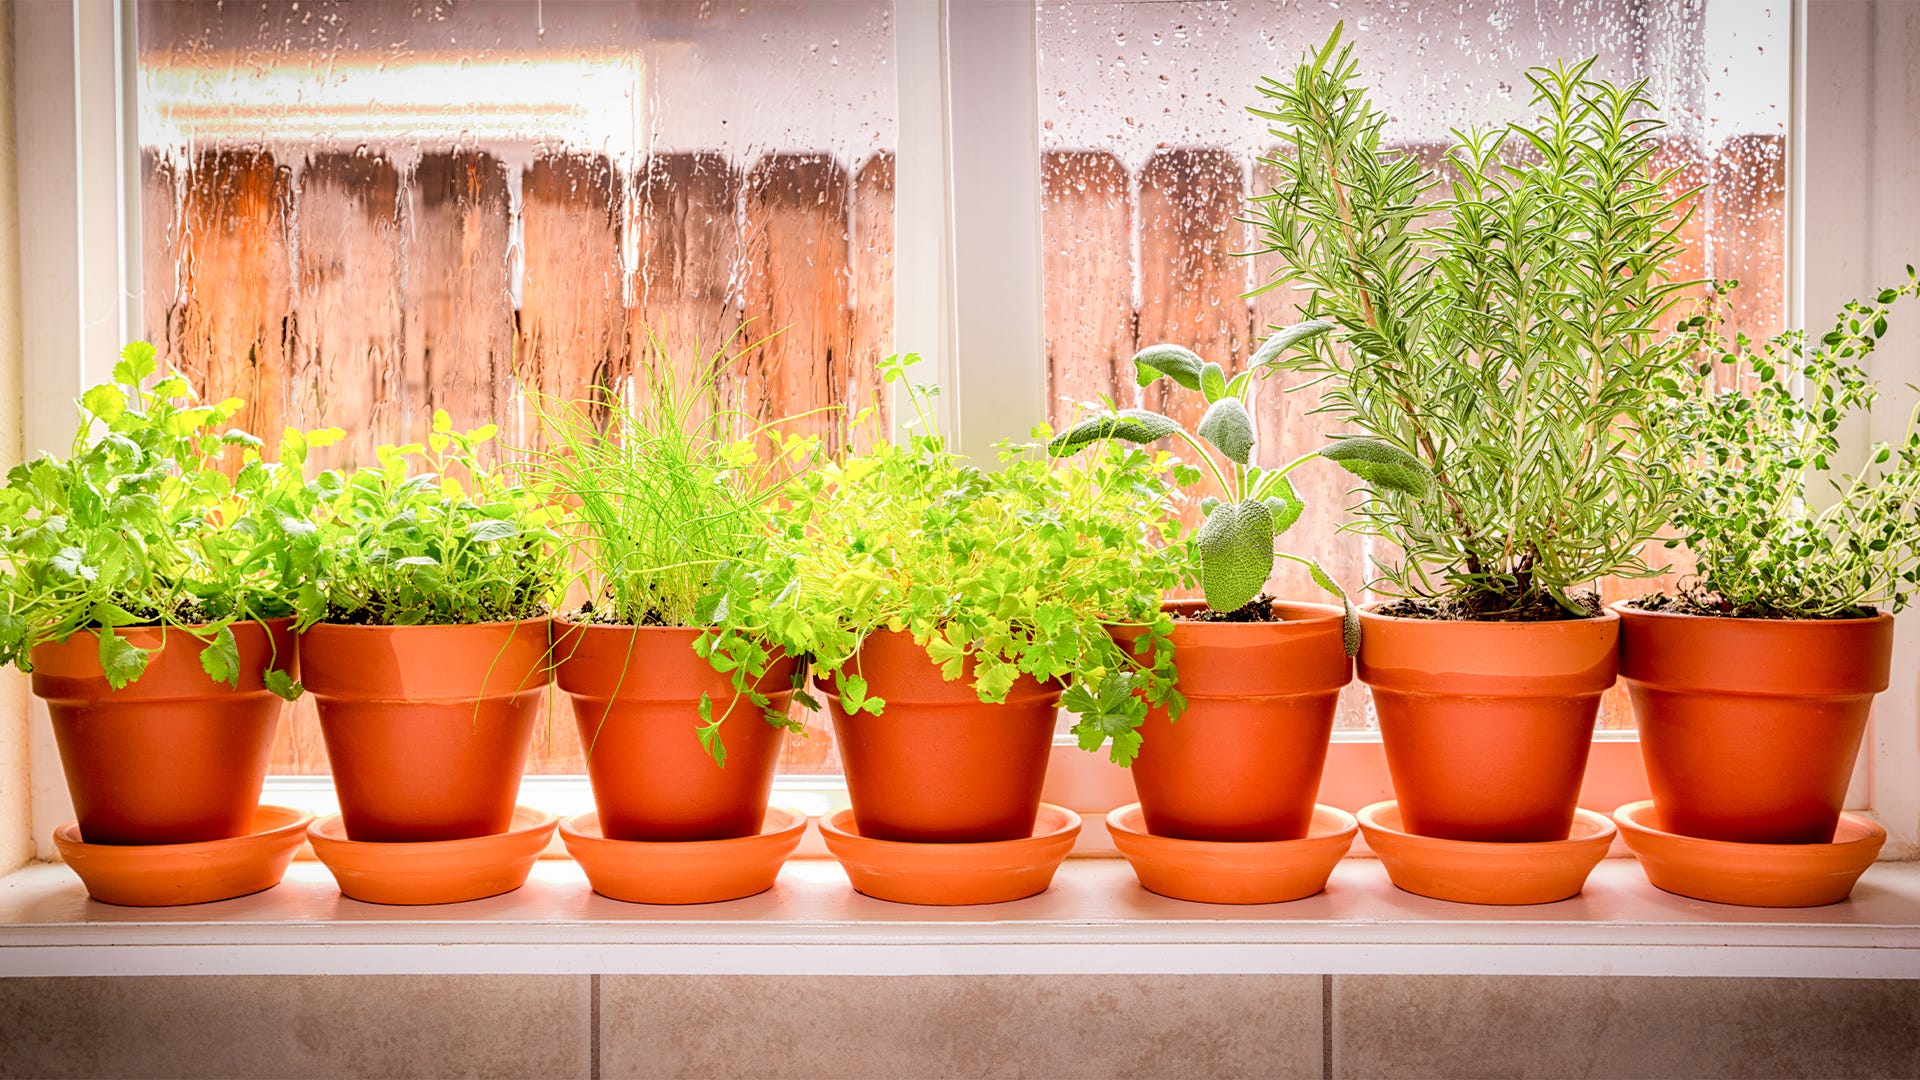
A south-facing windowsill is the simplest place to start.
Source: youtube.com
Pick Herbs That Match Your Confidence Level
Not all herbs are equally easy. Some forgive missed waterings and imperfect light. Others keel over at the first mistake. Start with the resilient ones, build a routine, then expand.
The Six Most Forgiving Herbs
- Mint — Nearly impossible to kill, but it spreads aggressively. Always plant it in its own pot or it will swallow its neighbors.
- Chives — Tolerates cooler temperatures and less light than most herbs. Snip leaves near the base and it regrows steadily.
- Parsley — Prefers even moisture and morning sun. Slow to germinate, but once established, it is very reliable.
- Thyme — Needs bright light and then mostly neglect. Let the soil dry out between waterings.
- Oregano — Like thyme, it wants full sun and dry soil. Frequent harvesting keeps it compact.
- Basil — Fast and delicious, but demanding. It needs warmth, strong light, and consistent moisture. Save it for after you have built a watering habit.
Herbs To Add Once You Have Momentum
- Rosemary — Requires excellent drainage and loathes wet feet. In humid homes, root rot is a constant risk.
- Sage — Prefers dry soil and full sun. Overwatering turns the woody stems bitter.
- Dill — Grows tall quickly and dislikes transplanting. Sow seeds directly into its final pot.
- Lemongrass — A tropical grass that loves heat and humidity. It thrives in warm, bright rooms.
Match Herbs To Your Actual Conditions
| Your Spot | Herbs That Will Thrive |
|---|---|
| South-facing window, warm room | Basil, thyme, oregano, rosemary, sage |
| East-facing window, cooler room | Parsley, chives, cilantro, mint |
| Low natural light + grow light | Almost anything, with the right setup |
| Hot, dry balcony in summer | Rosemary, thyme, oregano, sage |
| Shady balcony | Mint, chives, parsley |
A Quick Note On Pets
Some common herbs are toxic to cats and dogs. Chives and other alliums can cause serious harm, and mint can upset stomachs if eaten in quantity. Rosemary and thyme are generally safe. If you share your home with curious animals, check the ASPCA's plant toxicity list before choosing which herbs to grow. You can also read our guide on how to improve garden soil naturally.
A small mixed pot of hardy herbs makes an ideal first collection.
Source: gardenary.com
Set Up Soil, Containers, And Drainage
Most beginner failures trace back to the soil and pot. Healthy roots need air as much as water. The right container makes that possible.
The Right Potting Mix
Use a lightweight potting mix made for containers. Good mixes contain peat or coir, perlite, and compost—a combination that stays fluffy and drains well. Never use garden soil or topsoil in pots; it compacts, holds too much water, and suffocates roots.
For Mediterranean herbs like thyme, rosemary, and oregano, mix in extra perlite or coarse sand. They evolved in dry, rocky ground, and their roots rot quickly in moisture-retentive soil.
If you grow herbs in the ground instead of containers, take the same approach before planting: breaking up compacted ground gives roots the loose, aerated soil they need to establish quickly.
Container Selection Guide
| Container Type | Pros | Cons | Best For |
|---|---|---|---|
| Terracotta / clay | Breathable, wicks away excess moisture | Dries out fast, brittle | Thyme, rosemary, oregano |
| Plastic | Lightweight, holds moisture | Can stay too wet | Basil, mint, parsley |
| Glazed ceramic | Looks great, stable | Expensive, non-breathable | Decorative pieces |
| Fabric grow bags | Excellent drainage and air pruning | Dry out quickly | Mint and other aggressive growers |
| Self-watering | Consistent moisture | Some herbs get waterlogged | Busy schedules, short trips |
Drainage Rules
Every pot needs at least one drainage hole. Place a saucer underneath, but empty it within 10 minutes of watering. Standing water in the saucer is the fastest route to root rot.
For rosemary and other rot-prone herbs, prop the pot up on small feet so excess water drains freely. A layer of gravel at the bottom helps slightly, but a good potting mix matters far more.
Realistic Starter Budget
You do not need a greenhouse. A basic setup costs about $30 to $50:
- Pots with drainage holes: $2–5 each
- Quality potting mix: $8–12 per bag
- Seeds or seedlings: $2–5 each
- Hand pruners: $10–15
- Spray bottle: $3–5
- Liquid fertilizer: $8–10
Optional upgrades that pay off later: an LED grow light ($25–50), a timer ($10–15), and a humidity tray ($10–15).
Match the pot to the herb: clay for Mediterranean herbs, plastic for moisture lovers.
Source: saferbrand.com
Start Herbs From Seeds, Cuttings, Or Divisions
There are three ways to begin, and each fits a different situation. You can start from seeds, take cuttings from a friend's plant, buy seedlings, or divide an established plant you already own.
Growing From Seeds
Seeds are the cheapest route and hugely satisfying. To get them right:
- Fill a tray or small pots with moistened seed-starting mix.
- Scatter seeds thinly—most herb seeds need light to germinate, so do not bury them deeply.
- Press them gently into the surface.
- Mist the surface and cover with a clear dome or plastic wrap to keep humidity high.
- Place the tray in a warm spot (70–75°F) with bright indirect light.
- Expect sprouts within 5 to 14 days for most herbs. Parsley and rosemary can take 3 to 4 weeks.
The most common seed mistakes are sowing too thickly, letting the mix dry out, and giving up on slow germinators. If you move on to tougher seeds later, the patience you practiced here will serve you well—germinating woody seeds works on a similar timeline.
Rooting Stem Cuttings
Basil, mint, and rosemary root easily from cuttings. This method is faster than seeds and gives you an exact clone of the mother plant.
- Cut a 4-inch stem just below a leaf node.
- Remove the lower leaves, leaving two or three sets at the top.
- Place the cutting in clean water or push it directly into moist potting mix.
- If rooting in water, change the water every 2 to 3 days.
- Once roots reach about an inch, transplant into soil.
This trick also rescues supermarket herbs. Many store-bought basil plants contain several stems in one pot—carefully separate them and root each one.
Dividing Existing Plants
Perennial herbs like chives, mint, oregano, and tarragon can be divided whenever they crowd their pot. Water the plant the day before, tip it out, and gently tease the root ball apart. Use a clean knife for tough roots. Replant each division in fresh mix, water well, and keep it in shade for a few days to recover.
Seedlings are ready to pot on once they have at least two sets of true leaves.
Source: homedepot.com
Plant Everything Correctly The First Time
Getting planting depth and spacing right avoids most later problems.
Prep The Pots
- Wash pots with soap and water to remove pathogens.
- Confirm drainage holes are clear.
- Add a saucer underneath.
- Fill pots two-thirds full with pre-moistened potting mix.
Plant Seeds Or Seedlings
For seeds: scatter them on the surface according to the packet, cover with a fine layer of mix about twice the seed's depth, mist to settle, and label immediately. Seedlings all look alike at first.
For seedlings: make a hole, lift the seedling gently by its leaves or root ball, and set it at the same depth it grew in its nursery pot. Burying the stem invites rot. Backfill, press lightly, and water until a little drains from the bottom.
Arrange The Growing Area
Space pots so air can move between them. Rotate them a quarter turn weekly so every side gets light. If you are using grow lights, position them 6 to 12 inches above the foliage and run them on a timer for 12 to 14 hours daily.
A common mistake is placing pots too close to hot glass in summer. Leaves can literally cook. Watch for wilting or scorched patches and pull pots back from the window during heat waves.
Plant seedlings at the same depth they grew in their nursery pot.
Source: gardeningknowhow.com
Master Daily And Weekly Care
Watering, feeding, and pruning are the whole game. Nail these three and your herbs will reward you for months.
Water Without Overwatering
Overwatering kills more indoor herbs than any pest or disease. Judge by soil feel, not a fixed calendar. Stick a finger about an inch into the soil. If it feels dry, water. If it feels damp, wait. Lift the pot too—a light pot means dry soil, a heavy one means it is still wet.
When you water, water thoroughly until it runs out of the drainage holes. This wets the whole root zone. Empty the saucer after 10 minutes.
Frequency varies with conditions:
| Situation | Typical Watering Interval |
|---|---|
| Warm, bright room | Every 2–3 days |
| Cool, shaded room | Every 5–7 days |
| Terracotta pot | More often than plastic |
| Small pot | More often than a large one |
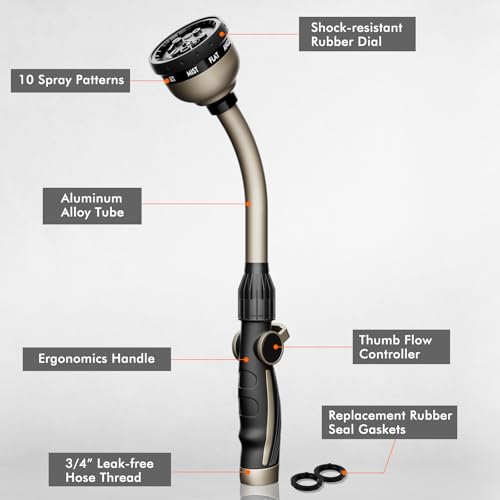
If you are watering several pots on a balcony with a hose, the right water flow saves time and avoids waste. For indoor pots, use a small watering can or a hose-end sprayer with a soft setting so you do not blast soil out of the container.
Feed Lightly
Culinary herbs need very little fertilizer. Too much produces soft, fast growth with weak flavor—and makes plants more attractive to pests.
Use a balanced liquid fertilizer at half strength every 2 to 4 weeks during active growth in spring and summer. Stop feeding in winter when growth slows. If your herbs are already growing well and taste great, skip feeding entirely. Only feed when growth stalls or leaves turn pale.
Prune For Bushy Growth
It feels counterintuitive, but cutting herbs makes them grow more. Regular harvesting and pinching prevent leggy, woody plants.
Basic rules:
- Pinch or cut just above a pair of leaves.
- Never remove more than a third of the plant at once.
- Use clean shears so you do not crush the stem.
- Harvest often—the more you cut, the more the plant produces.
Herb-specific tips: basil should be cut just above a leaf pair with at least two leaf sets left behind. Mint branches readily if cut just above a node. Chives regrow from the bulb when you snip leaves near the base. Thyme and oregano stay compact if you trim straggly stems regularly.
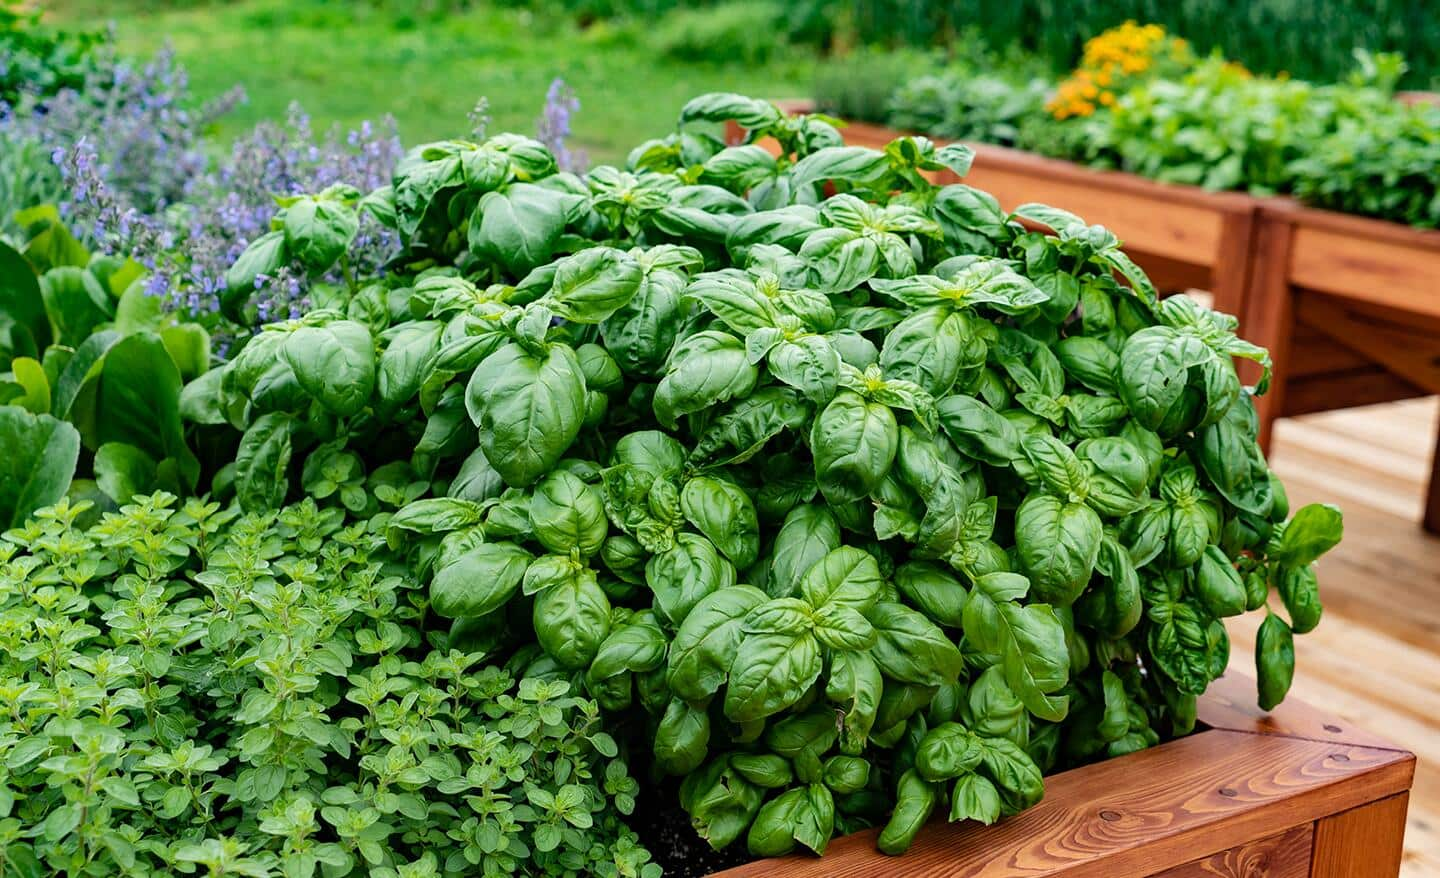
Pinch basil just above a leaf pair to encourage denser growth.
Source: youtube.com
Grow Herbs All Year: Seasonal Care And Grow Lights
Herbs respond to the seasons even indoors. Adjusting your routine keeps them productive in every month of 2026 and beyond.
Spring And Summer
Warm weather accelerates growth, but heat is hard on cool-loving herbs. Cilantro and dill bolt—they flower and turn bitter—as soon as temperatures climb. Solutions: sow new batches every couple of weeks, move pots to morning sun and afternoon shade, keep soil consistently moist, and bring pots indoors when temperatures exceed 85°F.
Autumn And Winter
Short days and low light slow most herbs dramatically. Without intervention, they simply stop growing. To keep them going:
- Run LED grow lights 12 to 14 hours daily.
- Keep the lights 6 to 12 inches above the foliage.
- Water less often—plants use far less in cool, low-light months.
- Stop fertilizing between November and February.
- Counteract dry heating air with pebble trays.
Keep LED grow lights close to the canopy, but not close enough to scorch the leaves.
Source: youtube.com
Prevent And Manage Pests And Diseases
Indoor herbs have fewer pests than outdoor gardens, but problems still arrive—usually on new plants you bring home. A stressed plant is far more vulnerable than a healthy one.
Common Indoor Herb Pests
| Pest | Signs | Treatment |
|---|---|---|
| Aphids | Clusters of small green or black insects on new growth | Rinse with water; apply insecticidal soap |
| Spider mites | Fine webbing and stippled yellow leaves | Raise humidity; rinse foliage; use a miticide |
| Whiteflies | Tiny white insects that scatter when disturbed | Yellow sticky traps; insecticidal soap |
| Fungus gnats | Small flies hovering around the soil | Let the soil dry out; use sticky traps |
Prevention is the best medicine:
- Inspect any new plant for pests before it joins your collection.
- Check leaf undersides once a week.
- Quarantine new plants for a week.
- Water the soil directly and keep foliage dry.
Recognise And Treat Diseases
Powdery mildew looks like a white powder on leaves. Improve airflow, remove affected leaves, and reduce humidity.
Root rot shows up as yellowing leaves, wilting, and sour-smelling soil. It is almost always caused by overwatering. Repot in fresh, well-draining mix and water less.
Fungal leaf spot causes dark spots with yellow halos. Avoid wetting the foliage and keep air moving.
A five-minute weekly inspection catches most problems before they spread. Early action is worth more than any cure.
Check the undersides of leaves weekly; early detection is the most effective treatment.
Source: allthatgrows.in
Harvest, Store, And Keep The Supply Coming
The whole point of growing herbs is eating them. Harvesting correctly keeps the plants producing.
When And How To Harvest
Early morning is the best time. After the dew dries but before the heat of the day peaks, the essential oils are most concentrated. Use clean, sharp scissors so you make a clean cut instead of crushing the stem.
Harvest little and often. Frequent small harvests stimulate more growth than rare big cuts. Always leave enough foliage for the plant to keep photosynthesizing.
Storing Fresh Herbs
Fridge (short term): Wrap herbs loosely in a damp paper towel inside a sealed container, or stand the stems in a jar of water covered with a plastic bag. Most herbs last 5 to 7 days this way.
Freezer (longer term): Chop the herbs, pack them into ice cube trays, and cover with olive oil or water. Or freeze leaves flat on a baking sheet, then transfer to a bag. Frozen herbs work best in cooked dishes.
Drying: Hang small bundles in a warm, dark, airy room, or use a food dehydrator on low. Store the crumbled leaves in airtight jars away from light. Dried herbs lose potency after about a year but still add flavor.
Keep The Harvests Coming
Short-lived herbs like basil and cilantro eventually flower and go to seed. When they bolt, the leaves turn bitter and the plant stops producing. The fix is succession sowing: start a new batch every 2 to 3 weeks so young plants are always ready to replace the old ones.
If you grow herbs outdoors in beds, mulching with autumn leaves protects roots through winter and improves the soil as it breaks down.
Harvest in the morning when the leaves hold the most flavor.
Source: youtube.com
Troubleshoot Common Herb Problems
Even experienced growers see these patterns. The key is to recognise the symptom early and adjust quickly.
| Symptom | Likely Cause | Fix |
|---|---|---|
| Leggy, stretched stems | Not enough light | Move to a brighter spot; add a grow light |
| Yellow lower leaves | Overwatering or poor drainage | Water less; improve drainage |
| Brown, crispy leaf tips | Low humidity or salt buildup | Use a pebble tray; flush the soil |
| Pale, weak leaves | Too much fertilizer or too little light | Feed less; increase light |
| Wilting despite wet soil | Root rot | Repot in fresh mix; water less |
| Leaves dropping | Temperature stress or drafts | Move away from vents and cold glass |
| Weak aroma | Too much nitrogen | Cut back on fertilizer; give more light |
| Slow growth | Cool temperatures or poor soil | Warm the room; refresh the potting mix |
Keep simple notes about what works in your home. Every house has different light, temperature, and humidity. Your own observations will always beat generic advice. And accept that some plant losses are normal—even experienced gardeners kill herbs now and then. Each attempt teaches you something about your specific conditions.
Go Further: Hydroponics And Small Automated Setups
Ready to move beyond soil? Countertop hydroponic units are far more capable than the early versions. They combine built-in grow lights and automatic nutrient delivery, which makes them ideal for low-light kitchens and anyone who wants a nearly set-and-forget system.
You can also build a simple Kratky-method jar: a glass jar, a net cup, clay pebbles, and nutrient solution. It needs no pump and no electricity, and basil grows especially well in it. The USDA's gardening and plant science resources are a reliable starting point if you want to go deeper into soilless growing or soil biology.
Even with advanced systems, the basics still apply: adequate light, proper nutrients, and consistent monitoring.
Frequently Asked Questions
How much light do herbs need indoors?
Most culinary herbs need 6 to 8 hours of bright light daily. If natural light is limited, use an LED grow light for 12 to 14 hours a day, positioned 6 to 12 inches above the plants.
How often should I water potted herbs?
Water when the top inch of soil feels dry. In a warm, bright room that might be every 2 to 3 days; in a cool, shaded room, every 5 to 7 days. Always check the soil before watering.
Which herbs are best for absolute beginners?
Mint, chives, parsley, oregano, and thyme. They tolerate minor neglect and grow steadily in most indoor conditions. Add basil once your watering routine feels automatic.
Can I grow herbs from grocery store cuttings?
Yes. Basil and mint root easily in water. Take 4-inch cuttings, remove the lower leaves, place them in clean water, and wait for roots to develop—then pot them up. Many supermarket basil plants also contain several stems that can be separated and rooted individually.
Why is my basil leggy and weak?
Not enough light is the usual cause. Move it closer to a window or under a grow light, pinch the top tips to encourage branching, and remove the weakest stems.
Do herbs really need fertilizer?
Yes, but very little. A half-strength liquid fertilizer every 2 to 4 weeks during active growth is plenty. Overfeeding causes soft growth, weaker flavor, and more pest problems.
Why are my herb leaves turning yellow?
Yellow leaves usually mean overwatering or poor drainage. Check that every pot has drainage holes, empty saucers promptly, and water only when the top inch of soil is dry.
Conclusion
Growing herbs at home is one of the most rewarding gardening projects you can start in 2026—it is cheap, forgiving, and it makes your cooking noticeably better. The fundamentals are simple: give herbs bright light, use well-draining soil, water by feel, and harvest regularly.
Start with a few forgiving varieties in one or two pots. Set them in your brightest spot, water them properly, and build a simple weekly routine. As your confidence grows, add a grow light, try cuttings and divisions, and expand into more demanding herbs.
The payoff goes beyond fresh flavor. It is the satisfaction of keeping something alive, the money saved on grocery herbs, and a small patch of green in your home. Pick the one herb you use most in the kitchen, buy a pot and a bag of soil, and plant it today. In three weeks, you will be harvesting your own herbs—and wondering why you did not start sooner.