Use plywood, plastic sheeting, and a leaf blower to float on air.
If you want to learn how to build a hovercraft with a leaf blower, this guide lays out every step with clear tips, tested methods, and safe practices. I have built and tuned several backyard hovercrafts, and I will show you what works, what fails, and how to get a smooth lift on your first try.

Safety first: protect people, places, and tools
A hovercraft looks simple, but it moves air fast and lifts weight. Respect the force. Before you start how to build a hovercraft with a leaf blower, set rules and prepare your space.
Follow these core steps.
- Work on a flat, smooth floor. A gym floor, garage slab, or a tarp over grass is best.
- Wear eye and ear protection. Use gloves when cutting and drilling.
- Keep kids and pets at a safe distance. Never ride near cars or steep edges.
- Use a battery blower if you can. If you use corded tools, plug into a GFCI outlet and manage cords.
- Do a slow first test. Do not stand until you confirm even lift and airflow.
- Cap all sharp screw tips with washers. Check for leaks and loose parts before each run.
A hovercraft is not a toy for roads or water. Use it for short, slow demos only. Keep top speed low and avoid slopes.

How a leaf blower hovercraft works
Lift comes from pressure. The blower pushes air into a plenum under the board. Air spreads under the skirt and leaks out in a thin ring. That thin air film lowers friction, so the craft can glide.
Two numbers matter most.
- Total weight. You, the board, and the blower.
- Footprint area. Bigger area lowers the pressure needed.
Leaf blowers make lots of airflow and modest pressure. For a 4-foot disk, you need about 0.1 to 0.2 psi to lift an adult. Most modern blowers can do this if the skirt seals well. To master how to build a hovercraft with a leaf blower, aim for smooth flow paths, a balanced skirt, and even hole sizes.

Tools and materials
Here is a tested kit for how to build a hovercraft with a leaf blower. It keeps the build simple and safe.
Materials.
- One 48-inch round of 1/2-inch plywood. You can cut from a 4×4 panel.
- One 6-mil plastic sheet or heavy-duty tarp, about 5×5 feet.
- Screws, 1 inch, with large fender washers, about 30 pieces.
- Duct tape and construction adhesive.
- One PVC coupling or short 3 to 4-inch duct section for the blower port.
- Foam pad or old yoga mat for a seat and grip.
- Optional: nylon webbing for a carry handle. Velcro straps for securing the blower.
- Jigsaw, drill, 1/2-inch and 3 to 4-inch hole saws.
- Tape measure, marker, straightedge.
- Sandpaper or sander.
- Safety glasses, hearing protection, gloves.
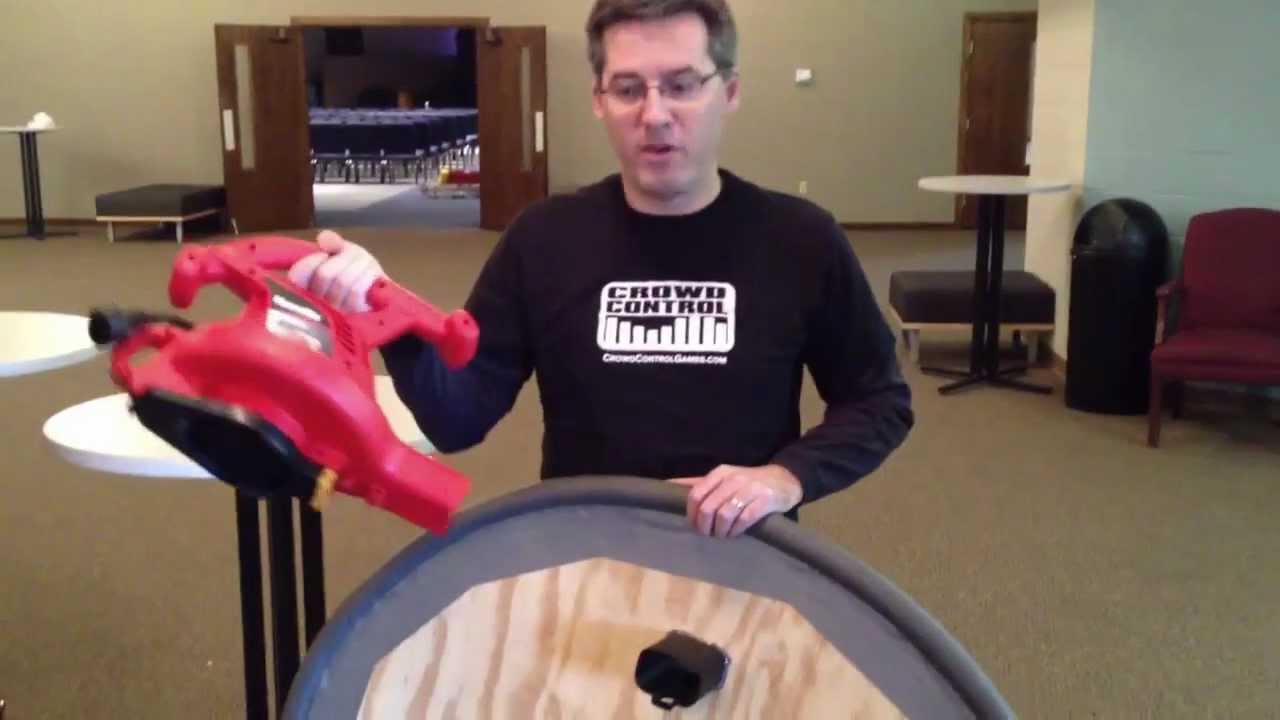
Leaf blower.
- Battery or corded, 300 to 700 CFM. Higher is better. Backpack units work too.
- A round nozzle is easiest to couple. If yours is oval, make an adapter with duct and tape.
This setup has lifted 180 to 220 pounds in my tests. If you plan how to build a hovercraft with a leaf blower for a larger rider, consider a 5-foot disk or a second blower.
Step-by-step: how to build a hovercraft with a leaf blower
Use this sequence to get a clean, repeatable result. I use these same steps for workshops and school demos.
- Lay out and cut the base.
- Mark a 48-inch circle on plywood. Cut with a jigsaw. Sand the edge smooth.
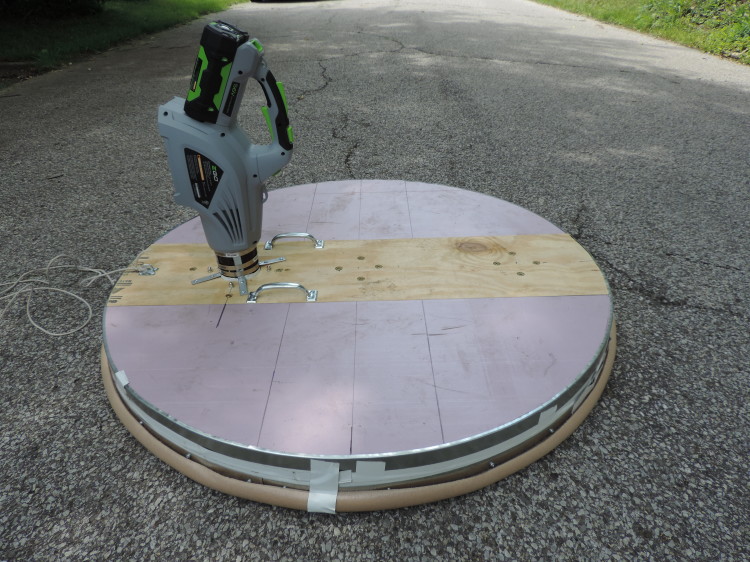
- Make the blower port.
- On the top side, mark a hole 6 inches from the edge. Cut a 3 to 4-inch hole for the blower duct. Keep it off-center so you have room to sit.
- Drill lift holes.
- On the center, draw a 10-inch circle. Drill 10 to 12 holes of 1/2 inch along this circle. These holes spread air under the skirt.
- Prepare the skirt.
- Lay the plastic sheet under the disk. Center it. You want 6 to 8 inches of overhang all around.
- Attach the skirt.
- Fold the plastic up and over the top face by 2 inches. Secure with screws and fender washers every 4 to 6 inches. Keep even tension, but do not stretch tight. You need slack.
- Make the outlet slits.
- Flip the craft. On the underside, near the outer edge, cut 8 short slits. Each slit should be 1 inch long and spaced evenly. These let air escape in a ring. Add more slits later if needed.
- Seal leaks.
- Tape around the blower port and the skirt seam. Seal visible gaps. Smooth tape to avoid flapping.
- Mount the blower.
- Fit the PVC coupling in the port. Tape and glue for a snug fit. Strap the blower nozzle to the coupling. The blower should angle down into the hole.
- Add a seat and handle.
- Glue a foam pad near the center. Add a small strap handle on the front edge for control.
- Final checks.
- Inspect all screws and tape. Confirm lift holes are clear. Make sure the skirt has slack and no tears.
These build steps show how to build a hovercraft with a leaf blower in under two hours with basic tools.
First tests, tuning, and safe riding
Your first goal is even lift, not speed. Here is how to dial it in fast.
- Lift test without rider. Run the blower. The skirt should puff evenly. Look for leaks or flat spots.
- Add weight in small steps. Start with a sandbag. Then kneel, then sit. Keep your center over the drilled hole circle.
- Adjust the outlet slits. If the craft feels stuck, add one more slit. If it hisses too loud and drops, tape over a slit.
- Control movement. Use small foot shifts and the front handle. Do not yank the blower.
When you master how to build a hovercraft with a leaf blower, you will see small tweaks matter. A clean skirt and smooth floor make the biggest difference.

Troubleshooting and common mistakes
Most problems trace to leaks or poor balance. Use this checklist before big changes.
- It will not lift. Check skirt slack. Add tape at seams. Reduce rider weight or increase disk size.
- It lifts but drags. Add one or two outlet slits. Sand any rough spots on the edge.
- It spins too much. Shift weight forward. Add a small fin or hold a broom tip to the ground lightly to damp spin (for demos only).
- The blower pops off. Use a better coupling and strap it tight. Add foam tape as a gasket.
- Skirt tears often. Use thicker plastic or a tarp. Round all edges and use fender washers.
These fixes are part of how to build a hovercraft with a leaf blower that works the first time.

Cost, time, and skill level
Here is what most builders can expect.
- Cost. About $60 to $150, depending on the blower you own.
- Time. One to two hours for a first build. Tuning may take 20 minutes.
- Skill. Basic cutting and drilling. No special math needed.
With a modest budget, you can practice how to build a hovercraft with a leaf blower for school demos, science fairs, or family projects.

Upgrades and variations
Once you get a clean hover, add features for comfort and control.
- Stronger skirt. Switch to ripstop nylon or reinforced tarp with hemmed edges.
- Dual blowers. Use a Y-duct to combine flow. Watch weight and battery life.
- Diffuser ring. Add a light ring under the edge to steady the air film.
- Throttle control. Mount a simple remote switch or trigger lock.
- Bigger deck. Move to a 5-foot disk to lower pressure and improve lift.
These upgrades show how to build a hovercraft with a leaf blower that feels refined, not rough.

Maintenance and storage
Small habits keep your craft ready and safe.
- After each use, check the skirt for scuffs and tiny cuts. Patch with tape.
- Tighten loose screws and replace bent washers.
- Wipe dust from the blower intake and filter.
- Store the craft flat to protect the skirt slack.
Routine care is part of how to build a hovercraft with a leaf blower that lasts for many demos.
Legal, noise, and community care
Be a good neighbor and follow local rules.
- Use your hovercraft on private property with permission.
- Avoid early mornings or late nights. Leaf blowers are loud.
- Do not ride on roads, bike paths, or near water.
- Supervise youth users and set simple boundaries.
These steps align with safe, smart ways on how to build a hovercraft with a leaf blower without trouble.
Frequently Asked Questions of how to build a hovercraft with a leaf blower
Is one leaf blower enough to lift an adult?
Yes, for short demos on a smooth floor. Use a 4 to 5-foot disk, a tight skirt, and a modern blower with high airflow.
What is the best size for the base?
A 48-inch round works well for most riders. Larger disks lower pressure needs but add weight.
Do I need a special skirt material?
No. A 6-mil plastic sheet or a tough tarp is fine for starters. Upgrade to ripstop nylon if you want more durability.
Can I steer the hovercraft like a go-kart?
No. There is almost no friction, so steering is subtle. Shift weight, use a handle, and keep speed low.
Is a shop vacuum better than a leaf blower?
A shop vac has higher static pressure and can work well. It may be heavier and louder, but it can give steadier lift.
How long will the battery last?
Most battery blowers run 10 to 20 minutes at high power. Bring spare packs for longer demo sessions.
What if the craft keeps spinning?
Center your weight and add a small anti-spin pad or use gentle foot taps. Check that the outlet slits are even.
Conclusion
You now have a clear plan to design, build, and tune a simple hovercraft that runs on a leaf blower. With a few tools, a smart skirt, and patient tests, you can glide on a thin cushion of air and teach core physics at the same time.
Start with the basic build. Keep it safe. Then upgrade step by step as you learn. If this guide helped, share your build, ask a question, or subscribe for more hands-on projects.


