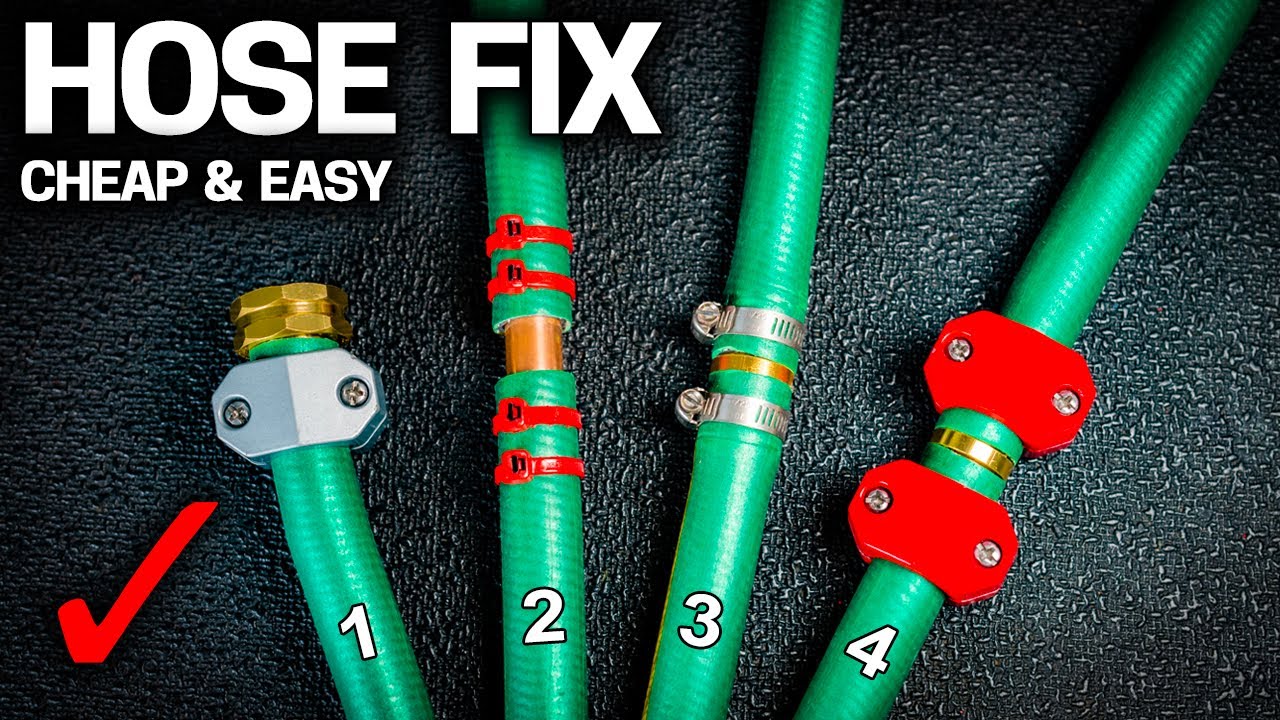
Cut out damage, use a hose mender or self fusing tape.
If you want a simple, proven guide on how to repair hole in garden hose, you are in the right place. I have fixed dozens of hoses for clients and my own yard. In this guide, I show you how to repair hole in garden hose with steps that work, gear that lasts, and tips that save time and water. Let’s get your hose back to full strength, fast.

What causes holes and leaks in a garden hose
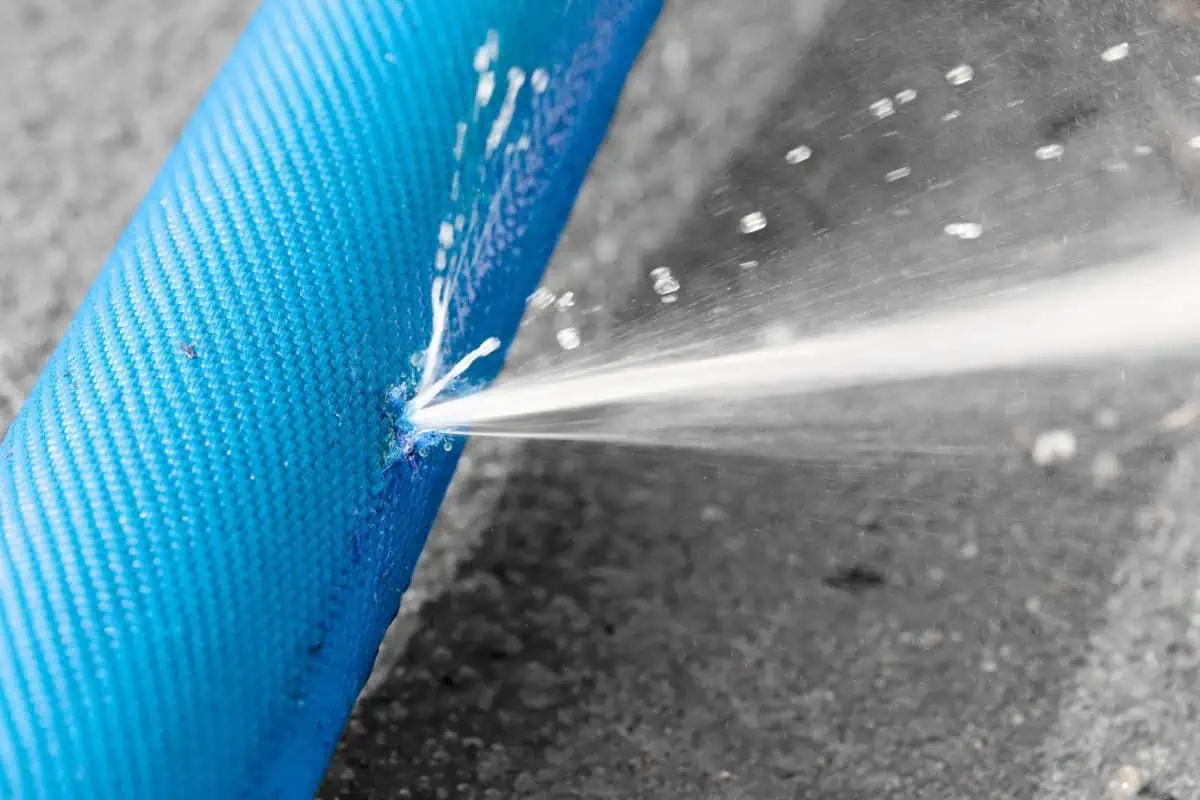
Hoses fail for simple reasons. Kinks weaken the wall and form cracks. Sunlight dries vinyl and makes it brittle. Dragging on rough concrete rubs through the outer layer.
Cold snaps can split a hose if it freezes full of water. Pets chew. Lawnmowers nick the sides. High water pressure also exposes weak spots. Know the cause, and your fix will last longer.
Tools and materials you will need
Pick the right repair for the damage. Here are the common tools and parts.
- Utility knife with a fresh blade
- Marker and measuring tape
- Hose mender, barbed or compression type sized to your hose
- Two worm gear clamps if using a barbed mender
- Self fusing silicone tape for pinholes and small cracks
- Replacement female or male hose end if the fitting leaks
- Fine sandpaper or a scouring pad to clean the area
- Screwdriver for clamps and a clean rag
- Bucket and soapy water for leak checks
- Gloves and eye protection
Most homes use 5/8 inch hoses, some use 1/2 inch, and heavy duty uses 3/4 inch. Check the label on the hose or measure the inside diameter. This matters for how to repair hole in garden hose with parts that fit.

Quick fixes vs permanent repairs
Quick fixes stop a small leak fast. Self fusing tape is great for a pinhole. It bonds to itself without glue. It handles water and heat well.
Permanent repairs use a mender. You cut out the bad piece and join the hose ends. This lasts for years if you size and clamp it right. For many jobs, this is the best method for how to repair hole in garden hose.

Step-by-step: how to repair hole in garden hose
Follow this simple process. It covers both small holes and larger cuts.
- Find and mark the leak
- Turn on the water. Look for spray or mist.
- Mark the spot with a marker.
- If the leak is small, use soapy water to see fine bubbles.
- Turn off and drain
- Shut off the spigot.
- Open the nozzle to drain.
- Let the hose dry a few minutes.
- For a pinhole or tiny crack: tape wrap
- Clean and dry the area. Lightly scuff the surface.
- Stretch self fusing silicone tape while wrapping.
- Overlap each turn by half the width. Wrap 2 to 3 inches past the hole on each side.
- Press the tape down and let it set per the package.
- This is a fast way for how to repair hole in garden hose when the hole is small.
- For a slit, split, or large hole: cut and mender
- Use a square cut to remove the damaged part. Cut at least 1 inch past all damage.
- Slide a clamp on each hose end if using a barbed mender.
- Push the barbed mender halfway into one side, then the other. Twist while pushing.
- Place clamps over the barbs under the hose wall. Tighten until snug. Do not crush the hose.
- If using a compression mender, insert and tighten the collars by hand, then snug with a wrench.
- For a leak near the end fitting
- Cut off the bad end square.
- Install a new female or male end of the same size.
- Follow the kit steps. Many ends use a barbed stem and a clamp or a screw-on collar.
- Test your work
- Turn on water with the hose straight.
- Check for drips. Tighten clamps a bit if needed.
- Flex the hose and test again.
I have done this fix on old vinyl hoses that I wanted to save for the garden beds. The mender held for three seasons. It is a solid approach for how to repair hole in garden hose without buying a new one.

Method details and when to use each
Use self fusing tape when the hole is tiny and the hose is still strong. It seals well if the hose is clean and dry. It is also handy when you need water right now.
Use a barbed mender for a slit, long crack, or blown section. This is the best choice for how to repair hole in garden hose when more than a pinhole is involved. Choose brass for durability. Plastic works on light duty hoses.
Use a compression mender if you do not want clamps. It is a tidy fix and works well on many sizes. It is great if you do not have extra tools.
If the hose has many holes in one area, cut it there and shorten the hose. Then rejoin with a single mender. That often beats stacking many tape wraps.

How to replace a crushed or leaking hose end
A bad end fitting can waste more water than a hole. It is easy to swap.
- Cut off the old end square.
- Match the size and type: female for the spigot side, male for the nozzle side.
- Insert the new end per the kit and secure it.
- Add a new washer inside the female end.
This method is part of how to repair hole in garden hose because end leaks act like holes. A fresh washer often stops drips at the spigot too.

Testing, safety, and troubleshooting
Test at full flow with the hose straight. Then coil and flex the area. Look for fine mist. Soapy water helps spot tiny leaks. Wipe dry and recheck.
If it still leaks at the clamp, loosen it, reseat the hose so the barb is fully covered, and retighten. Do not overtighten. The clamp can cut the hose. If tape peels, clean better and stretch the tape more during wrap.
Wear gloves when cutting. Use a sharp knife and cut away from your body. Shut off water before any work. These safe steps belong in every guide on how to repair hole in garden hose.

Prevention tips to avoid future holes
Good habits keep hoses healthy.
- Store the hose in shade on a reel or hanger.
- Drain before winter and before heat waves.
- Use hose guides at garden bed corners.
- Do not yank the hose by the nozzle. Walk it forward.
- Keep it off sharp edges and hot pavement.
- Use a pressure regulator if your pressure is very high.
- Train pets away from hoses or use a chew guard.
I learned to place a cheap rubber mat over the edge of my concrete step. That one change cut my hose wear a lot. It is simple and it works.

When to repair vs replace a garden hose
Repair if the hose has one or two leaks, the wall still feels firm, and the fittings are sound. It is fast and cheap. It saves water too.
Replace if the hose has many soft spots, lots of cracks, or kinks every few feet. Old vinyl that turns chalky will keep failing. If you water edibles, look for drinking water safe hoses.
Think value and time. A mender and tape cost little. A quality rubber hose may be a better long term buy if repairs stack up. This is a smart way to think about how to repair hole in garden hose without wasting money.
Cost, time, and skill estimates
Most repairs take 10 to 20 minutes. Mark, cut, insert, and test. Tape jobs are even faster.
Typical costs are low. Self fusing tape runs a few dollars per roll. Barbed menders with clamps are modest. Compression menders cost a bit more but save tool time.
Anyone can learn how to repair hole in garden hose with basic tools. Read the kit steps, match the size, and take your time.
Frequently Asked Questions of how to repair hole in garden hose
What is the fastest way to stop a small hose leak?
Use self fusing silicone tape. Clean the area, stretch the tape, and wrap with overlap. It seals fast and holds under pressure.
Which is better, a barbed mender or a compression mender?
Both work well if sized right. Barbed plus clamps is cheaper. Compression menders are quick and tidy, with no clamps.
How do I know my hose size for a proper mender?
Check the printed size on the hose jacket. If missing, measure the inside diameter with a ruler and match 1/2, 5/8, or 3/4 inch.
Can I use duct tape to fix a hose?
Duct tape is a short term patch at best. It peels when wet and warm. Use self fusing silicone tape or a proper mender instead.
Why does my repair still leak at the clamp?
The barb may not be fully under the hose, or the clamp may sit over the bevel. Reseat the hose, place the clamp over the barb, and tighten until snug.
Is it safe to drink from a repaired hose?
Use drinking water safe hoses and parts if you need potable water. Many standard hoses are not rated for that use.
How long will a hose mender repair last?
A good brass mender can last for years. Make square cuts, use the right size, and avoid kinks at the repair spot.
Conclusion
You can master how to repair hole in garden hose with a few simple steps. Find the leak, choose the right fix, and take your time. A clean cut and a proper mender give a long lasting result.
Try one repair today and see the difference. Save water, save money, and keep your garden happy. Want more practical yard fixes like this? Subscribe for weekly tips or leave a question in the comments.