How To Winterize A Garden Hose: 2026 Freeze-Proof Tips
A single night below freezing can destroy a garden hose and, worse, crack the outdoor faucet it's attached to—leading to water damage inside your walls. The good news? Winterizing takes about ten minutes per hose and requires almost no special equipment. This guide walks you through the complete process, covering everything from basic draining to advanced blow-out techniques, special hose types, and what to do if you're already too late.
Why Skipping This Step Gets Expensive
Water expands by roughly nine percent when it freezes. Inside a closed garden hose, that expansion has nowhere to go. The pressure builds until the hose wall splits, fittings crack, or—in the worst case—ice pushes back into the spigot and bursts the pipe inside your home's wall. A burst pipe isn't a garden repair; it's a plumber, drywall work, and potentially a flooded basement.
Beyond protecting your home, proper winterization extends the life of your hose significantly. A hose left outside year-round deteriorates from UV exposure, freezing, and repeated thaw cycles. A hose stored indoors over winter can easily last a decade or more. That's a meaningful return on a ten-minute investment each fall.
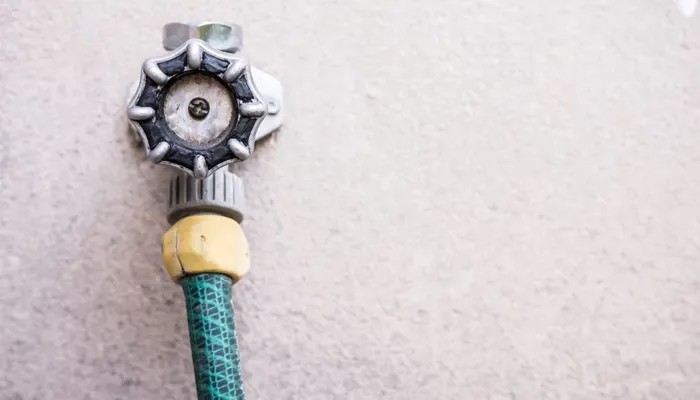
An unprotected spigot and attached hose are vulnerable to freeze damage.
Source: abmay.com
What You'll Need Before You Start
The beauty of this job is that most households already own everything required. Gather these items before heading outside:
- Work gloves and safety glasses
- A bucket or large tub to catch residual water
- An old towel or rag for drying
- Spare hose washers and O-rings
- Hose caps or quick-connect dust covers
- A foam faucet cover for the outdoor spigot
- Zip ties or hook-and-loop straps for coiling
- Optional: a shop vacuum with blow function or a small air compressor with a blower tip
If you have an air compressor, check that it has a pressure gauge. You'll need to keep output between 30 and 50 psi—more on that below. A compressor makes the job faster and more thorough, but it's not required for most setups.
Step-by-Step: Winterizing Your Garden Hose
Pick a dry day when temperatures are above freezing. This makes the water flow more easily and keeps your hands comfortable. Work through these steps in order:
1. Shut off the water supply. Turn the valve on the outdoor faucet completely clockwise. Then open the hose nozzle to release any pressure in the line.
2. Detach everything. Remove sprayers, nozzles, splitters, timers, and inline filters. Set each attachment aside to drain separately. These small devices trap water and freeze easily, so don't skip this step.
3. Lay the hose out straight. Walk it out across the yard on a slight slope if possible. Eliminate kinks and bends so water can flow freely.
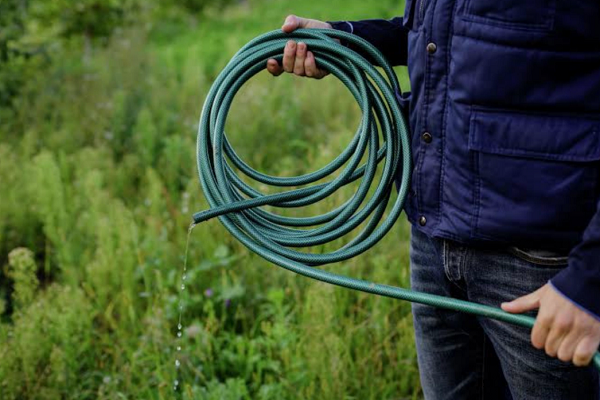
4. Drain by lifting. Starting at the far end, lift the hose and walk your hands toward the faucet end, pushing water out as you go. Then swap ends and repeat. Do this two or three times until the flow stops completely.
5. Blow out remaining water (optional but recommended). Attach your shop vac or compressor to one end and run short bursts of air through the hose. Keep the pressure at or below 50 psi. Point the open end away from your face and body. If you don't have a compressor, gravity draining usually suffices for most homes.
6. Inspect and replace washers. Check the rubber washers inside the female ends of the hose. Flat, cracked, or stiff washers cause leaks and trap water. Replace any that look worn—these are cheap and available at any hardware store.
7. Wipe the hose dry. Run a rag along the full length to remove surface moisture. A dry hose resists mold and mildew during months in storage.
8. Coil in wide loops. Make each loop roughly 14–18 inches in diameter—pizza-pan size, not dinner-plate size. Tight coils create sharp bends that weaken the hose material over time.
9. Cap the ends. Thread on hose caps or quick-connect dust covers. This keeps dirt, insects, and rodents out of the interior.
10. Store indoors. A garage wall hook, basement shelf, or shed shelf works well. Keep the hose off the concrete floor, away from direct sunlight, and somewhere it won't be stepped on.
11. Protect the spigot. Remove any Y-splitter or attachments. Close the valve, drain the stub pipe, and install a foam faucet cover. If your setup has an indoor shutoff for that line, close it and open the outdoor valve to drain the pipe completely.
12. Set a reminder. Calendar a mid-winter check. During warm spells, glance at your stored hose and spigot for any issues.
For year-round equipment care, keep similar routines in mind—consistent maintenance across your outdoor tools prevents costly surprises when the seasons change.
Special Cases by Hose Type
Not all hoses drain the same way. Here's how to handle the common variations:
Expandable and fabric hoses
These lightweight hoses hold water inside their woven outer sleeve. Gravity drainage alone often leaves them soggy for days. Squeeze them along the full length while draining, and avoid using compressed air—the pressure can burst the inner tube. Store them in a breathable bag indoors to prevent mildew.
Heavy-duty rubber and no-kink hoses
Ribbed interiors trap water in small pockets. Blowing these out with air at 30–50 psi makes a real difference. When coiling, use extra-wide loops. Rubber takes a set in cold weather, and tight bends from storage can become permanent kinks.
Drinking-water-safe hoses (RV and marine)
These hoses are manufactured to food-safe standards. Never introduce antifreeze or cleaning chemicals into them. Drain thoroughly and store with caps on both ends. Keep them in a labeled bin so they don't get mixed up with regular hoses.
Soaker hoses and drip lines
Open the far end cap and let the line drain by gravity over an hour or two. Soaker hoses weep water from hundreds of tiny pores, so they take longer to empty. Store them flat or in loose coils—tight wrapping can crack the porous material.
Timers, filters, and backflow preventers
Remove batteries from timers and store them indoors. Unscrew backflow preventers if local codes permit, drain them, and bring them inside. For built-in backflow devices, follow the manufacturer's drain instructions exactly.
Different hose sizes also affect drainage and storage choices. If you're unsure whether your setup needs extra attention, comparing common hose diameters helps you understand flow and freeze risks.
Smart Storage and Organization
Where and how you store hoses matters nearly as much as draining them. Good storage prevents damage and makes spring setup faster:
- Use a wide-saddle wall hanger. Narrow hooks create pressure points that deform the hose.
- Keep loops large. Aim for 14–18 inches in diameter.
- Store off the floor. Concrete absorbs cold and moisture, and floors invite pests.
- Block sunlight. UV radiation degrades hose jackets, causing cracking and brittleness.
- Label your hoses. A strip of tape with the length or intended use saves time next spring.
A practical setup: hang hoses near the garage door on large hooks, labeled by length. You'll see them when you head out in spring and instantly know what you have—no more buying duplicates.
What To Do If Your Hose or Spigot Already Froze
If a cold snap caught you off guard, don't panic. Follow these safe recovery steps:
For a frozen hose: Never bend or force a stiff, frozen hose. It will crack. Carry it into a warm room and let it thaw slowly. Once soft, drain and inspect the full length for bulges, splits, or leaks. Replace any damaged washers, then pressure-test by running water through it over a tub or outdoors on a warm day.
For a frozen outdoor faucet: Shut off the indoor supply valve for that line. Open the outdoor faucet to relieve pressure. Warm the faucet gently using room heat or towels soaked in warm water—never use a torch, heat gun, or open flame. If you see water stains on walls or ceilings, hear dripping inside walls, or the faucet won't shut off after thawing, call a plumber immediately.
After recovery, ensuring your soil drains properly around the foundation can reduce moisture issues near outdoor plumbing.
Frequently Asked Questions
When should I winterize my garden hose?
Start before the first hard freeze—typically when nighttime temperatures approach 32°F. Sudden cold snaps happen, so it's wise to complete this task by mid-to-late fall, even if mild weather lingers.
Do I need an air compressor?
No. Gravity draining works well for most homes and hose types. A shop vac or compressor makes the job more thorough, especially for ribbed or long hoses, but it's optional.
Can I leave a drained hose outside in winter?
It's not recommended. Cold temperatures and sunlight still degrade hose material over months. If you have no indoor option, drain thoroughly, cap the ends, and store it on a wide hanger off the ground.
Is it safe to use antifreeze in a garden hose?
No. Automotive antifreeze is highly toxic and will contaminate the hose permanently. The only safe method is draining and dry indoor storage.
What PSI should I use to blow out a hose?
Use 30–50 psi in short bursts. Higher pressure risks damaging fittings and can burst the hose itself. Never exceed 50 psi.
How often should I replace hose washers?
Inspect them every fall. Replace any that are flat, cracked, stiff, or missing. They're inexpensive and take seconds to swap, but they prevent leaks and trapped water.
Final Checklist: Ten Minutes to Freeze-Proof
- Water supply shut off at the spigot
- Nozzles, splitters, timers, and filters removed and drained
- Hose fully drained (gravity and/or air)
- Washers inspected and replaced as needed
- Hose wiped dry
- Coiled in wide loops
- Ends capped
- Stored indoors, off the floor, out of sunlight
- Spigot drained and covered with foam insulation
- Indoor shutoff closed (if applicable)
Winterizing a garden hose is one of the fastest, highest-value home maintenance tasks you'll do all year. It protects your equipment, prevents expensive plumbing damage, and takes less time than brewing a pot of coffee. For reliable freeze protection, focus on thorough draining and dry indoor storage—those two principles cover 95 percent of the job. Also, keep your yard maintenance routine organized so spring cleanup starts smoothly.
Take ten minutes this week and get it done before the next frost advisory. Your future self—and your plumbing—will thank you.