

Cleaning Out Dryer Vent With Leaf Blower: 2026 Safety Guide
Yes, for short, straight vents, a leaf blower can clear lint quickly and safely.
I have cleaned many vents in homes with this exact method. When done right, cleaning out dryer vent with leaf blower can boost airflow, cut run time, and lower fire risk. In this guide, I will show you when it works, when it does not, and how to do it the right way. You will get pro tips, step-by-step steps, and safety checks that most guides skip.

Why airflow matters and how your dryer vent works
Your dryer pushes warm air and lint into a duct. That duct should send air outdoors. Lint builds up in bends, seams, and the outside cap. This slows airflow, heats the dryer, and can cause a fire.
Every foot and every elbow adds drag. Long runs and roof vents make it worse. Cleaning out dryer vent with leaf blower can restore flow fast on simple runs. It blows lint out in one strong push.

Safety first: what to check before you start
A dryer is a heat source. Lint is fuel. Treat this job with care.
Follow these key checks first:
- Unplug the dryer. For gas dryers, close the gas valve if you will move the unit.
- Use only rigid or semi-rigid metal duct. Do not blow into plastic or foil flex. It can tear or melt.
- Remove the lint screen and clean the housing by hand or a vacuum.
- Wear eye protection and a dust mask. Lint can fly fast.
- Clear the outside vent cap. Open the damper. Remove any screen guard before you blow.
- Keep kids and pets away. Lint clouds can trigger allergies.
- If you smell gas or see crushed ducts, stop and call a pro.
I follow this list on every job. It keeps you and your home safe.

Is cleaning out dryer vent with leaf blower right for your setup?
The method shines when the duct is short and straight. Most garages and first-floor walls fit this case. I use a leaf blower here with great results.
Do not use this method if:
- The vent runs more than 15 to 20 feet with many elbows.
- The vent goes up to a roof cap with a steep rise.
- There is a booster fan in the line.
- The outside cap has a fixed screen you cannot remove.
- The duct is flexible plastic or thin foil.
In these cases, use a rotary brush kit or hire a pro. Cleaning out dryer vent with leaf blower is not a cure-all. Know the limits and you will avoid damage.

Tools and prep checklist
You can do this job with simple gear. Here is what I keep in my kit:
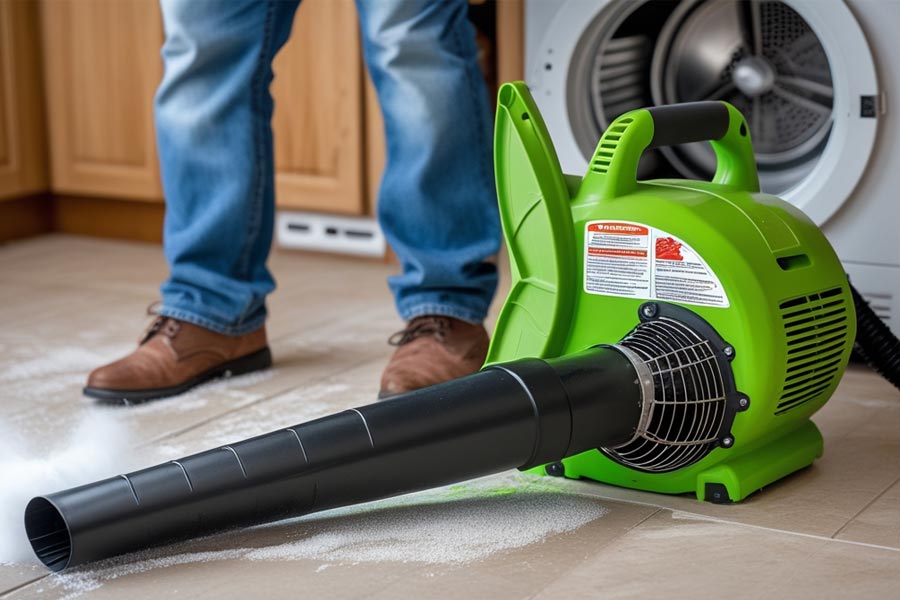
- Leaf blower with a round nozzle. Battery or corded both work.
- Duct tape or a rubber coupling to seal the nozzle to the vent.
- Screwdriver or nut driver to loosen clamps and remove the cap.
- Vacuum and trash bags for lint cleanup.
- Dryer vent brush for stubborn spots near the dryer.
- Flashlight to inspect joints and the outside cap.
- Gloves, eye protection, and a dust mask.
Set up a safe work zone. Move the dryer out just enough to reach the duct. Place towels to catch dust. If you will blow from inside to outside, open a window for fresh air.

Step-by-step: cleaning out dryer vent with leaf blower
I use two main setups. Pick the one that fits your space.
Method A: Blow from inside to outside
- Unplug the dryer. Pull it out gently. Do not kink the gas line on gas units.
- Loosen the clamp. Detach the transition duct from the wall vent.
- Insert the leaf blower nozzle into the wall vent opening. Seal it with tape or a rubber coupling.
- Go outside. Open the vent cap or hold the damper flap open. Put a bag or tarp below to catch lint.
- Stand inside at the blower. Start on low. Run 10 to 30 seconds.
- Stop. Check outside. Remove lint piles into a bag.
- Repeat bursts until no more lint comes out.
- Use a brush to sweep the first few feet near the dryer if needed.
- Reconnect the duct with a tight clamp. Do not use screws that pierce the duct.
- Plug in the dryer. For gas, reopen the valve. Run a test cycle and check outside airflow.
Method B: Blow from outside to inside
- Remove the outside cap if needed. Hold the damper open.
- Insert the blower nozzle at the cap. Seal around the opening.
- Place a large bag or sheet behind the dryer to catch lint.
- Use short bursts of air. Expect dust indoors.
- Clean up lint inside. Reinstall the cap.
Method A is cleaner and safer in most homes. It pushes lint outside, which is where we want it. When cleaning out dryer vent with leaf blower, short bursts work best. A steady blast can pack lint into elbows.

Results to expect, benefits, and performance checks
After cleaning out dryer vent with leaf blower, you should see:
- Strong airflow at the outside cap. You can feel a steady push, even on low heat.
- Shorter dry times. A heavy towel load should dry faster by 10 to 20 minutes.
- Lower dryer heat. The cabinet should feel cooler to the touch.
- Less lint on clothes and around the laundry area.
Do two quick checks:
- Tissue test at the outside cap. The tissue should blow flat at full dry.
- Time test with one load of towels. Record the new time. Compare to last week.
These simple checks tell you if the job worked.
Common mistakes to avoid and pro tips
I see the same errors in the field. They waste time and can harm the duct.
Avoid these mistakes:
- Blowing into a duct with a built-in screen. It will clog and trap lint.
- Using high speed right away. Start low to avoid packing lint.
- Leaving gaps at joints. Air leaks reduce flow and pull dust into walls.
- Reattaching with long screws. They snag lint. Use foil tape and proper clamps.
Pro tips from years on the job:
- Warm the dryer for five minutes first. Warm lint moves easier. Turn the dryer off before you blow.
- Tap the duct gently along the run while you blow. It breaks lint ridges free.
- Replace crushed transition ducts with UL-listed semi-rigid metal. It pays off.
- Keep a small brush just for the lint trap channel. This spot hides a lot of lint.
Cleaning out dryer vent with leaf blower is fast, but the finish work matters most.

Maintenance schedule and prevention upgrades
A clean vent is not a one-time task. Lint builds up again.
Follow this plan:
- Clean the lint trap after every load.
- Inspect the outside cap monthly. Make sure it moves free.
- Do cleaning out dryer vent with leaf blower every 6 to 12 months on short runs.
- In homes with pets or big families, shorten that to every 3 to 6 months.
Prevention upgrades:
- Swap to a smooth-walled metal duct. It catches less lint.
- Keep the run short with few elbows.
- Use a low-resistance vent cap. No fine mesh screen.
- Level the dryer. A stable drum reduces lint shed.
These steps keep airflow strong and your dryer happy.

Troubleshooting and when to call a pro
If lint still blows weak after cleaning, check these:
- The outside cap may be stuck or blocked behind siding.
- There may be a hidden sag or crushed elbow.
- The run may be too long for this method.
- The dryer’s internal fan or lint chute may be clogged.
Call a pro when:
- You have a roof vent, a booster fan, or a very long run.
- You smell gas after moving a gas dryer.
- There are signs of heat damage, melting, or scorch marks.
- Birds or rodents have nested in the duct.
A pro can use rotary brushes, air snakes, and high static pressure vacuums. Cleaning out dryer vent with leaf blower is great for quick wins, but not for every case.
Cost, time, and ROI
The cost is low if you own a blower. Even a budget unit works here. The main cost is your time.
Plan for 30 to 60 minutes, including setup and cleanup. The payoff is real:
- Energy savings from faster dry times.
- Longer dryer life due to lower heat.
- Lower fire risk.
For many homes, cleaning out dryer vent with leaf blower saves hours each year. It can pay for itself in one season.
Frequently Asked Questions
Can I use a leaf blower on any dryer vent?
No. It works best on short, straight, metal vents. Avoid flexible plastic or long, complex runs with many bends.
Should I blow from inside or outside?
Inside to outside is cleaner and safer. Lint exits outdoors, and you keep dust out of the laundry room.
Is it safe for gas dryers?
Yes, with care. Unplug power, close the gas valve if moving the dryer, and avoid stressing the gas line.
How often should I do this?
Every 6 to 12 months for most homes. If you have pets or heavy use, clean every 3 to 6 months.
What leaf blower size do I need?
Most handheld blowers work. High CFM helps, but short bursts and a good seal at the duct matter more.
Will this remove a bird nest or wet lint mat?
Not always. Wet lint and nests often need a brush or pro-grade tools to clear the blockage.
Can this method damage my duct?
It can if the duct is plastic, torn, or poorly joined. Use metal ducts and avoid long screws that snag lint.
How do I know it worked?
Check airflow at the outside cap and run a timed towel load. If dry time drops and airflow improves, you did it right.
What if lint keeps appearing indoors?
You likely blew from outside to inside without a good catch setup. Switch to inside-to-outside or improve your sealing and containment.
Does this clean the dryer’s inside?
No. It only cleans the vent line. The lint trap channel and internal blower housing may still need a brush or pro service.
Conclusion
A clean vent helps your dryer breathe, run cooler, and last longer. When your setup is simple and short, cleaning out dryer vent with leaf blower is a fast, budget-friendly fix. Use smart checks, short bursts, and good seals, and you will see a real boost in airflow and safety.
Take one hour this week to do it right. If your vent is long or complex, book a pro and stay safe. Want more guides like this? Subscribe for practical home tips or drop your questions in the comments.


