

How To Transplant Hydroponic Plants To Soil: Step-By-Step
Rinse roots, use airy soil, harden off, then water lightly for success.
If you want clear, reliable steps on how to transplant hydroponic plants to soil, you are in the right place. I have moved hundreds of plants from water to dirt, from basil to tomatoes, and learned what works. In this guide, I will show you how to transplant hydroponic plants to soil with simple steps, smart tips, and real experience that saves plants and time.
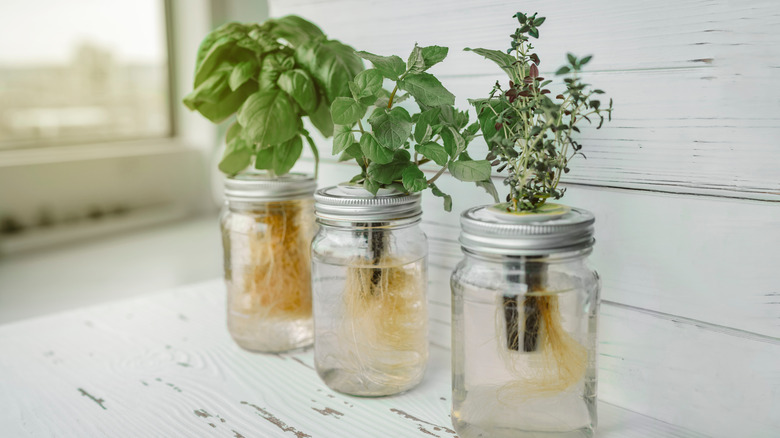
Why move from water to soil?
Switching a plant from water to soil changes how it breathes and feeds. Hydro roots grow long and smooth. Soil roots grow dense hairs to find air and food. When you move a plant, it needs time to build those hairs.
There are good reasons to make the switch. Soil is easy to manage. It buffers heat and water swings. It also gives you a rich web of microbes. Still, stress is real. Plants may droop as roots adjust to less oxygen and new microbes. Good prep cuts the risk.
My rule is simple. Keep stress low, light soft, air high, and soil loose. That is how to transplant hydroponic plants to soil with the best odds.

Best timing and preparation
Good timing makes or breaks the move. Young plants bounce back faster than large, woody ones.
Use this short checklist before you start:
- Choose plants with 4 to 8 true leaves. Avoid plants in heavy flower.
- Plan the move on a mild day. Avoid heat waves or cold snaps.
- Stop strong feed 24 hours before the move. Use clean water at pH 6.0 to 6.5.
- Water the soil mix before potting. Aim for even, light moisture.
I use this lead-in plan when I teach new growers how to transplant hydroponic plants to soil. Slow down. Prep first. Move once.

Tools and supplies checklist
Gather these items before you touch the roots:
- Pots with many drain holes
- A light, airy potting mix
- Perlite or pumice for air space
- Coco coir or peat for water hold
- Clean, room temp water
- Root inoculant with mycorrhizae
- Seaweed or kelp extract for shock relief
- A spray bottle or pump mister
- A humidity dome or clear tote for short use
- Scissors and a clean tray
This kit supports every step of how to transplant hydroponic plants to soil. Simple gear, big gains.

The right soil mix for hydro transplants
Hydro roots crave air. A heavy mix smothers them. Use a light blend you can squeeze and it springs back.
Try this simple recipe:
- 50% high quality potting soil
- 30% coco coir or fine bark
- 20% perlite or pumice
Add-ons that help:
- A dusting of mycorrhizae at the root zone
- One tablespoon of worm castings per quart of mix
- A mild starter charge at 0.3 to 0.6 EC
Targets to hit:
- pH around 6.2 to 6.5
- Moist, not soggy
- No slow-release hot fertilizer at the start
A soft mix like this is one of the best ways for how to transplant hydroponic plants to soil without burn or rot.
Step-by-step: how to transplant hydroponic plants to soil
Follow these steps in order. Work calm and quick.
- Water flush
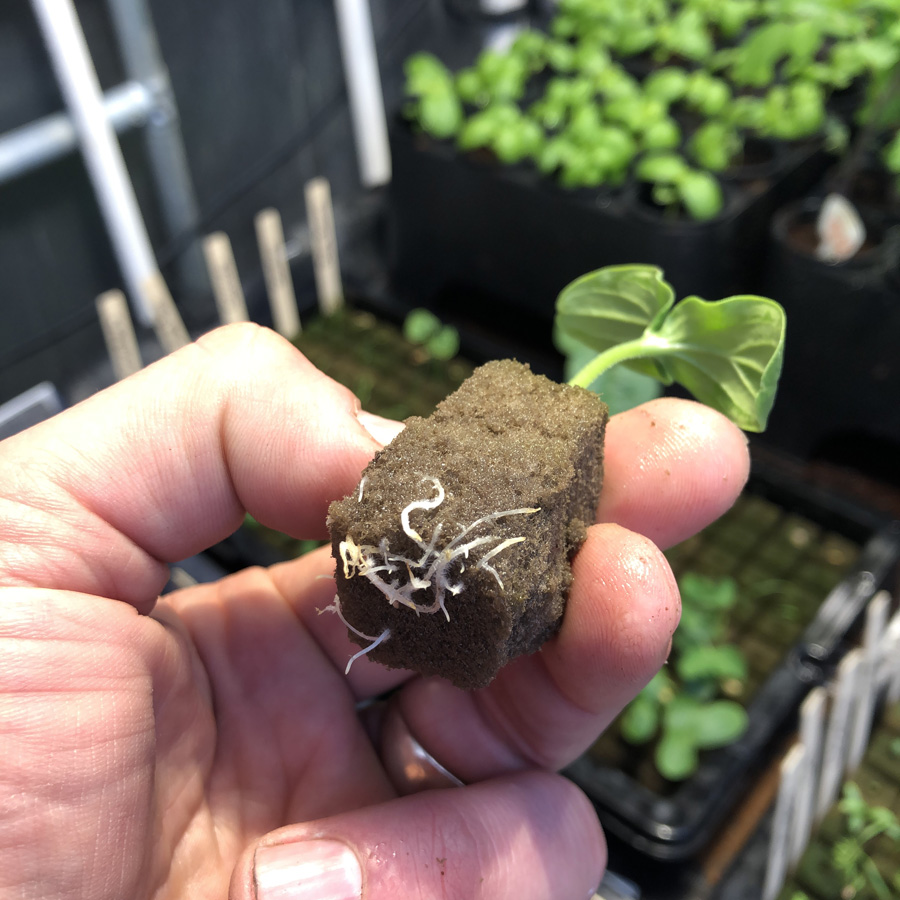
- Place roots in clean, room temp water. Swish to remove slime and salts.
- If roots are long and tangled, do not rip them. A gentle dip works best.
- Trim damage
- Snip off brown or mushy roots. Leave white roots alone.
- If the canopy is huge, remove one or two large leaves to cut stress.
- Dust roots
- Coat roots lightly with mycorrhizae. Tap to shake off clumps.
- Prep pots
- Fill pots two thirds with your airy mix. Make a well for roots.
- Set the plant
- Spread roots in the well. Do not bend them hard.
- Backfill with mix. Firm with your fingers. Keep the crown at the same level.
- First water
- Water around the edge first to pull roots outward.
- Add a splash of seaweed extract. Skip strong feed today.
- Shade and air
- Give bright shade or soft light for 2 to 3 days.
- Keep air moving. Avoid strong wind right away.
I use this exact flow when I show new growers how to transplant hydroponic plants to soil in workshops. It is clean, easy, and repeatable.

Hardening off water roots
Water roots need time to build soil root hairs. This is where most people rush and fail.
Use this simple ramp plan:
- Day 0 to 2: Bright shade. High humidity at 60 to 70%. Keep soil just moist.
- Day 3 to 5: Move to bright light. Lower humidity to 50 to 60%. Light breeze.
- Day 6 to 10: Full light or outdoor sun with mid-day shade if hot.
Watch for signs:
- Soft droop morning and night means root stress. Add shade and wait.
- Mid-day droop only can be normal. Do not drown the plant.
Hardening is the heart of how to transplant hydroponic plants to soil. Give time, not water.

Post-transplant care, week by week
Week 0 to 1
- Water when the top inch is dry. Do not keep soil wet.
- No heavy feed. A mild tea or seaweed is enough.
Week 1 to 2
- Begin light feed at 25 to 40% strength.
- Pinch flower buds on fruiting crops to push root growth.
Week 2 to 4
- Move to normal light and feed.
- Add a thin mulch to hold water. Keep stems dry.
I log notes for each batch. That habit has taught me how to transplant hydroponic plants to soil in a way that fits each crop and season.

Troubleshooting common issues
Yellow lower leaves
- Cause: Nitrogen dip or cold soil.
- Fix: Start light feed. Warm the root zone. Do not overwater.
Leaf curl or claw
- Cause: Overwater or too much salt.
- Fix: Let soil dry to the first knuckle. Flush once if EC is high.
Wilting all day
- Cause: Root rot or no air in mix.
- Fix: Improve drainage. Add perlite. Remove dead roots and re-pot if needed.
Brown spots on leaves
- Cause: Sun scorch after a quick light jump.
- Fix: Step back the light. Harden off again.
Slow growth
- Cause: Roots still adjusting or compacted soil.
- Fix: Gently poke air holes around the pot edge. Feed a mild, balanced mix.
These fast checks are core to how to transplant hydroponic plants to soil without long stalls.
Mistakes to avoid
- Planting into heavy, wet soil that starves roots of air
- Using strong nutrients on day one after the move
- Skipping shade or humidity control during the first days
- Burying the stem too deep and causing rot
- Rushing to full sun on a hot day
- Reusing dirty tools or pots that spread disease
- Watering on a schedule instead of by need
Avoid these traps and you will master how to transplant hydroponic plants to soil with far fewer losses.
Plant-specific tips
Leafy greens
- Very easy to move. Keep cool and moist. Harvest outer leaves first once growth resumes.
Herbs like basil and mint
- Prone to wilt. Trim a third of the top at transplant. Use bright shade for 3 days.
Tomatoes and peppers
- Need warmth. Pot up in stages. Stake early to avoid root shift.
Cucumbers
- Sensitive roots. Transplant young. Do not tease roots much.
Strawberries
- Keep crowns above soil. Avoid wet mulch on the crown.
These small tweaks make a big difference in how to transplant hydroponic plants to soil across crops.
Frequently Asked Questions
How long does it take for hydro plants to adjust to soil?
Most plants adjust in 7 to 14 days. Larger fruiting plants can take 3 to 4 weeks to hit full pace.
Should I remove all the hydro media from the roots?
Remove loose media but do not rip fine roots. A gentle water swish is enough for most setups.
What pH should I aim for in soil after the move?
Aim for a soil pH of 6.2 to 6.5. This range helps roots take up key nutrients without stress.
How often should I water after transplanting?
Water only when the top inch of soil is dry. Early on, less water is safer than more.
Can I transplant during hot summer days?
It is possible, but risky. Do it in the evening, add shade, and increase airflow to limit stress.
Do I need to fertilize right away?
No. Wait 5 to 7 days, then start a light feed at 25 to 40% strength. Watch the leaves for cues.
What size pot should I use?
Step up gradually. Move from a small plug to a 1-gallon, then to larger pots as roots fill the space.
Conclusion
You now have a clear plan for how to transplant hydroponic plants to soil and help them thrive. Prepare a light mix, handle roots with care, ramp light and humidity, and feed mild at first. Small steps, done in order, prevent the droop and the stall.
Put this guide to work on one plant today. Take notes. Then scale up with confidence. If this helped, subscribe for more grow guides, share your results, or leave a question so we can learn together.


