How To Charge A Riding Lawn Mower Battery: 2026 Guide
Connect a 12V smart charger: red to positive, black to negative, charge slowly.
If you want clear, step-by-step advice on how to charge a riding lawn mower battery, you are in the right place. I maintain fleets of small engines and have revived more “dead” mower batteries than I can count. I’ll show you what works, what fails, and why. You’ll learn safe setup, the right amps, how long to charge, and how to spot a bad battery before it wastes your time.

Safety first: tools and setup
Before you learn how to charge a riding lawn mower battery, set up a safe, clean space. Batteries can vent gas. Sparks and gas do not mix. Work in fresh air and keep flames away.
Tools you need:
- 12V smart battery charger with 1–4 amp settings for routine charging
- Safety glasses and gloves to protect your eyes and skin
- Wrench set to remove battery cables, often 10 mm
- Battery brush or small wire brush to clean posts
- Baking soda and water to neutralize acid on corrosion
- Paper towels or rags to wipe terminals dry
- Multimeter to check voltage before and after charging
Safety checks to do:
- Turn the ignition off, remove the key, and set the parking brake.
- If indoors, open doors and use a fan for airflow.
- Inspect the battery case. Do not charge a cracked or swollen battery.
- On flooded batteries, check fluid level. Cover exposed plates with distilled water before charging.

Understand your riding mower battery
Most riding mowers use a 12V lead‑acid U1 or U1R battery. You’ll see flooded (serviceable caps) and AGM (sealed) types. A few older units use 6V, and lithium conversions need a special charger. Always match the charger to the battery type.
Key specs to know:
- Voltage: 12V nominal for most modern mowers
- Capacity: about 28–35 Ah on many U1 batteries
- Cold Cranking Amps: often 150–350 CCA
- Charge acceptance: prefers slow charge at 1–4A
A quick voltage guide at rest (no load, after an hour off the charger):
- 12.7–12.8V means full
- 12.4V means about 75%
- 12.2V means about 50%
- 12.0V or less means low and needs charging
This context makes how to charge a riding lawn mower battery simple.

Step-by-step: how to charge a riding lawn mower battery
Below is how to charge a riding lawn mower battery step by step. The idea is to connect safely, charge slow, and verify the result.
Charge in place (most common):
- Park on level ground. Turn the key off. Set the brake.
- Lift the seat or remove the battery cover.
- If you see heavy corrosion, mix baking soda with water and scrub the posts. Dry them.
- For best safety, loosen and remove the negative (black, minus) cable first.
- Leave the positive cable on if access is tight, or remove it too if you prefer a bench charge.
- Make sure the charger is off and unplugged.
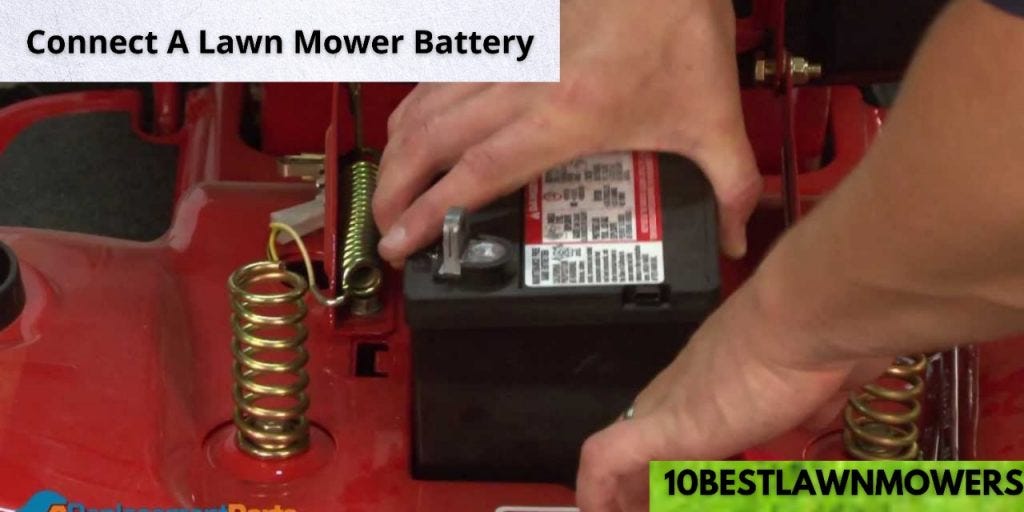
- Connect the charger’s red clamp to the positive (+) post.
- Connect the charger’s black clamp to the negative (−) post or a clean frame ground away from the battery.
- Set the charger to 12V and 2A–4A. Slower is gentler and works better on small batteries.
- Plug the charger in and start the charge. Many smart chargers auto-select mode.
- Let it charge until the charger shows full or switches to float/maintain.
- When done, turn the charger off and unplug it. Remove the black clamp first, then red. Reconnect the mower’s negative cable last.
Bench charging:
- Remove both cables (negative first). Lift out the battery and place it on wood or a battery mat.
- Repeat steps 6–12 above. Bench charging gives the best access and avoids sparks near the mower.
Polarity reminder:
- Red to +, black to −. If you reverse it, many smart chargers will not start. Do not force a charge with reversed clamps.
Pro tip from the field:
- I have brought back weak mower batteries with a 2A smart charger overnight many times. Fast 10A charges heat small batteries and raise the risk of gassing. Slow and steady wins here.

Pick the right charger and settings
The right charger is the heart of how to charge a riding lawn mower battery. A smart charger with float mode is best. It adjusts current as the battery fills and keeps it topped off without overcharge.
What to use:
- Smart charger, 12V, with 1–4A settings for routine use
- Trickle maintainer, 0.75–1.5A, for storage and long-term care
- For AGM batteries, confirm the charger has an AGM mode
What to avoid:
- Big automotive shop chargers at 20A or more for long periods
- Unregulated trickle chargers left on for days without float control
- Using a lithium charger on a lead‑acid battery, or vice versa
Desulfation modes:
- Some chargers pulse to break up sulfate on plates. It can help a battery that is not too far gone. It will not revive a shorted or dried-out battery.
Temperature:
- Charge above freezing if you can. A deeply discharged lead‑acid battery can freeze in the cold. Cold also slows the chemical reaction, so charge takes longer.

How long to charge and when it’s full
Time is the next part of how to charge a riding lawn mower battery. Use this simple rule of thumb:
Hours ≈ (Battery Ah × 1.2) ÷ Charger Amps
Examples:
- 28Ah at 2A: about 17 hours
- 35Ah at 4A: about 10–11 hours
How to tell it’s full:
- The charger says “Full,” “Float,” or “Maintain.”
- Voltage at rest after one hour is near 12.7–12.8V.
- Charge current on the display tapers near zero.
When to stop:
- If the case gets hot, stop and let it cool.
- If it vents a strong rotten-egg smell, stop. That is hydrogen sulfide. Ventilate and inspect.

Troubleshooting charging problems
If how to charge a riding lawn mower battery still fails, check these issues. A weak battery is not always the cause.
Common problems and fixes:
- Battery will not take a charge: It may be below 10V and the charger will not start. Try a charger with “force” or “recovery” mode, or parallel it for a minute with a good 12V battery to wake it, then switch to normal charging. If it still drops fast, replace it.
- Charged but goes flat overnight: Check for a parasitic draw. With the key off, remove the negative cable and put a multimeter in series on the 10A scale. Any steady draw above a few milliamps is suspect. Check lights, seat switch, or accessories.
- Corrosion returns fast: Clean posts, then coat with dielectric grease or battery spray. Make sure the hold‑down is snug. Vibration speeds corrosion.
- Mower does not charge while running: At full throttle, measure battery voltage. 13.4–14.7V means the charging system works. If it stays near 12.5V, test the stator and regulator/rectifier.
- Swollen or cracked case: Replace the battery. Do not charge it.
A note from experience:
- If a battery reads 12.6V after charge but drops under 10V when you hit the key, the internal resistance is high. A load test or simple crank test will show it. Replace it and save your starter.

Seasonal care and storage tips
A big part of how to charge a riding lawn mower battery is what you do off-season. Lead‑acid batteries hate sitting discharged.
Easy habits that add years:
- Put the battery on a 1A maintainer when the mower rests for more than a month.
- If you do not have a maintainer, top it up every 30–45 days.
- Disconnect the negative cable for winter to limit parasitic draw.
- Store the battery in a cool, dry spot above freezing.
- Keep the case clean and dry. Dirt can create a path for slow discharge.
- For flooded types, check fluid level twice a year and top with distilled water.
Real-world tip:
- I label each battery with the last charge date. This simple habit has cut spring no‑starts to almost zero across a half‑dozen mowers.
Frequently Asked Questions of how to charge a riding lawn mower battery
What voltage is a riding mower battery?
Most riding mower batteries are 12V lead‑acid. Check the label to confirm before you decide how to charge a riding lawn mower battery.
Can I jump‑start a mower with a car?
Yes, but be careful. Keep the car off, match 12V to 12V, and follow red to positive, black to frame, then remove in reverse order.
How many amps should I use to charge?
Use 1–4A for best battery health. This slow charge supports how to charge a riding lawn mower battery without excess heat or gassing.
How long does it take to charge from dead?
At 2A, many mower batteries need 12–20 hours. If you want a faster plan for how to charge a riding lawn mower battery, use 4A and monitor it.
Should I disconnect the battery to charge it?
It is safer to remove the negative cable, but you can charge in place. Disconnecting helps avoid sparks and protects electronics.
How do I know if my charger works with AGM?
Look for an AGM mode on the charger label. If in doubt, choose a modern smart charger rated for flooded and AGM.
Why does my mower battery keep dying?
It may be old, sulfated, or the mower is not charging. Verify 13.4–14.7V at full throttle and review how to charge a riding lawn mower battery for proper steps.
Conclusion
Charging a mower battery is simple when you slow down, connect in the right order, choose a smart 12V charger, and confirm the result with a quick voltage check. Respect safety, use 1–4A for routine charges, and keep a maintainer on during long breaks.
Take action today. Clean the posts, set your charger to 2A, and top the battery off before your next cut. Want more tips like this? Subscribe and share your charging wins or questions in the comments.